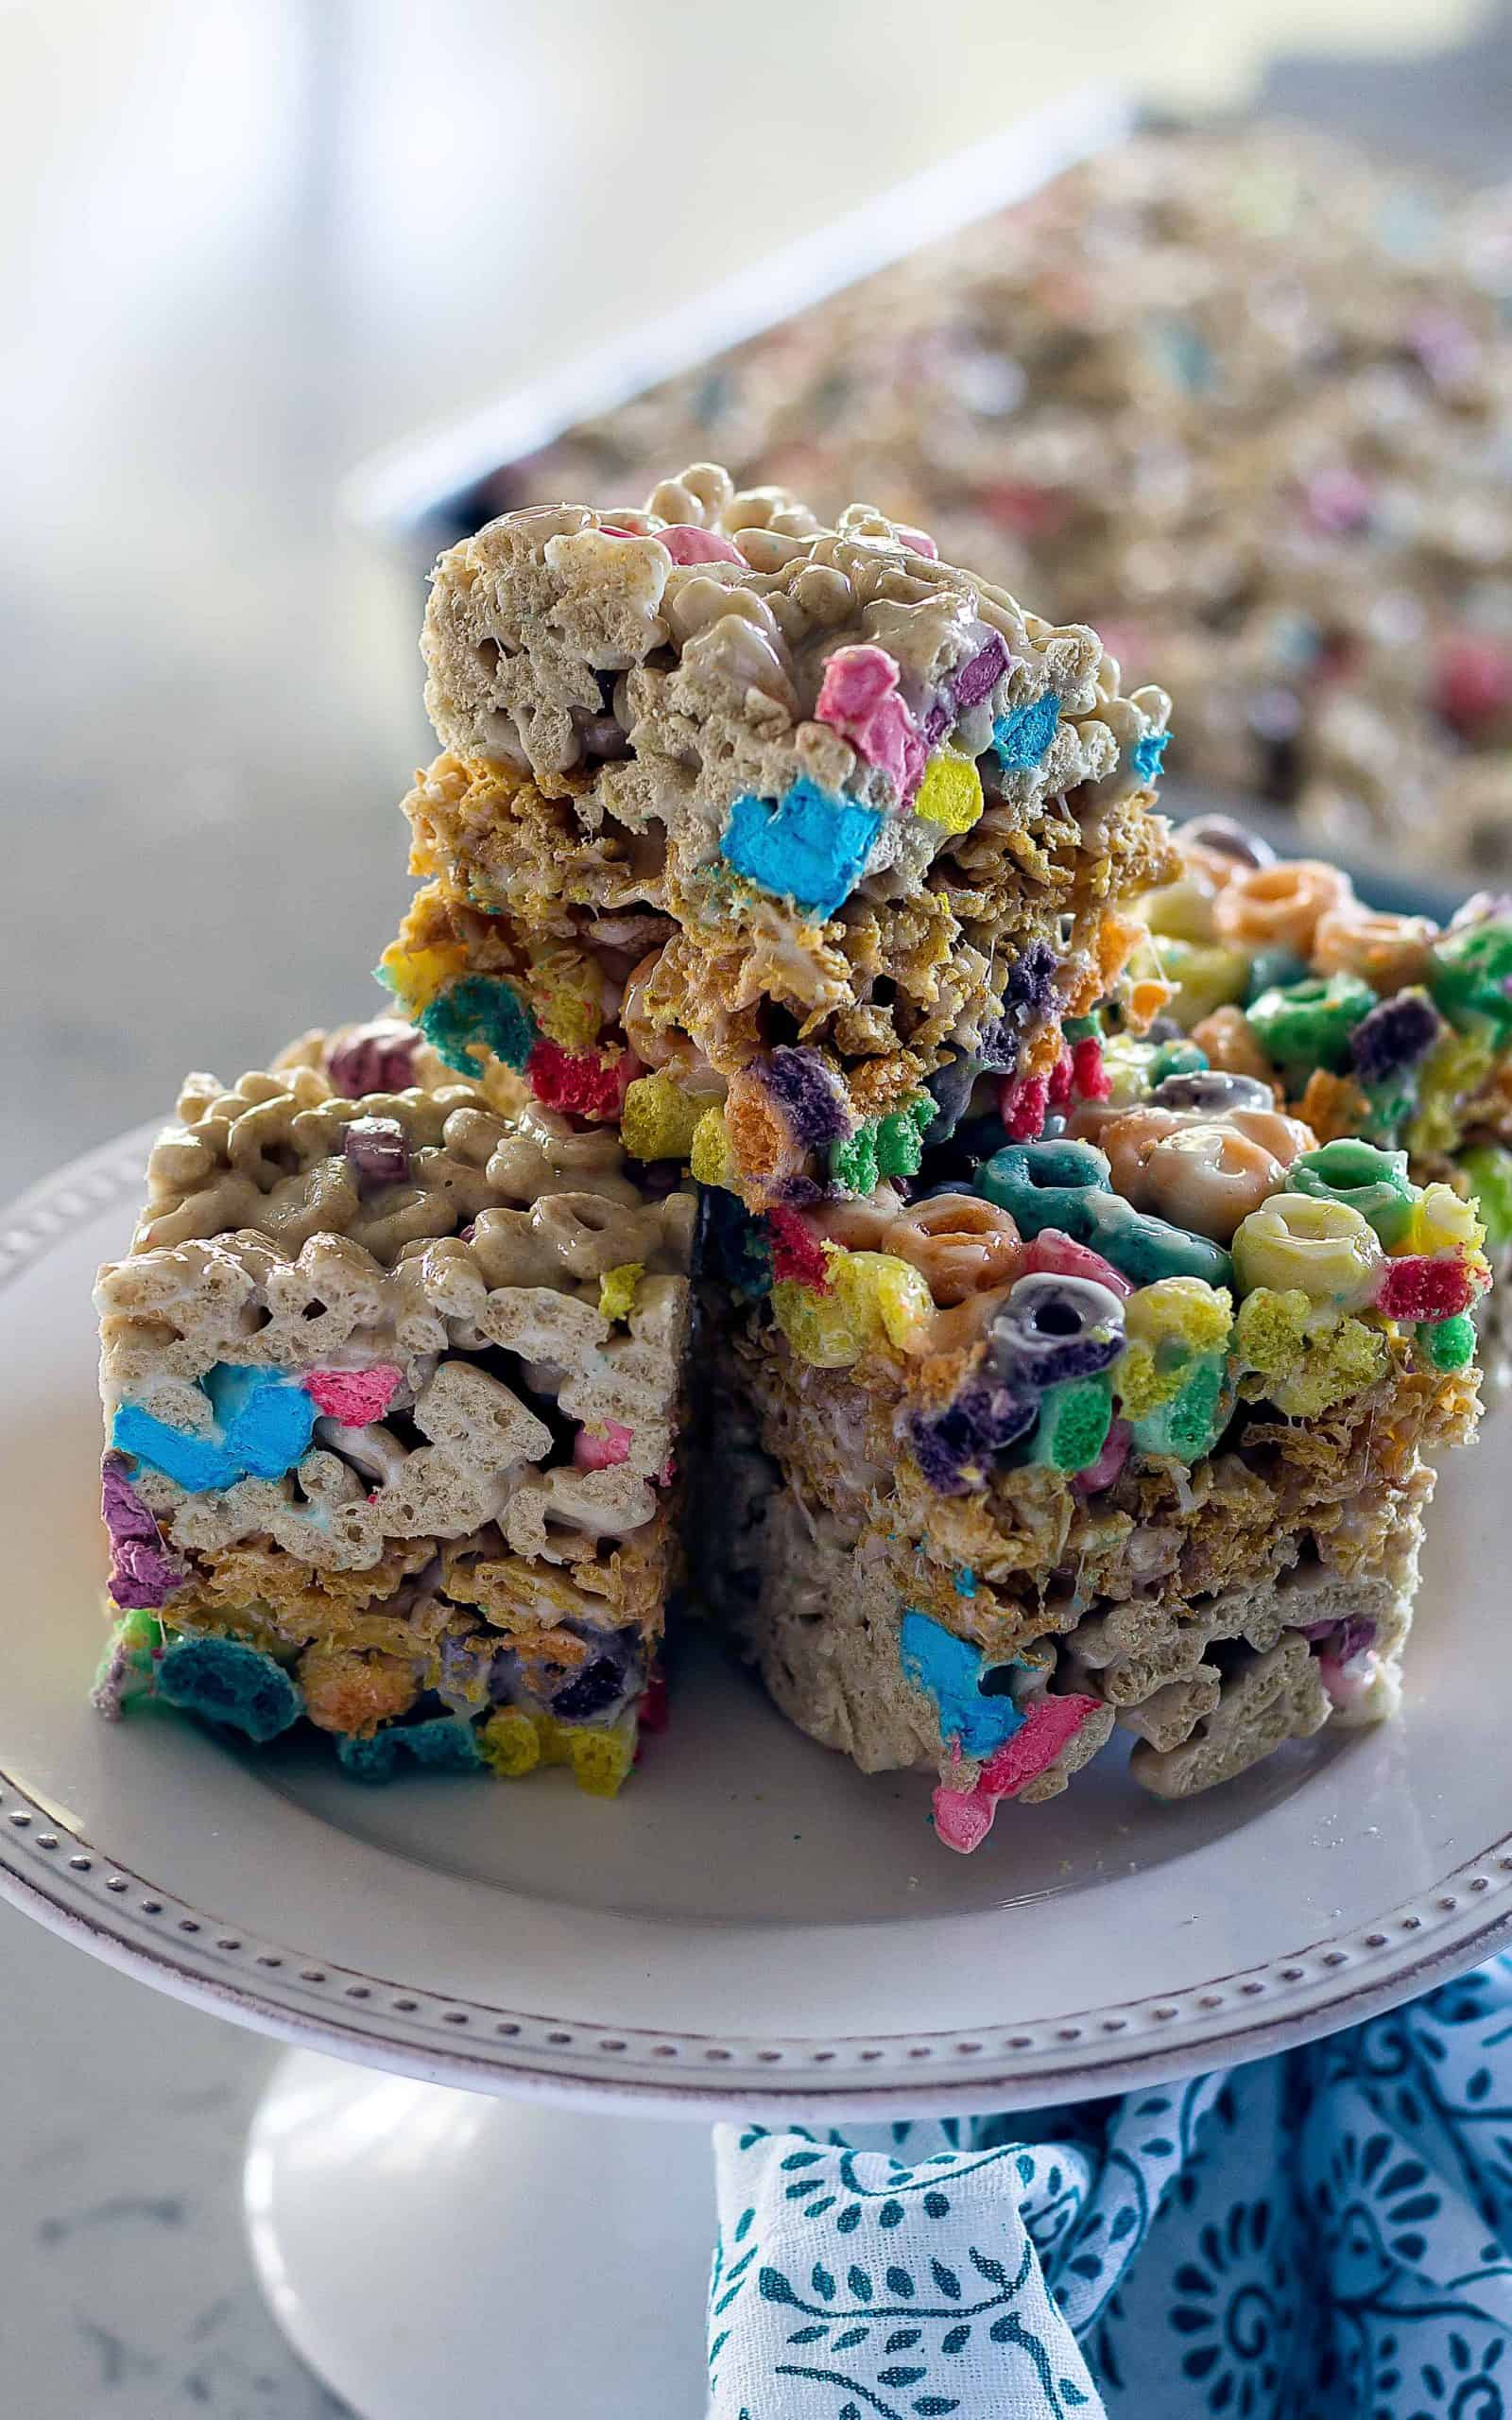
Layered Cereal Treat Bars
The traditional marshmallow treats get a makeover with different cereals. My Layered Cereal Treat bars are sweet, chewy, and full of your favorite cereals. Three of them!
It’s that time again! Time to buy new clothes, backpacks, and school supplies! Time for quiet in the house after the frantic chaos that happens every morning before school. No matter how hard I try to get organized the night before, I always end up running out the door with a kid that is mostly dressed, starving, and carrying an open backpack with papers falling out.
Breakfast is the most important meal of the day they say. I’m not sure that is the case unless you count caffeinated coffee or tea a meal, but if you are stuck in classes or meetings for most of the morning, you might not have the chance to grab something to eat after you have been awake and moving for a little time.
I, personally, need at least an hour of awake time before I can eat something. But I can drink copious amounts of caffeine in this time period. How else would I be able to run around frantically signing permission slips and finding missing shoes?
Let me introduce you to a portable breakfast that can travel with you until you are ready to eat it, the cereal bar!
There are lots of cereal bars out there already, but mine is different…
This post may contain affiliate links. As an Amazon Associate, I earn from qualifying purchases at no additional cost to you. Read my disclosure policy.
Most cereal bars are made to mimic eating a bowl of cereal with milk, or “Cereal Sauce” as my son calls it. They are usually made with healthier cereals and contain protein and whole grains.
My Layered Cereal Bars are not these “healthy” bars. My cereal bars are sweet, sticky, and purely indulgent.
Made with the cereals your children love (and maybe you too) but feel guilty about buying, they will be asking for them every morning! I feel guilty, but I still buy them.
And eat them too. What goes better with caffeine than sugar right? Frosted Flakes Rule!
Ingredients Needed
These Layered Cereal Bars are just like the traditional Rice Krispies Treats you grew up making as a kid, but with better cereals than that plain puffed rice mess. Check out the Almond Joy Rice Krispies Treats I made not too long ago!
When trying to decide which cereal to use to make these cereal bars, I had it narrowed down to about 7 of my favorites. I couldn’t really pick a favorite so I chose my top three. When you can’t make a decision, go with all the top choices, AMIRIGHT?!?
Here are my top three:
- Lucky Charms
- Frosted Flakes
- Froot Loops
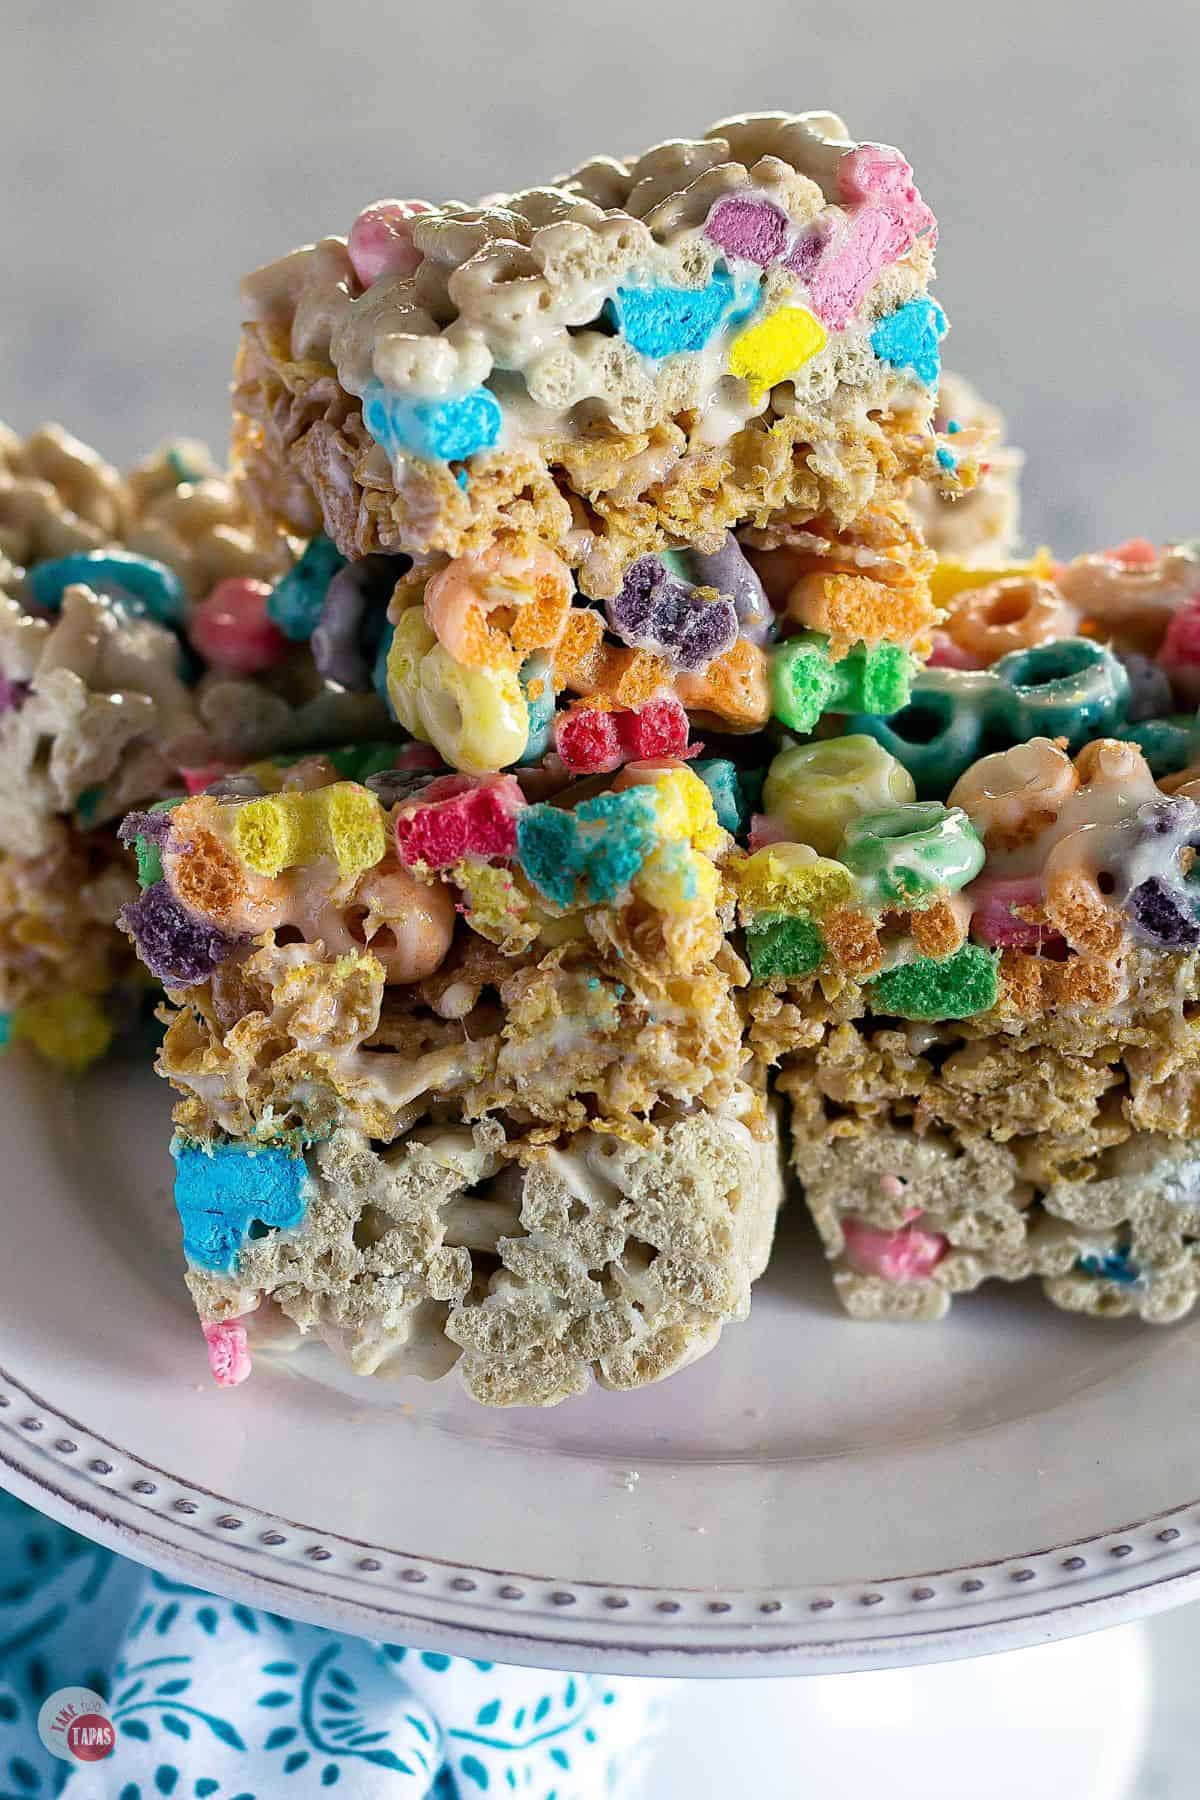
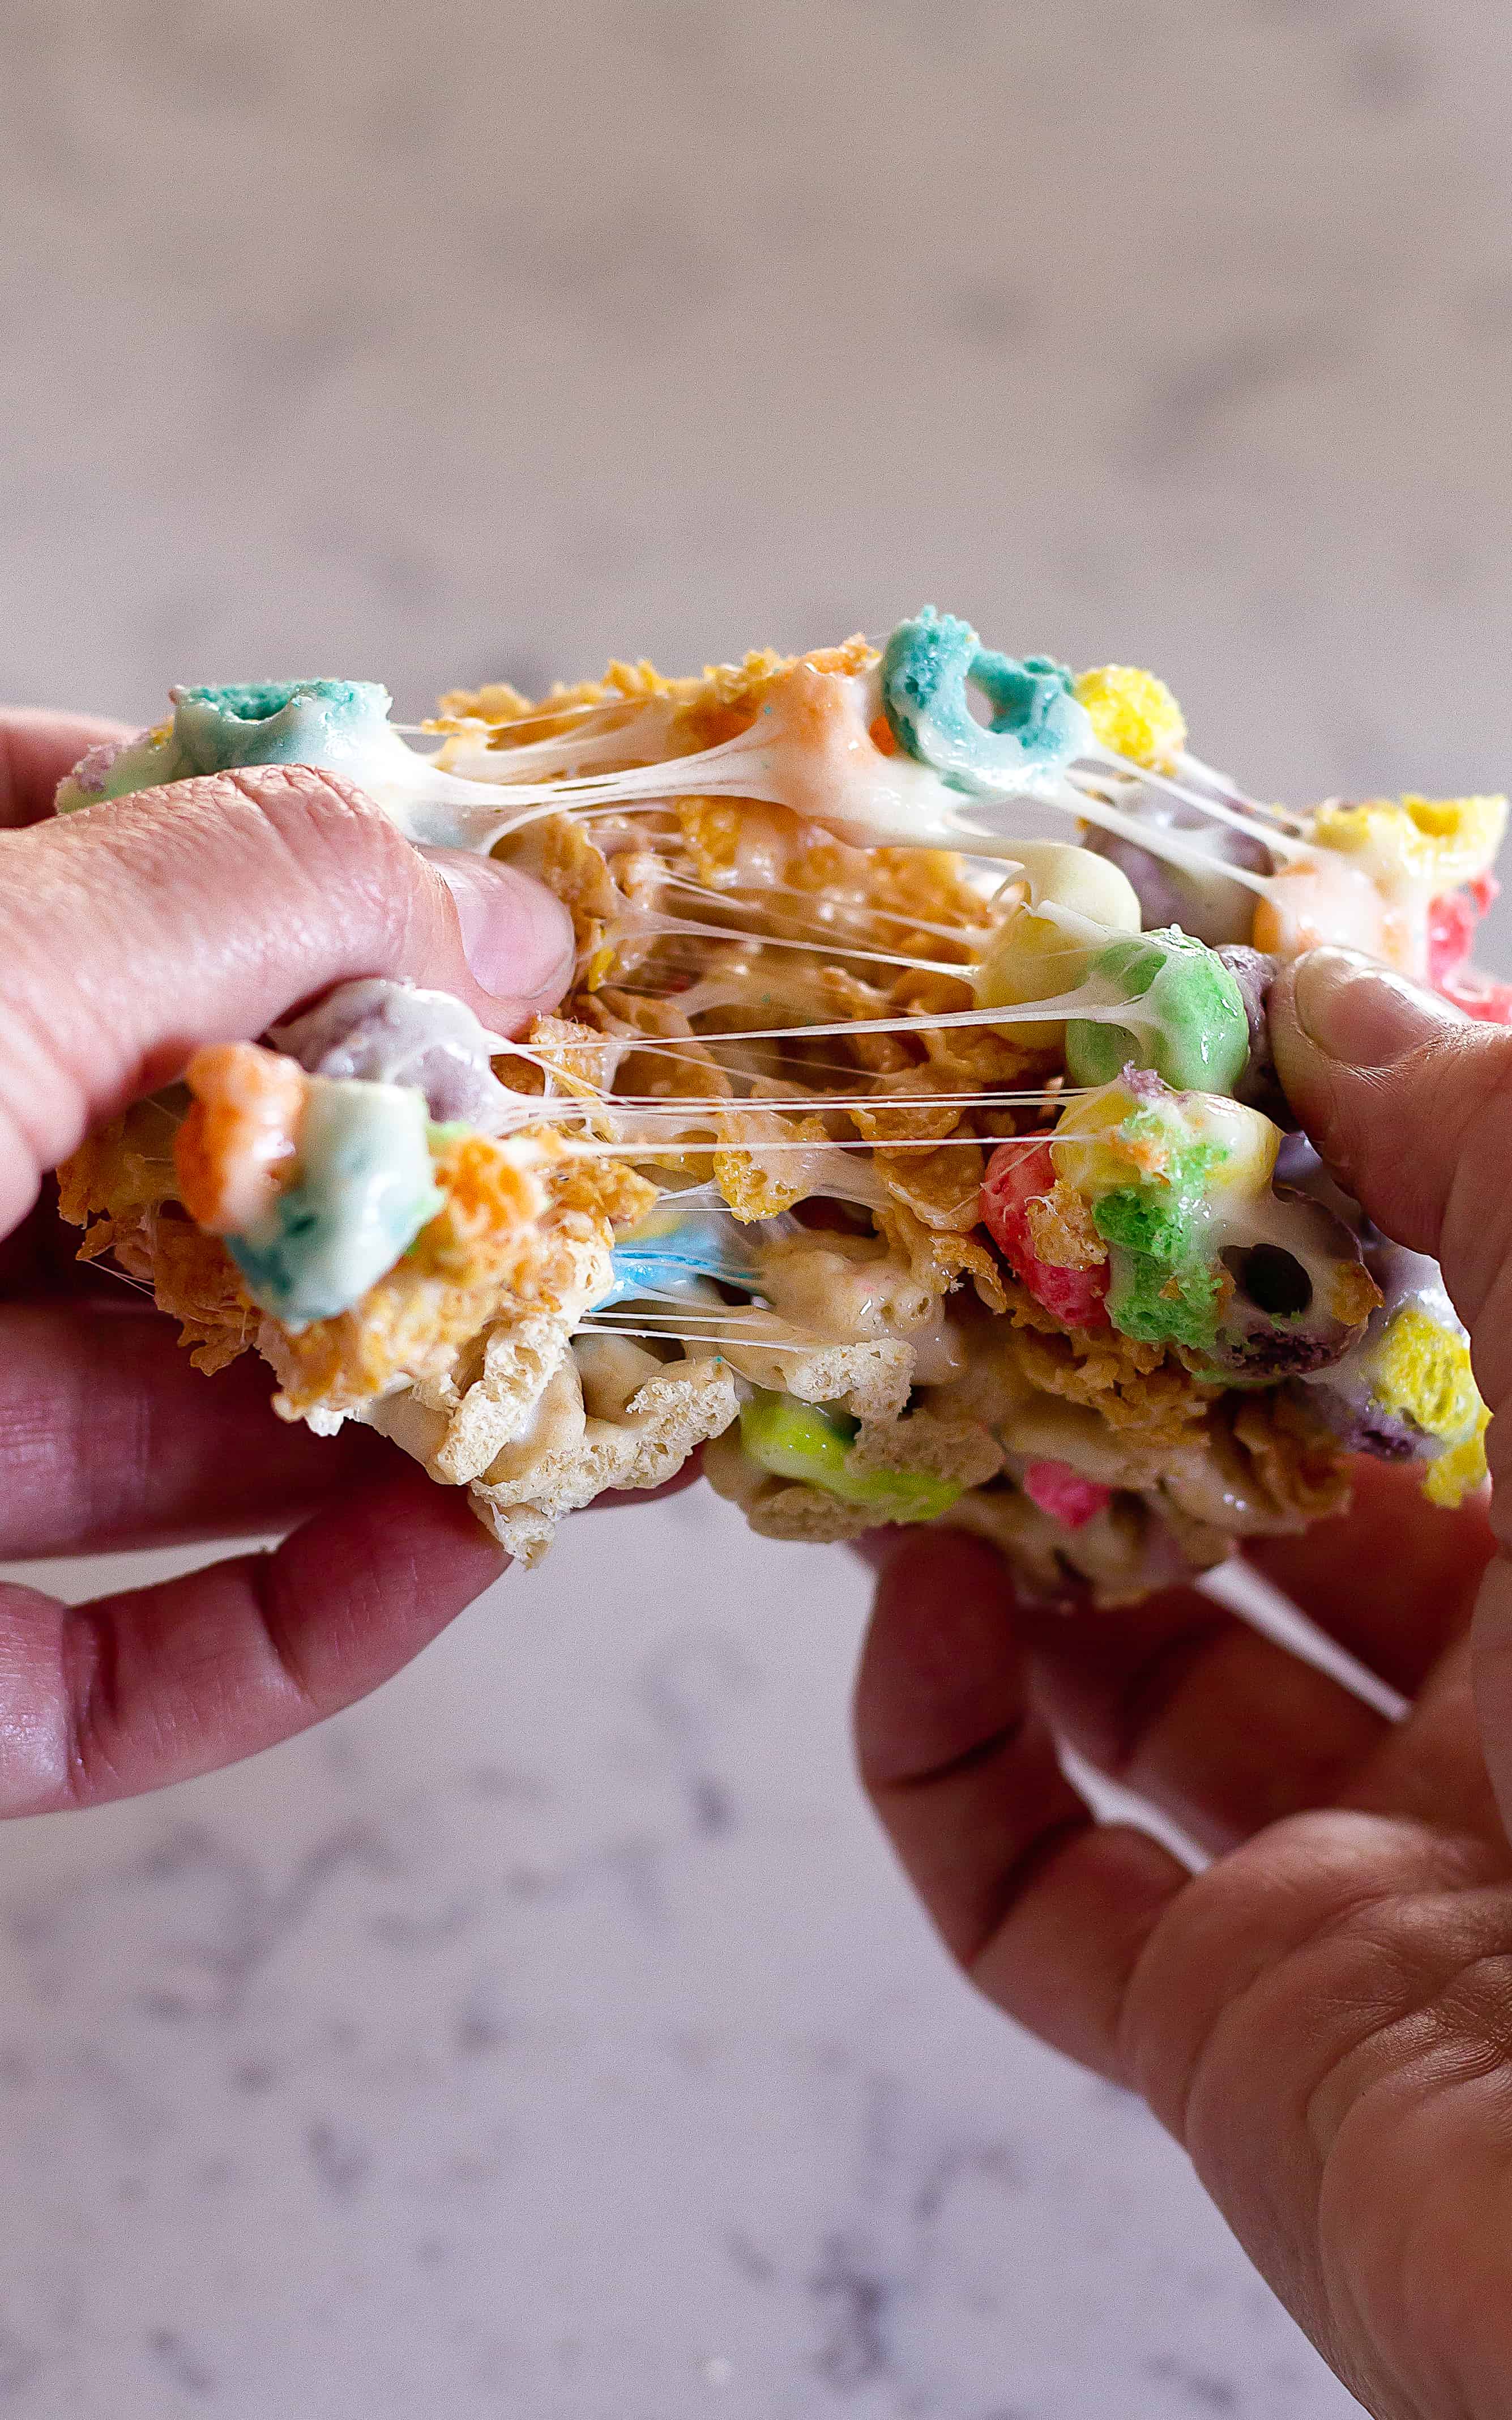
Because two of the three kinds of cereal are colored I chose them as the top and bottom layers and made the middle layer out of Frosted Flakes. That way you can see the actual layers easier.
Nice contrast, huh?
For more insider tips, tricks, and a behind the scenes look, follow me on Pinterest, Facebook, Instagram, & X.
How to Make Cereal Treat Bars
The recipe for these Layered Cereal Treat Bars is very similar to the original recipe but with a few tweaks. A little less butter, a few more marshmallows, and some extra cereal. I did that to make the layering easier to do. Who wants to try and break up ingredients into 3.183648 cups? Not me. This is supposed to be easy right?
You might be thinking that the butter is 8 tablespoons that I have to divide into thirds, but I really didn’t want to have to use more than one full stick of butter. 9 would have been a whole stick and one tablespoon cut off another one. UGH!
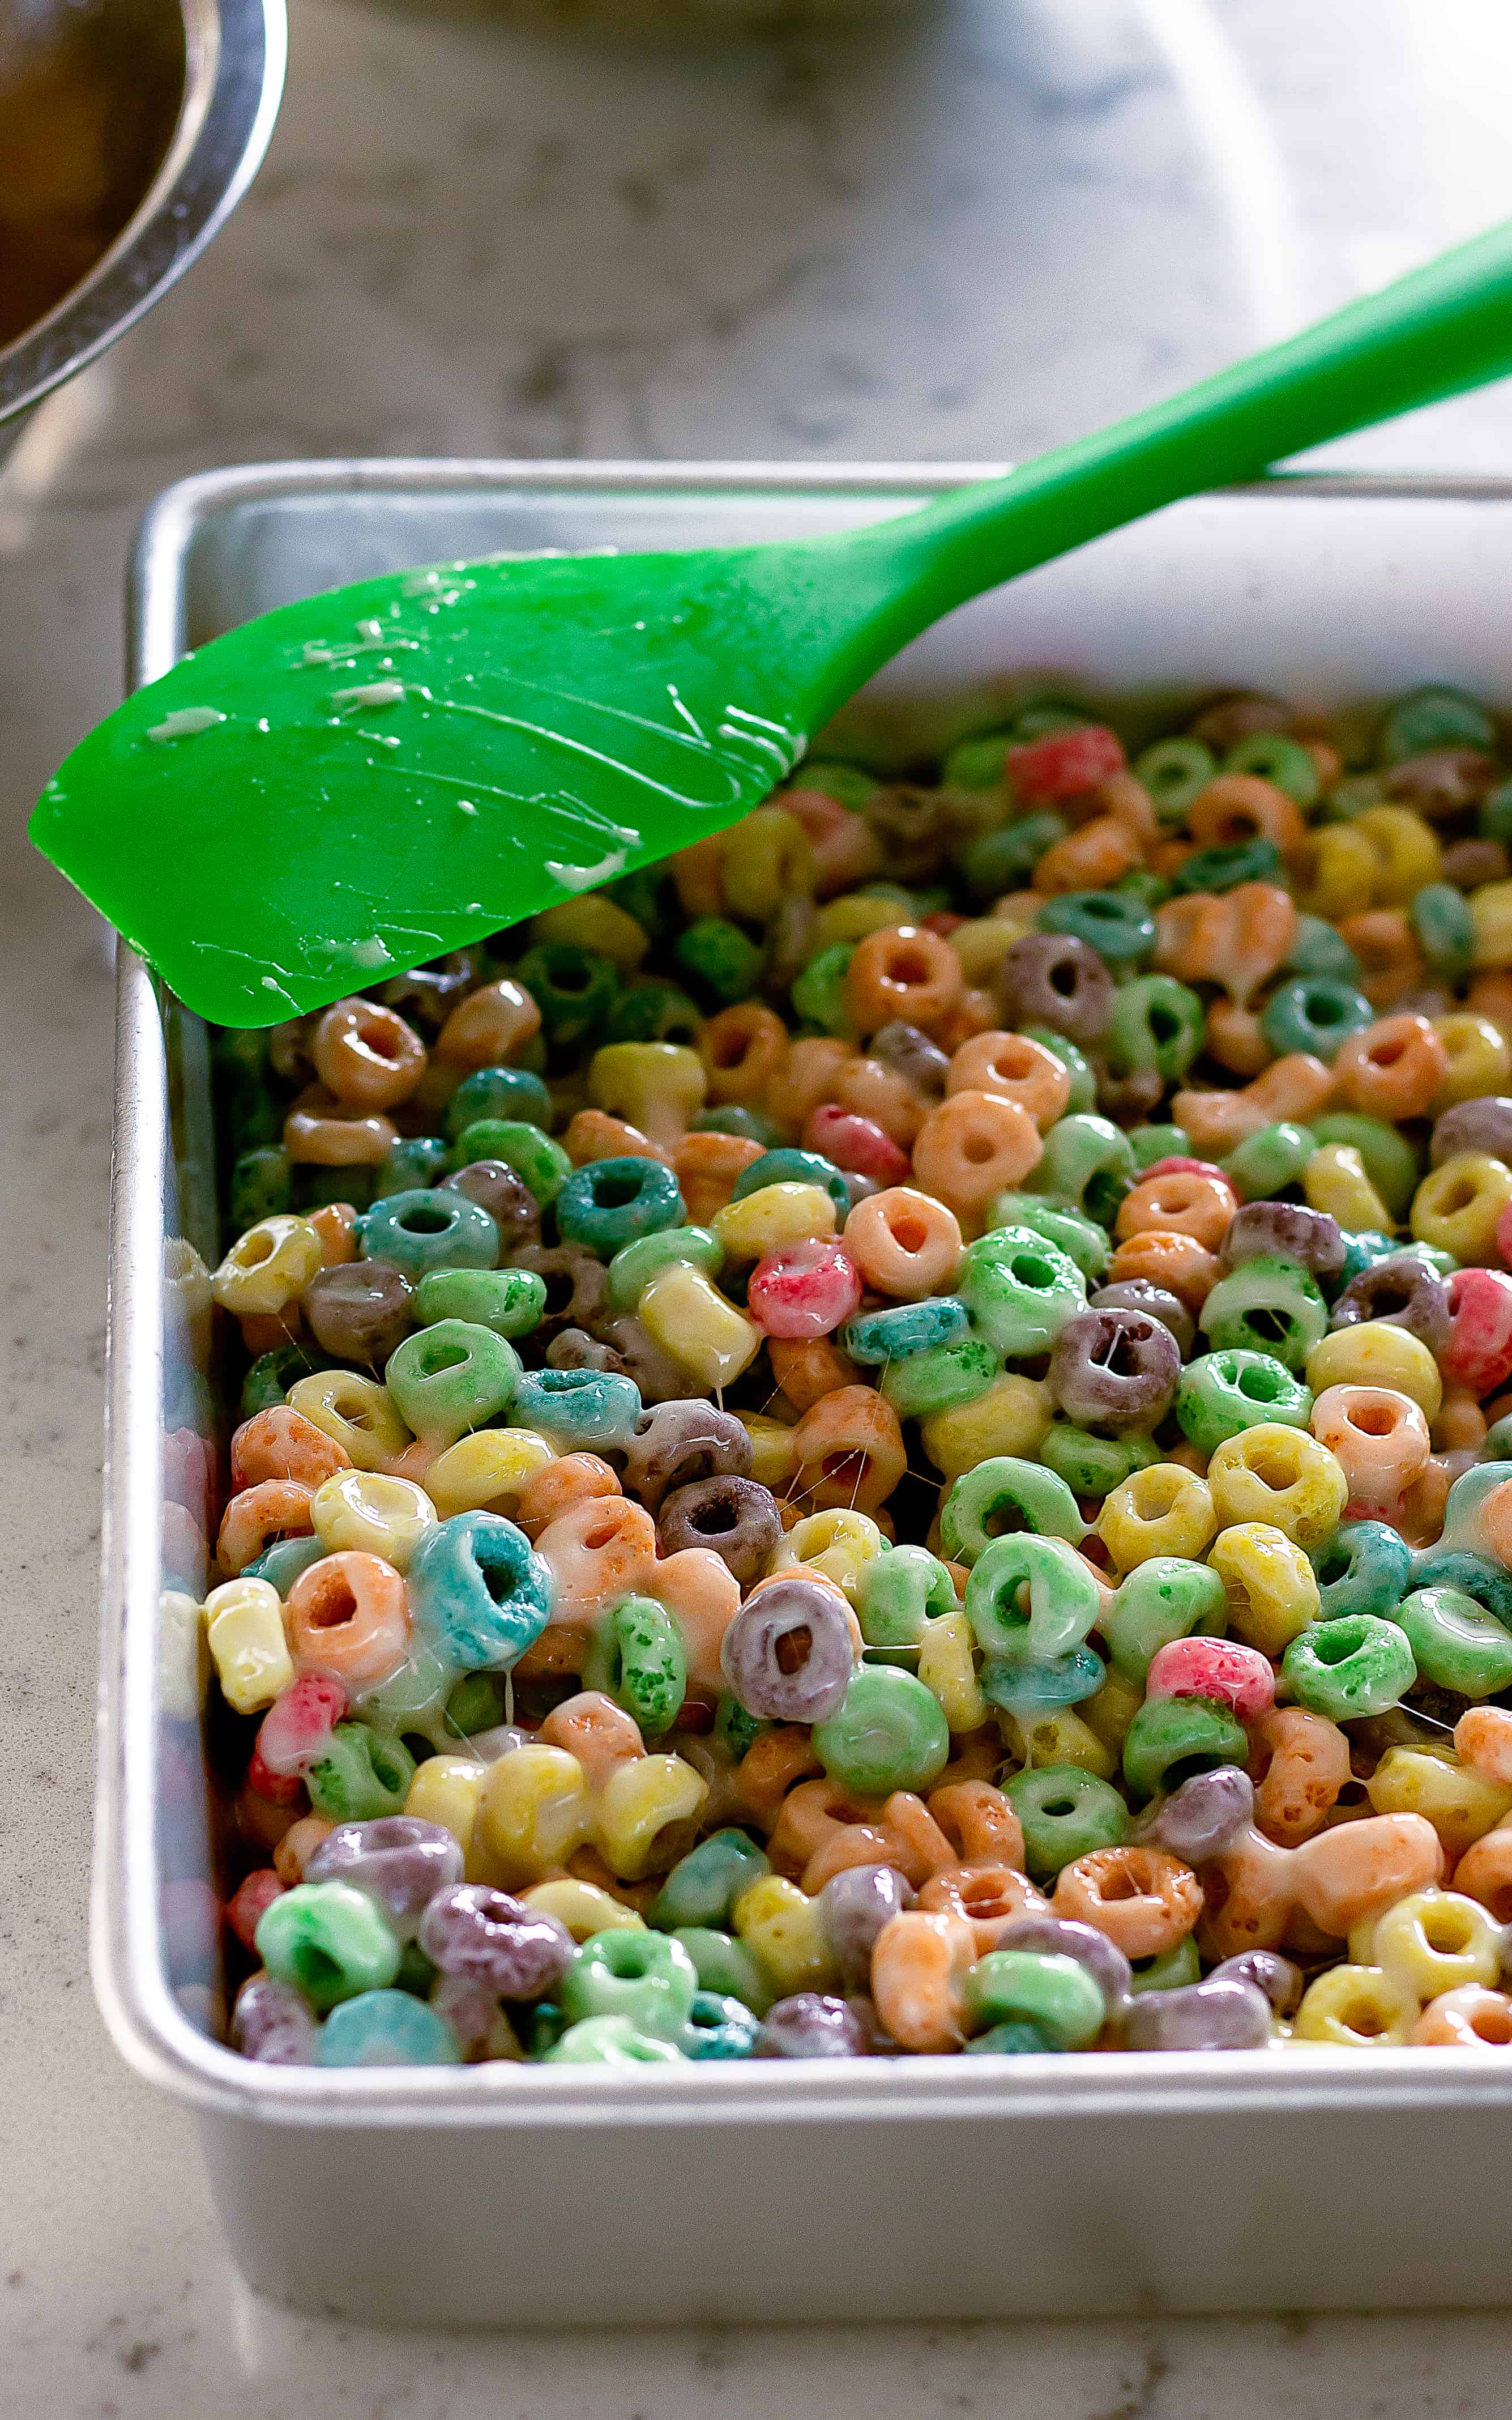
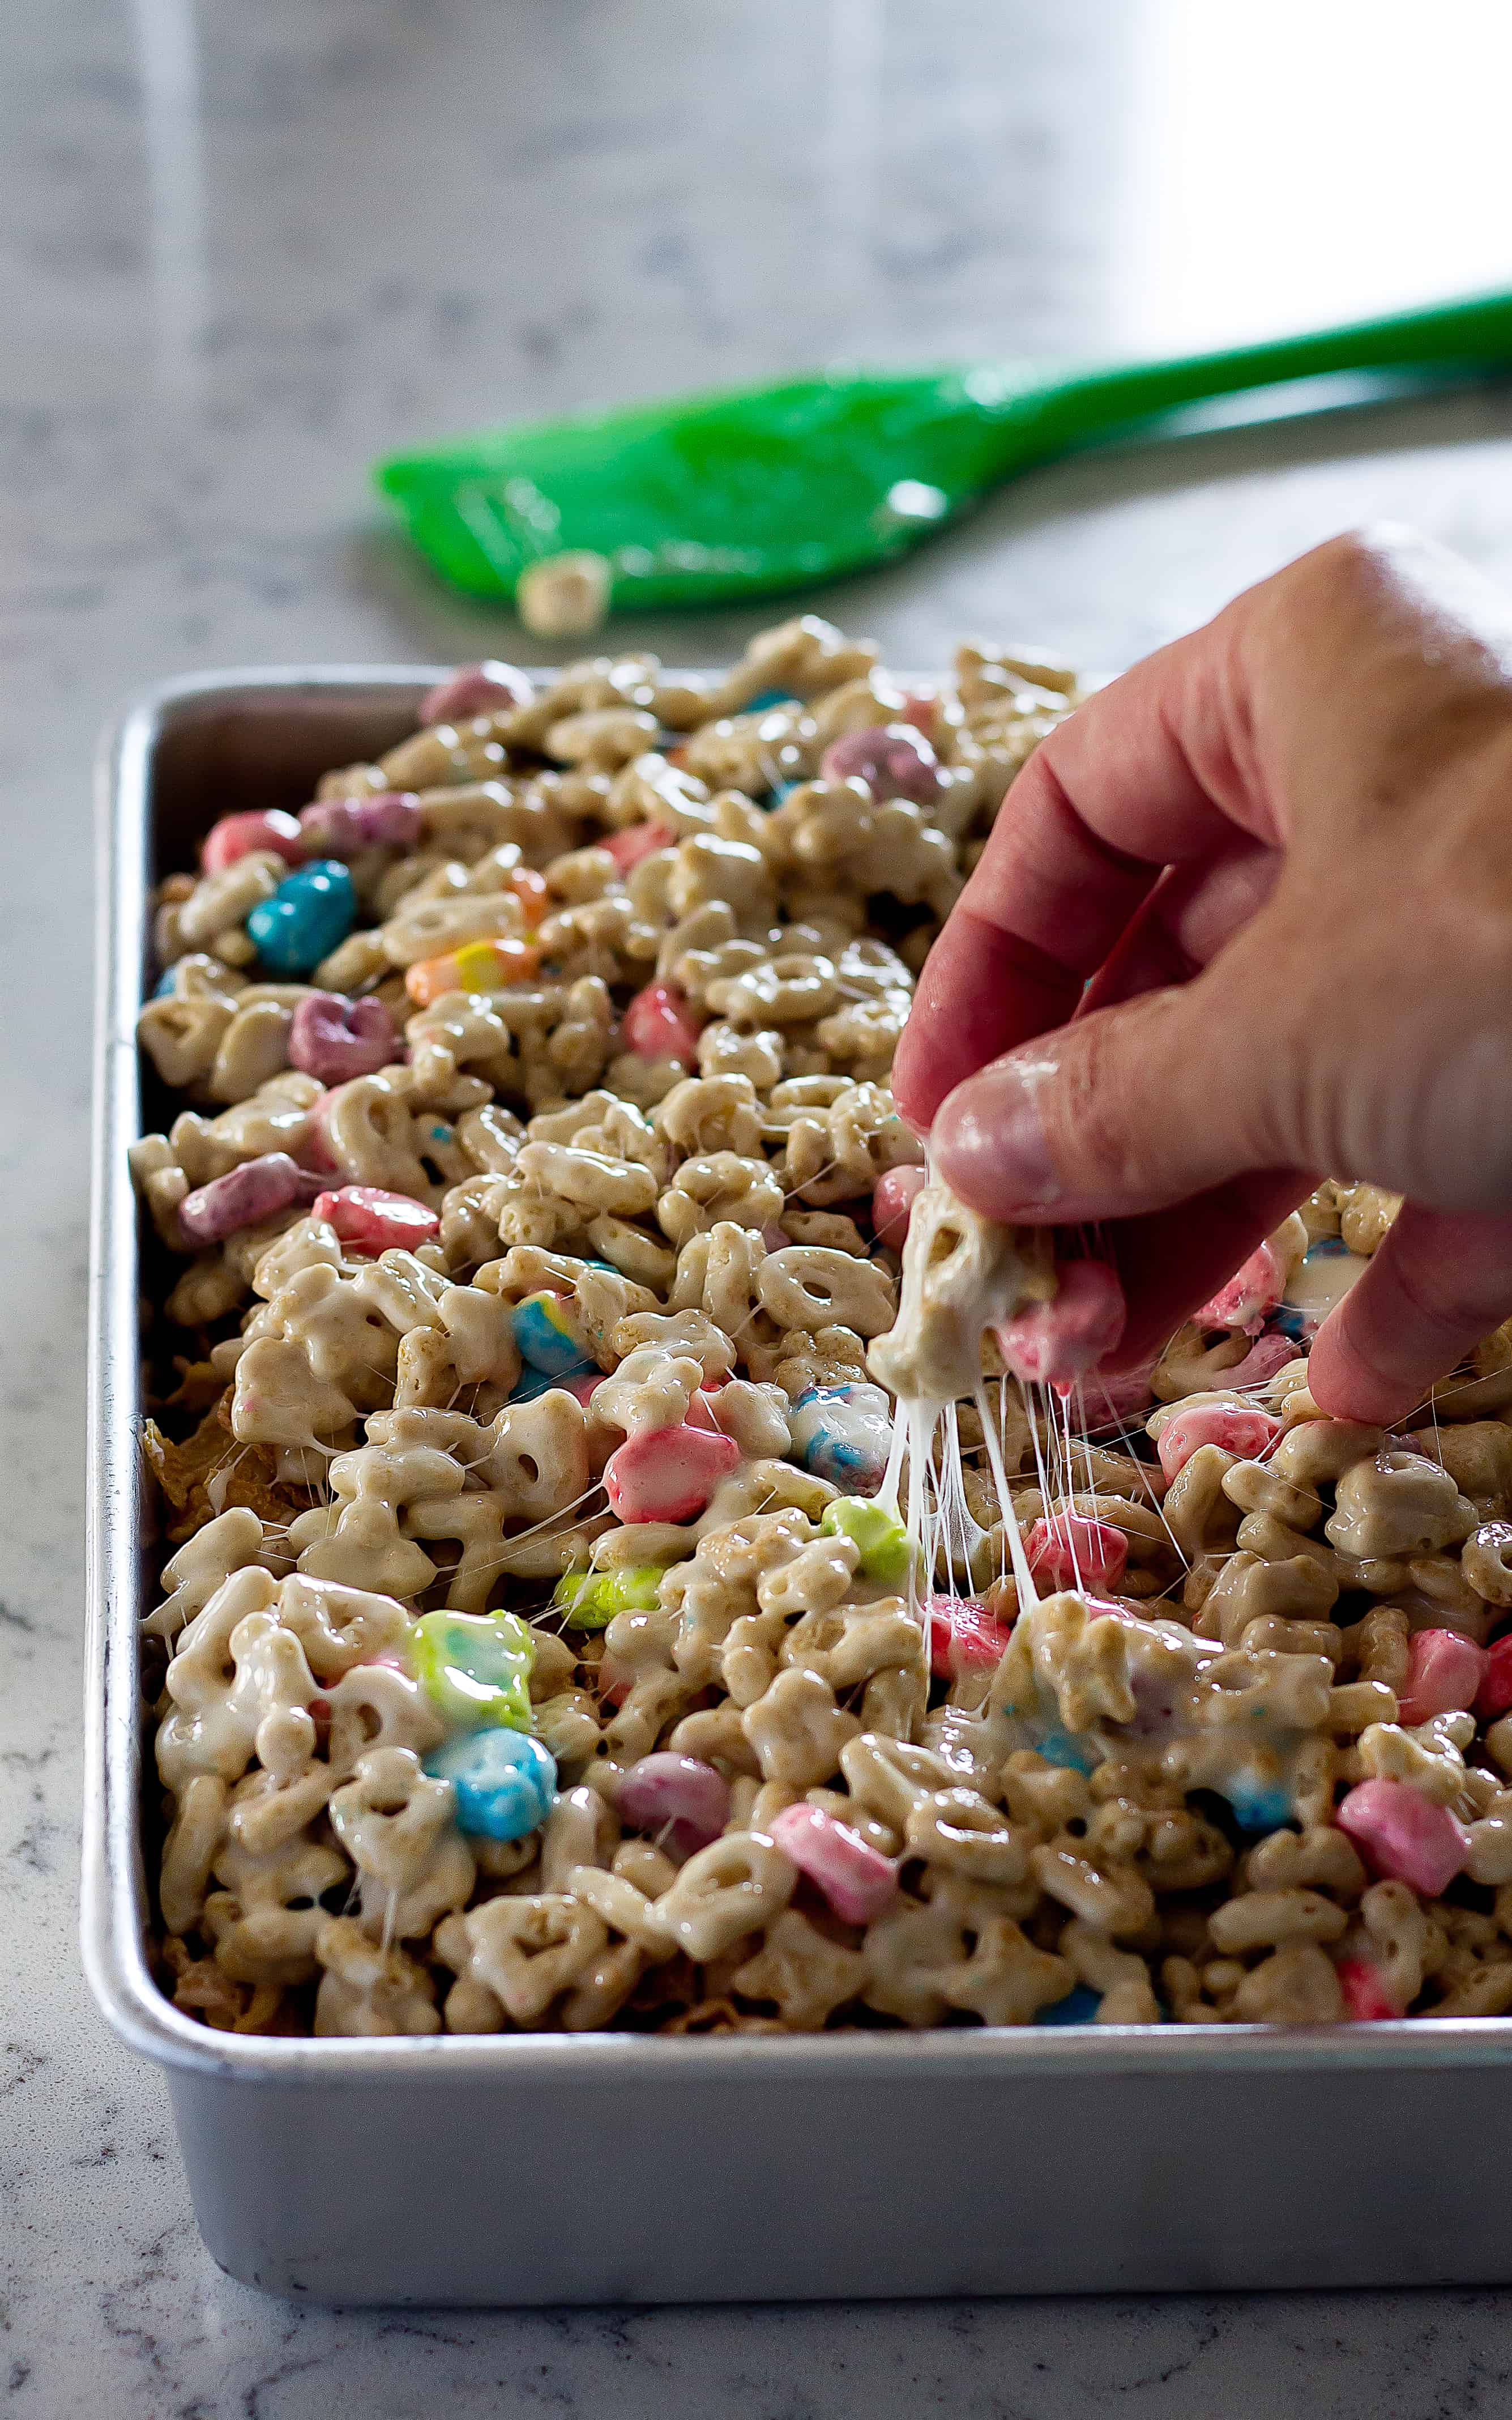
The cereal is neatly broken into three 5 cup sections. The marshmallows are done the same way, I just bag up the remaining mini marshmallows for hot cocoa!
The marshmallow and butter mixture that you mix the cereal in sets up fast so I make one layer at a time to avoid a clumpy, unevenly coated, mess. When you make your own Layered Cereal Treat Bars, you choose which layers go where and what cereals you want to use. These are totally customizable!
For the full recipe and detailed instructions, please refer to the recipe card at the bottom of the post.
If you love this recipe as much as I do, please leave us a ⭐️⭐️⭐️⭐️⭐️ five-star review in the comment section below. Thanks!
I tested Layered Cereal Treat Bars a few times (thank you to those who ate all the attempts) and found a few tips and tricks that will help! If you are organized you will only have a few dishes to wash, unlike my first attempt where I used every mixing bowl and spatula in the house.
Tapas Tips & Tricks
- Have lots of counter space cleared off so you can spread out.
- Gather all your ingredients before you get started so you aren’t frantic.
- Use a good non-stick spray that is unflavored and is not a weird yellow color. I like this one!
- Use a glass or metal bowl big enough mix your marshmallows and cereal together.
- Spray the bowl with non-stick spray BEFORE you put the cereal in it.
- Add the marshmallows and butter to a microwave-safe bowl, that you have sprayed with non-stick spray.
- Cut the butter into smaller pieces before putting on top of the marshmallows so it drips evenly down between the marshmallows.
- Spray your spatula with non-stick spray before you use it to stir the marshmallows and butter or you won’t get it off the spatula.
- Once the marshmallows and butter are melted, pour evenly over your cereal to spread it around and mix fast. The marshmallow will get even more sticky as it cools.
- Once evenly coated, add it to your pan and press into an even layer. I use my hands (it cools fast) for this because it is easier to spread it. Spray your hands before you touch the mix!
- You can use the same bowls for the second and third layers as long as you spray them down again.
Are you seeing a spray with non-stick spray theme here? Melted marshmallows are sticky, Y’all!
With these Layered Cereal Treat Bars you won’t have to decide between your favorite cereals to make these marshmallow treats!
More Easy Appetizers
- Margarita Bars
- Chocolate Frosted Sugar Cookie Bar
- Easy No Bake Peanut Butter Bars
- Peanut Butter Pretzel Bars
Layered Cereal Treat Bars
Ingredients
- 8 tablespoons butter divided into thirds
- 15 cups cereal 5 cups of each cereal I used Froot Loops, Frosted Flakes, and Lucky Charms
- 9 cups marshmallows divided into thirds
- non-stick spray
- 9 x13 or [10×10] pan
Instructions
Gather all your ingredients before starting as the process moves fast.
- Prepare the pan that you are going to build your layered cereal bars in by spraying with non-stick spray.
- In a glass or other microwave-safe bowl, add 3 cups of marshmallows.
- Place 1/3 of the butter on top of the marshmallows. I cut it into small pieces and sprinkle on top of the marshmallows.
- Microwave for 1 minute.
- With a spatula prepped with non-stick spray, stir or mix the marshmallows and butter until completely combined.
- Pour over one cereal type.
- Stir to coat the cereal evenly.
- Using your hands or a spatula (prepped with non-stick spray) and press the cereal into a single layer.
- Set aside briefly and continue with the next layer.
Repeat these steps for the second and third layers, making sure the layers are as even as possible.
- When finished, let set up for about 20 minutes.
- Store in an air-tight container for up to 3 days.
Notes
Nutrition
©TakeTwoTapas.com. Content and photographs are copyright protected. Sharing of this recipe is both encouraged and appreciated. Copying and/or pasting full recipes to any social media is strictly prohibited.

I’m going to make these for work with Halloween sprinkles for our work party. YUM!
John is a kid at heart and loves marshmallow treats. I can’t wait to surprise him with these!
Layering with different cereals is such a great Idea. These will be devoured in my house.
Layering with different cereals is such a great Idea. These will be devoured in my house.