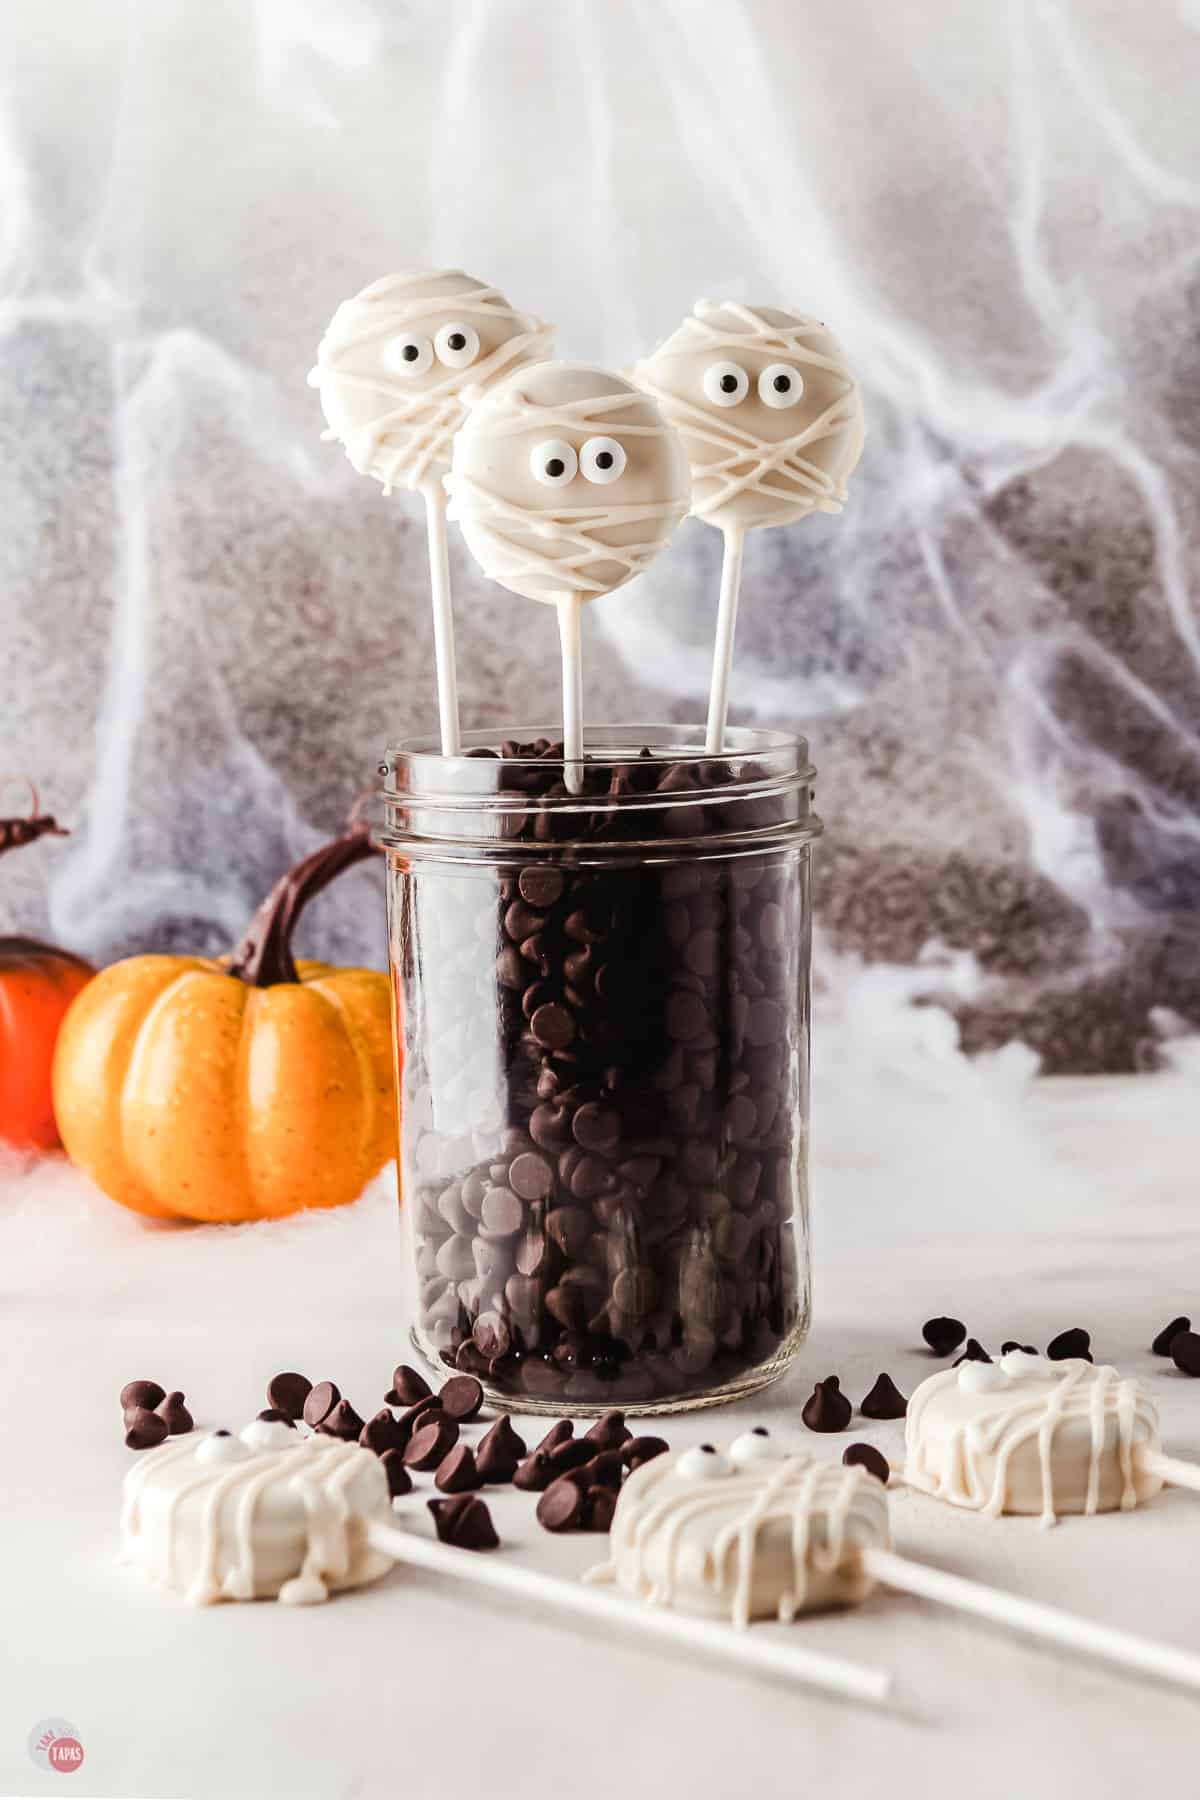
Halloween Oreo Pops
These mummy Halloween Oreo pops are super cute and super easy to make! With just a few ingredients and a fun time decorating, you will have these adorable treats that kids of all ages will love.
I love Halloween! Not only decorating and dressing in costume, but passing out candy to all the kids and seeing their faces light up. And it’s amazing the costumes that kids make these days. They get more creative every year.
As you can tell with all my Halloween recipes, I love this holiday and look forward to it every year.
When it comes to holidays I always stress myself out trying to have everything decorated, make a unique costume, and have all the food just right.
So this year, I am going simple and enjoying this season instead of trying to do ALL THE THINGS.
These mummy Oreo pops are just what I need. With just a few ingredients (chocolate and cookies) I can make these adorable treats and then customize them with all the sprinkles and candies I have stored away!
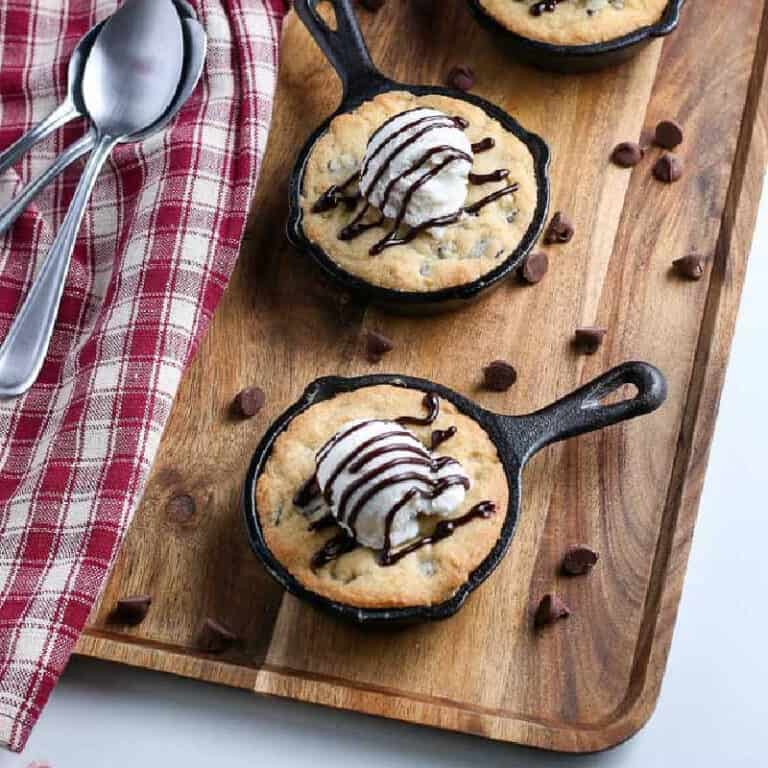
Serve them with Mini Mummy Pizzas, Nutter Butter Mummy Cookies, Monster marshmallow treats, and my Mummy Munch Snack Mix.
This post may contain affiliate links. As an Amazon Associate, I earn from qualifying purchases at no additional cost to you. Read my disclosure policy.

See recipe card for complete information on ingredients and their quantities.
Ingredient Notes
- White chocolate – You can use baking chips, almond bark, or candy melts.
- Coconut oil – This is for thinning out the melted chocolate so it dips smooth.
- Oreo cookies – You can use regular, double stuffed, mega stuffed, and even golden Oreos!
- Lollipop sticks – I like the white ones but you can find colored ones or even use the flat wood sticks too.
- Candy eyes – You can find these in the baking section of most grocery stores year round but they might be moved to the seasonal section if Halloween is close at hand.
For more insider tips, tricks, and a behind the scenes look, follow me on Pinterest, Facebook, Instagram, & X.
How To Make Halloween Oreo Pops
- Prepare a baking sheet with parchment paper and set aside. In a small bowl melt the 4 tablespoons of white chocolate in the microwave for 20 second intervals until smooth.
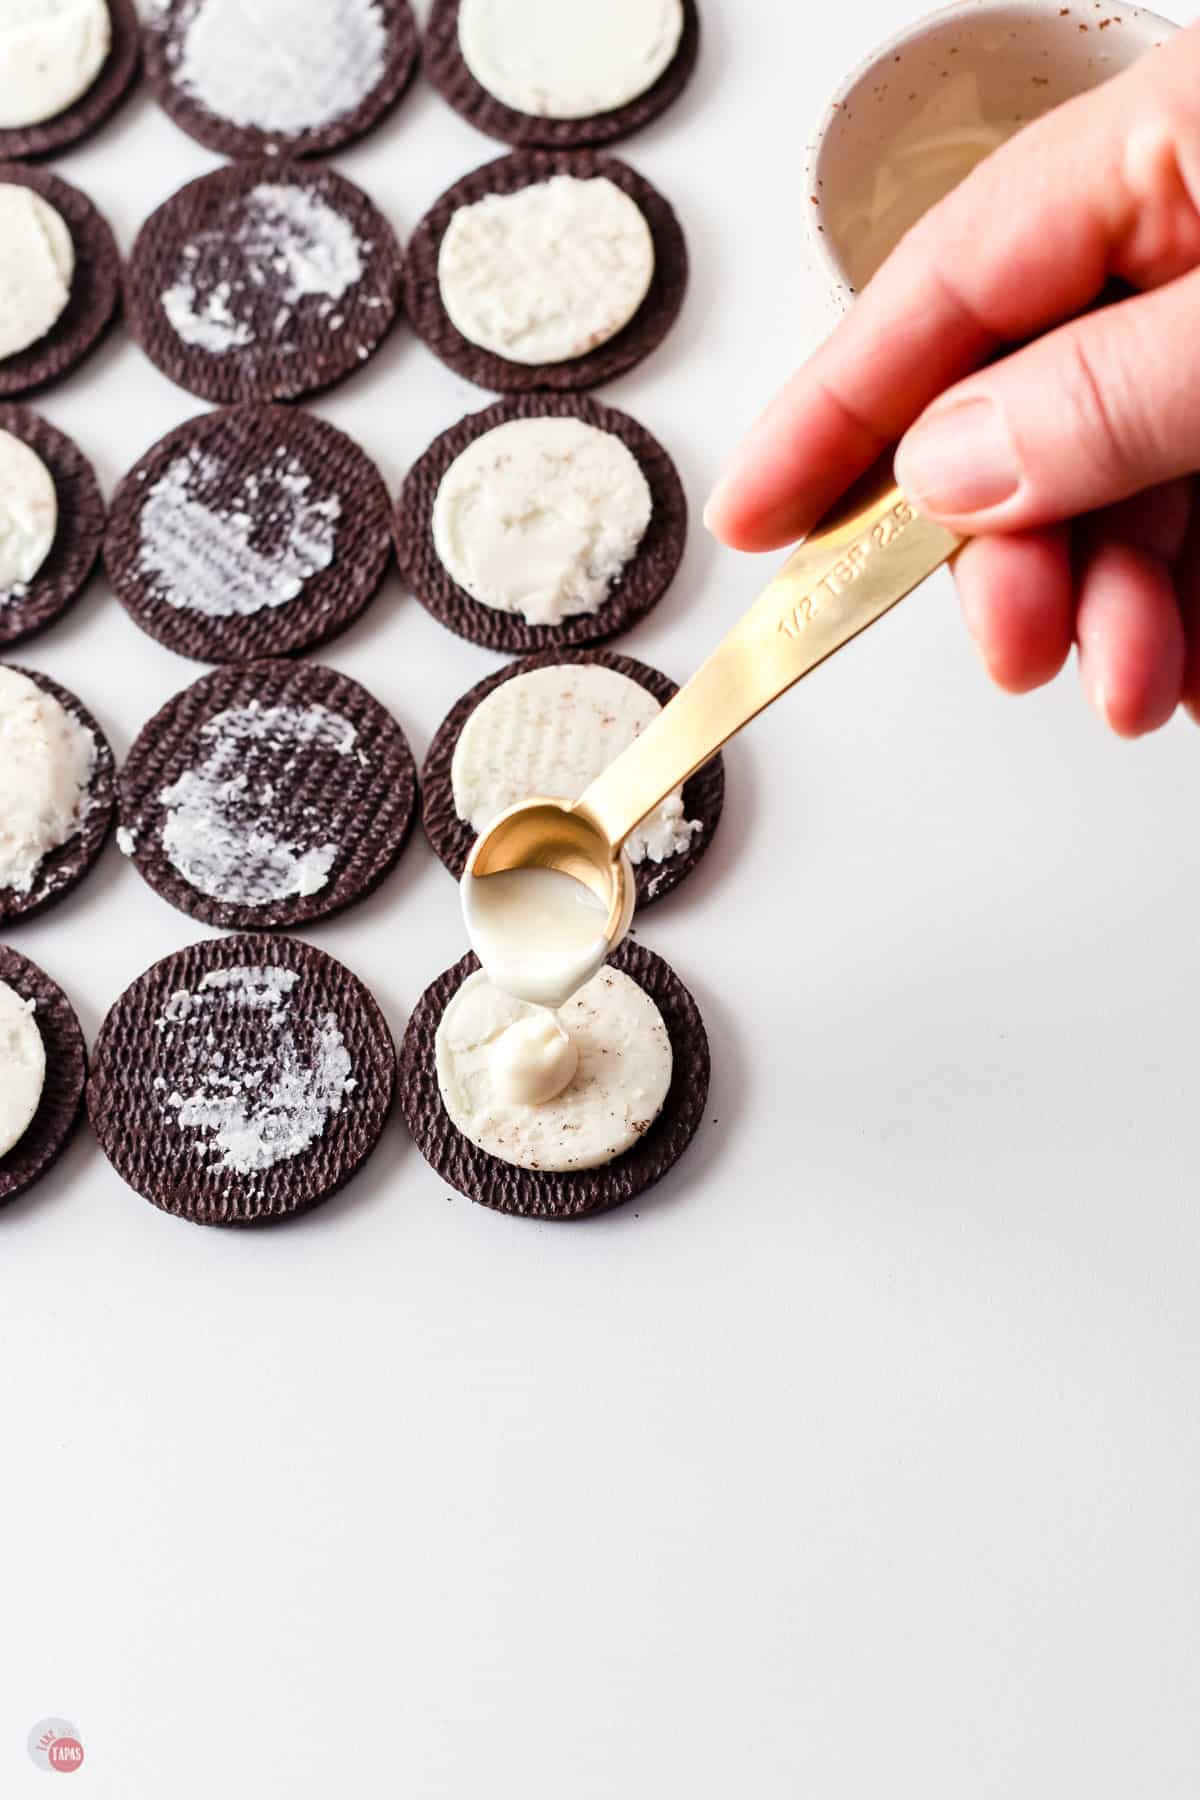
- Open the Oreo in half and place a teaspoon of white chocolate on the cream side of the Oreos.
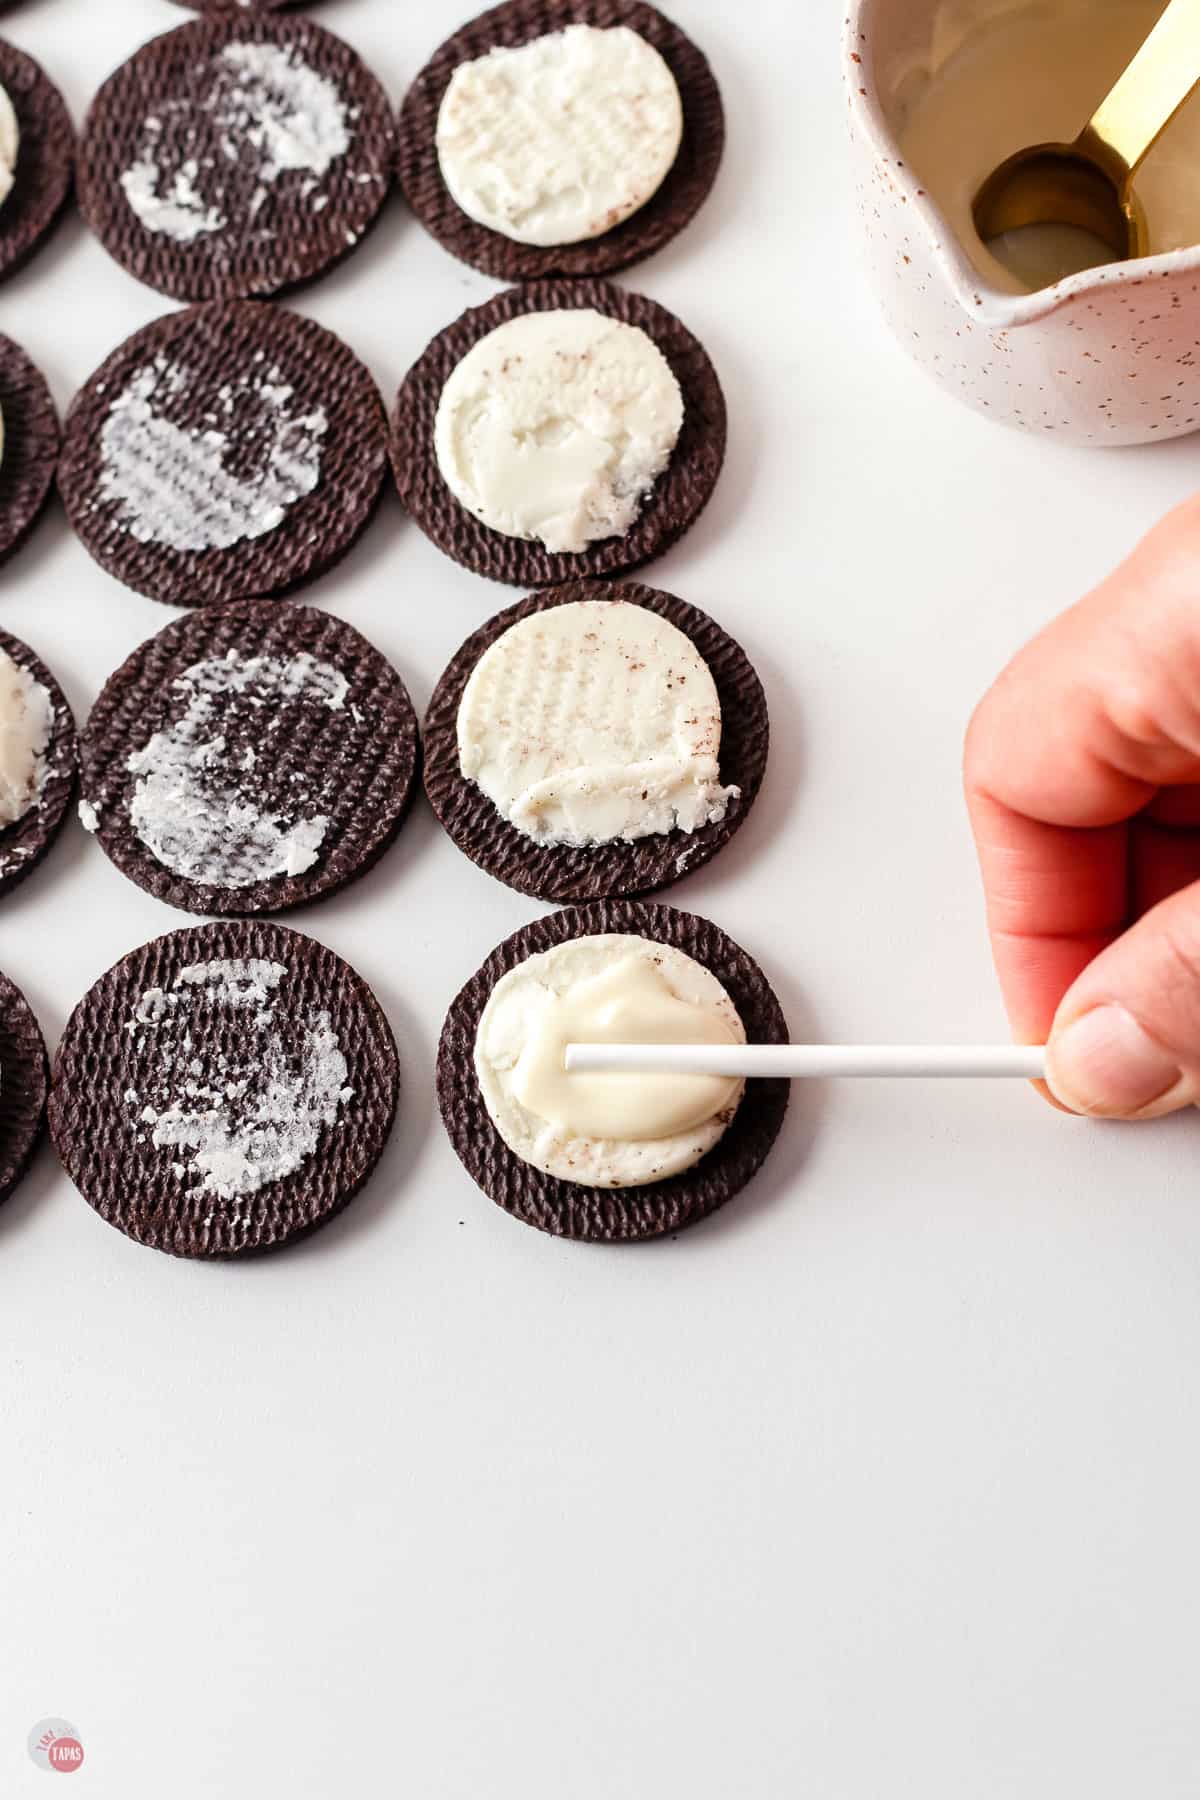
- Place the lollipop sticks into the melted chocolate and close the Oreo. Place in the refrigerator for 10 to 15 minutes, to seal completely.
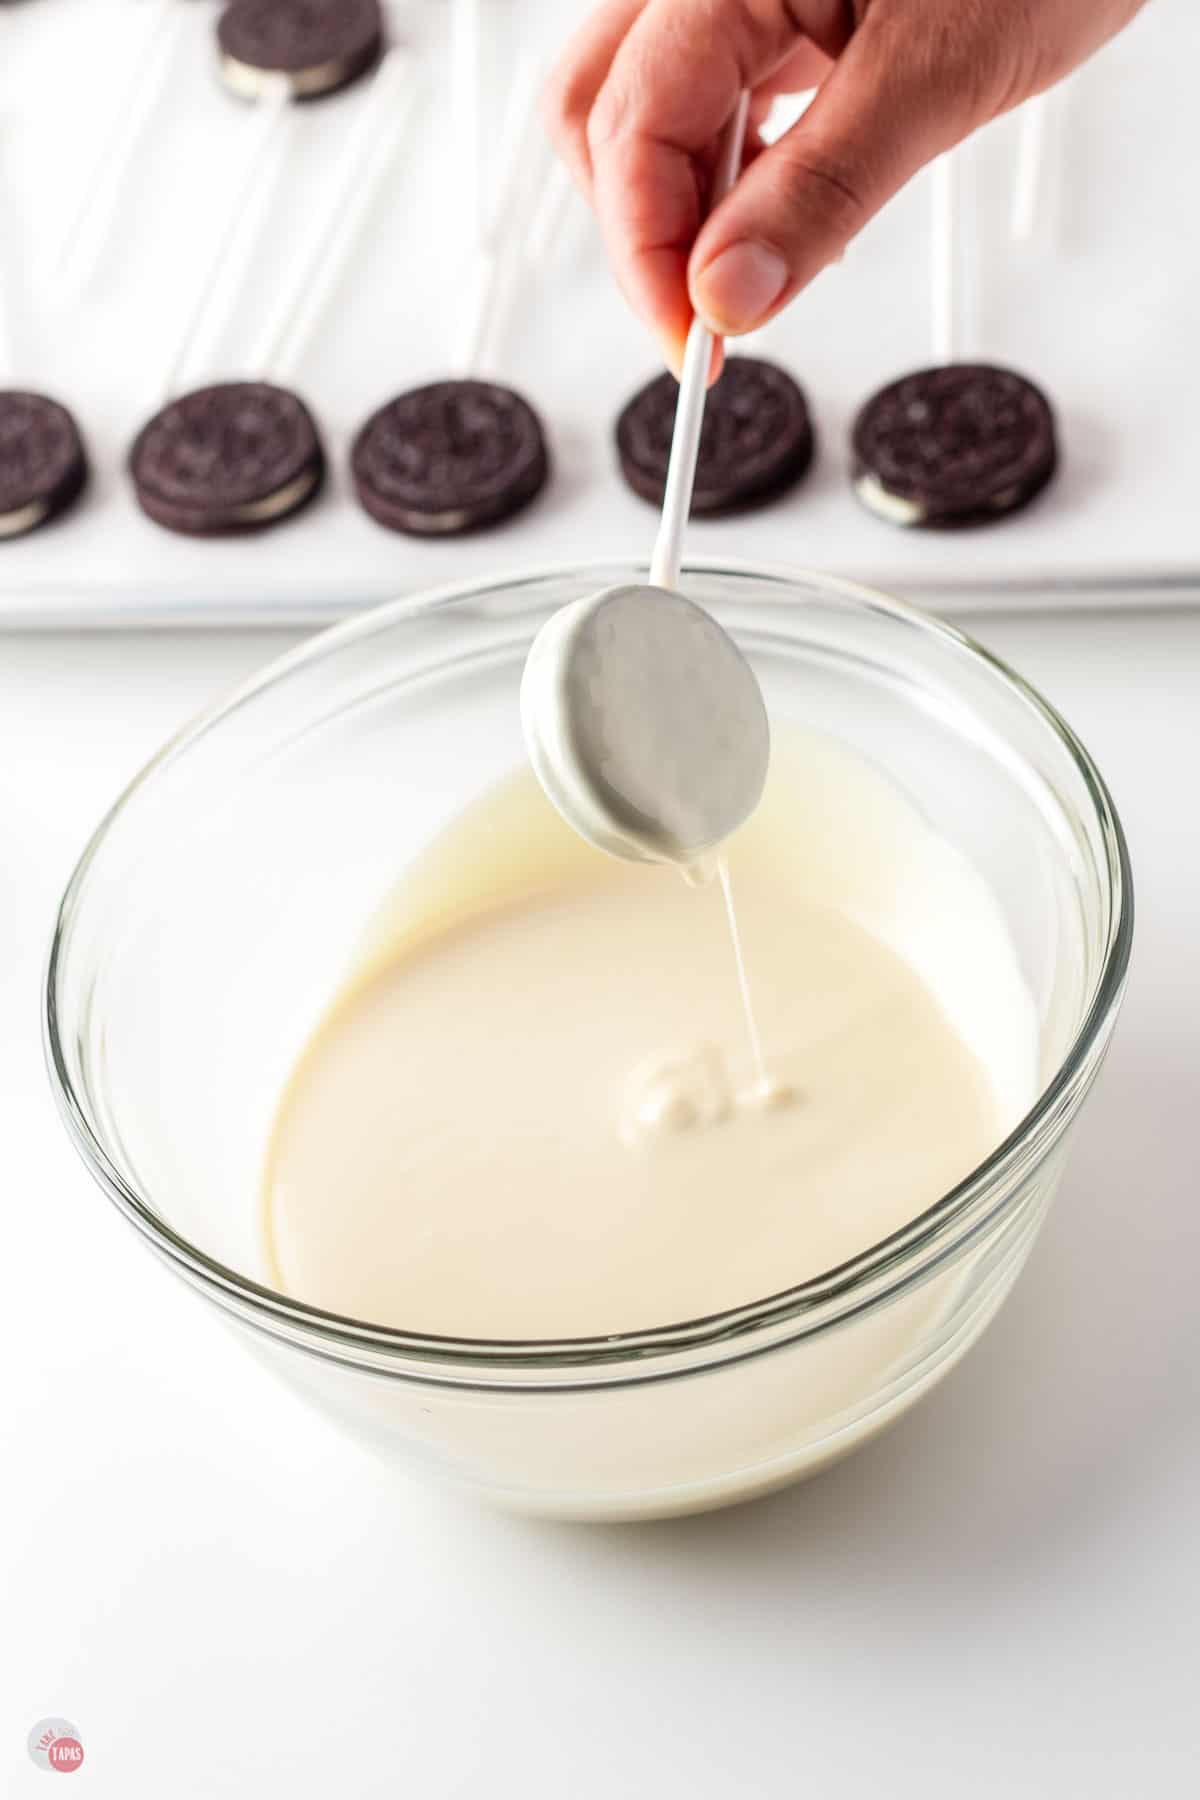
- Once sealed, melt the rest of the chocolate and coconut oil in another bowl, for 20 second intervals. Make sure you don’t burn the chocolate.
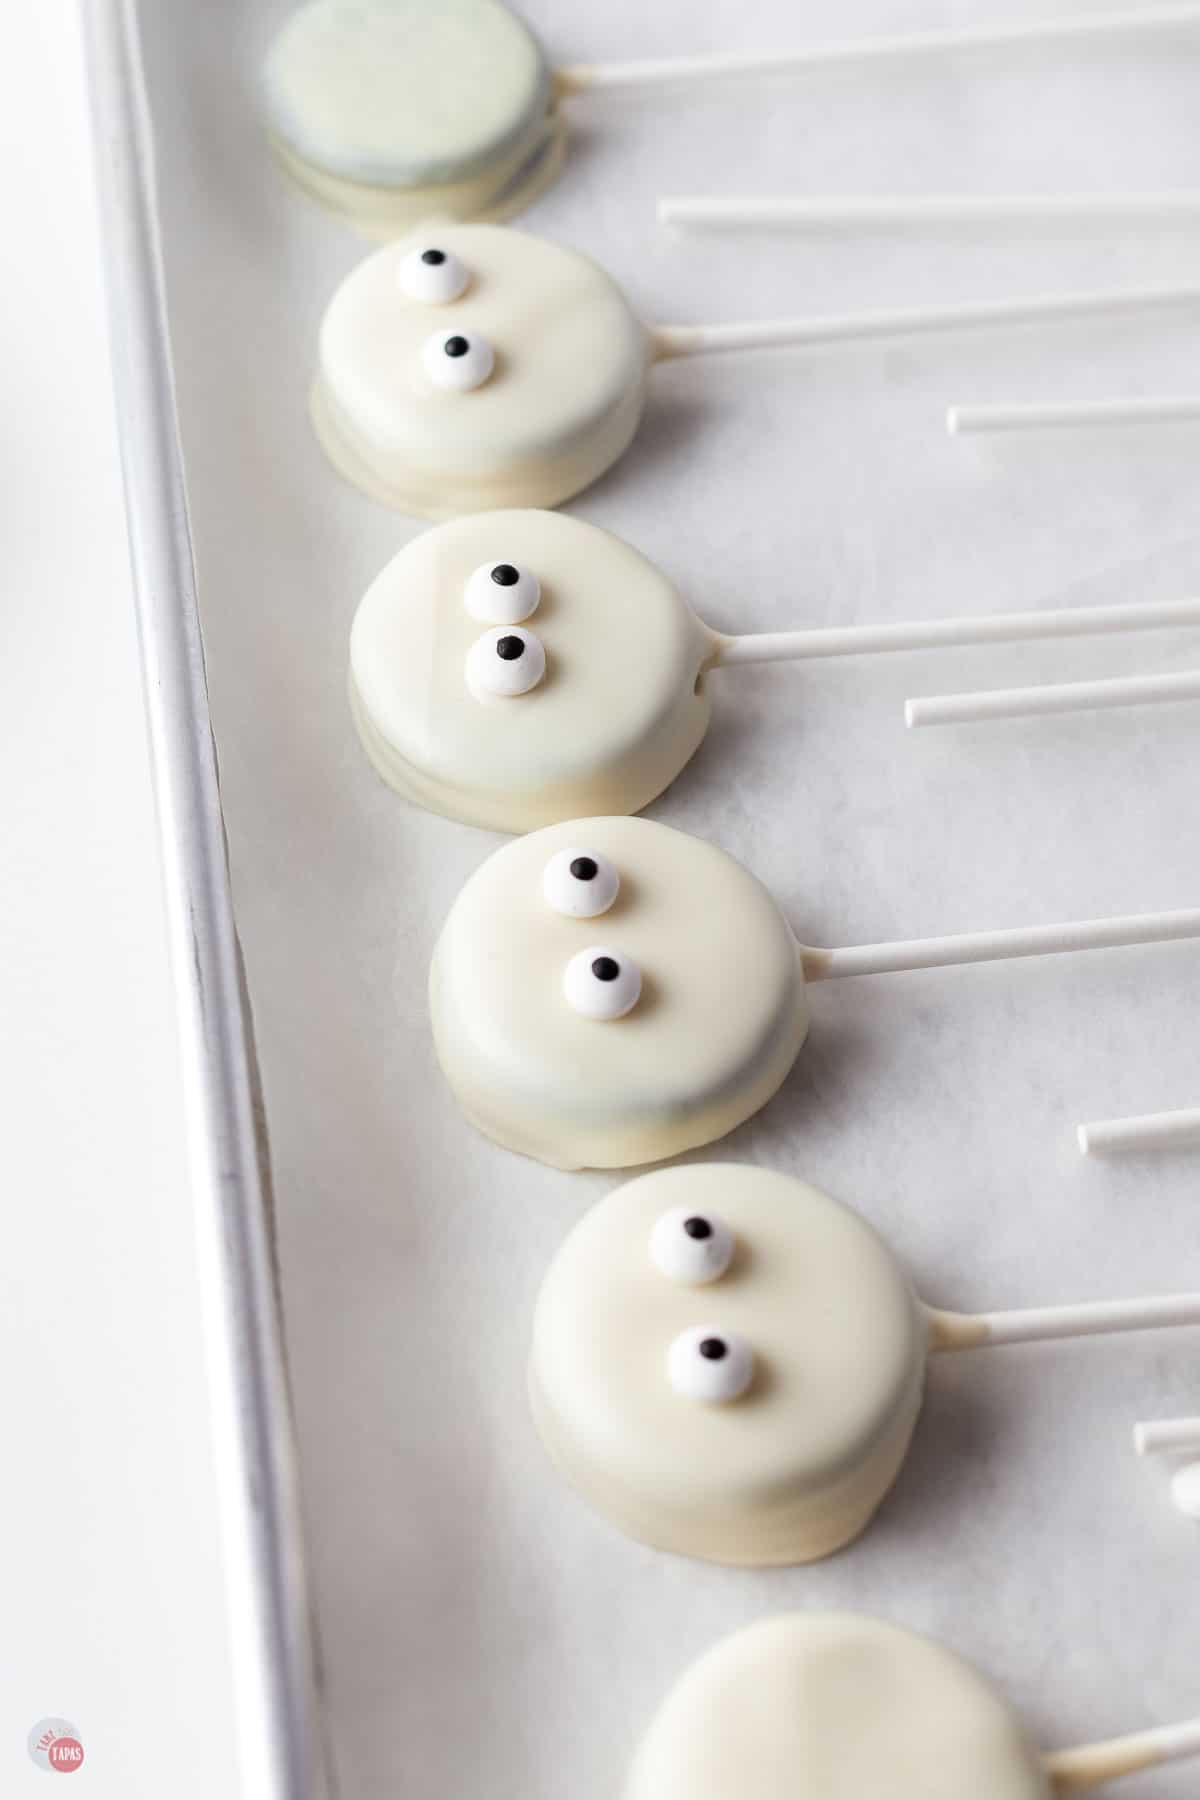
- Dip Oreo pops in the melted white chocolate and set it on your baking sheet to dry. Repeat for a second coating of white chocolate and place two eyes onto each Oreo. Let set completely.

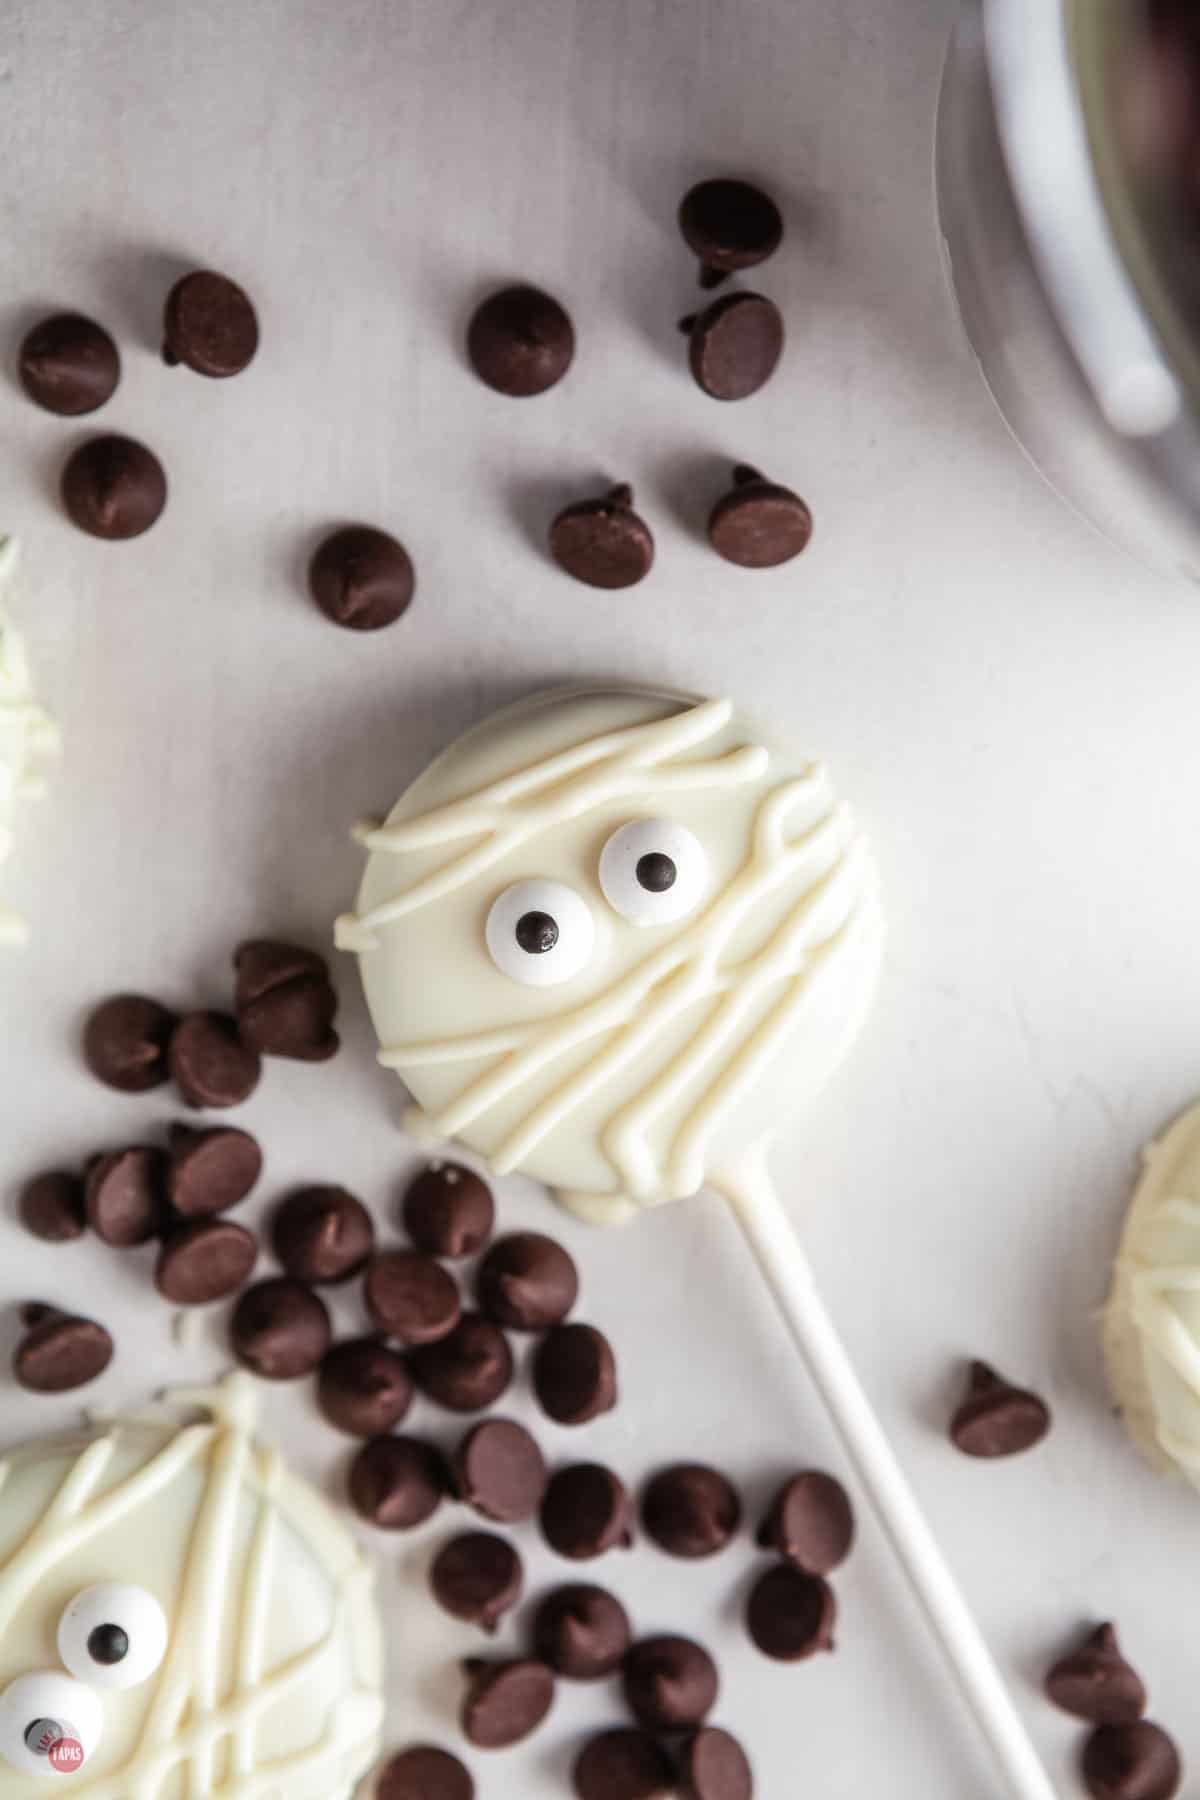
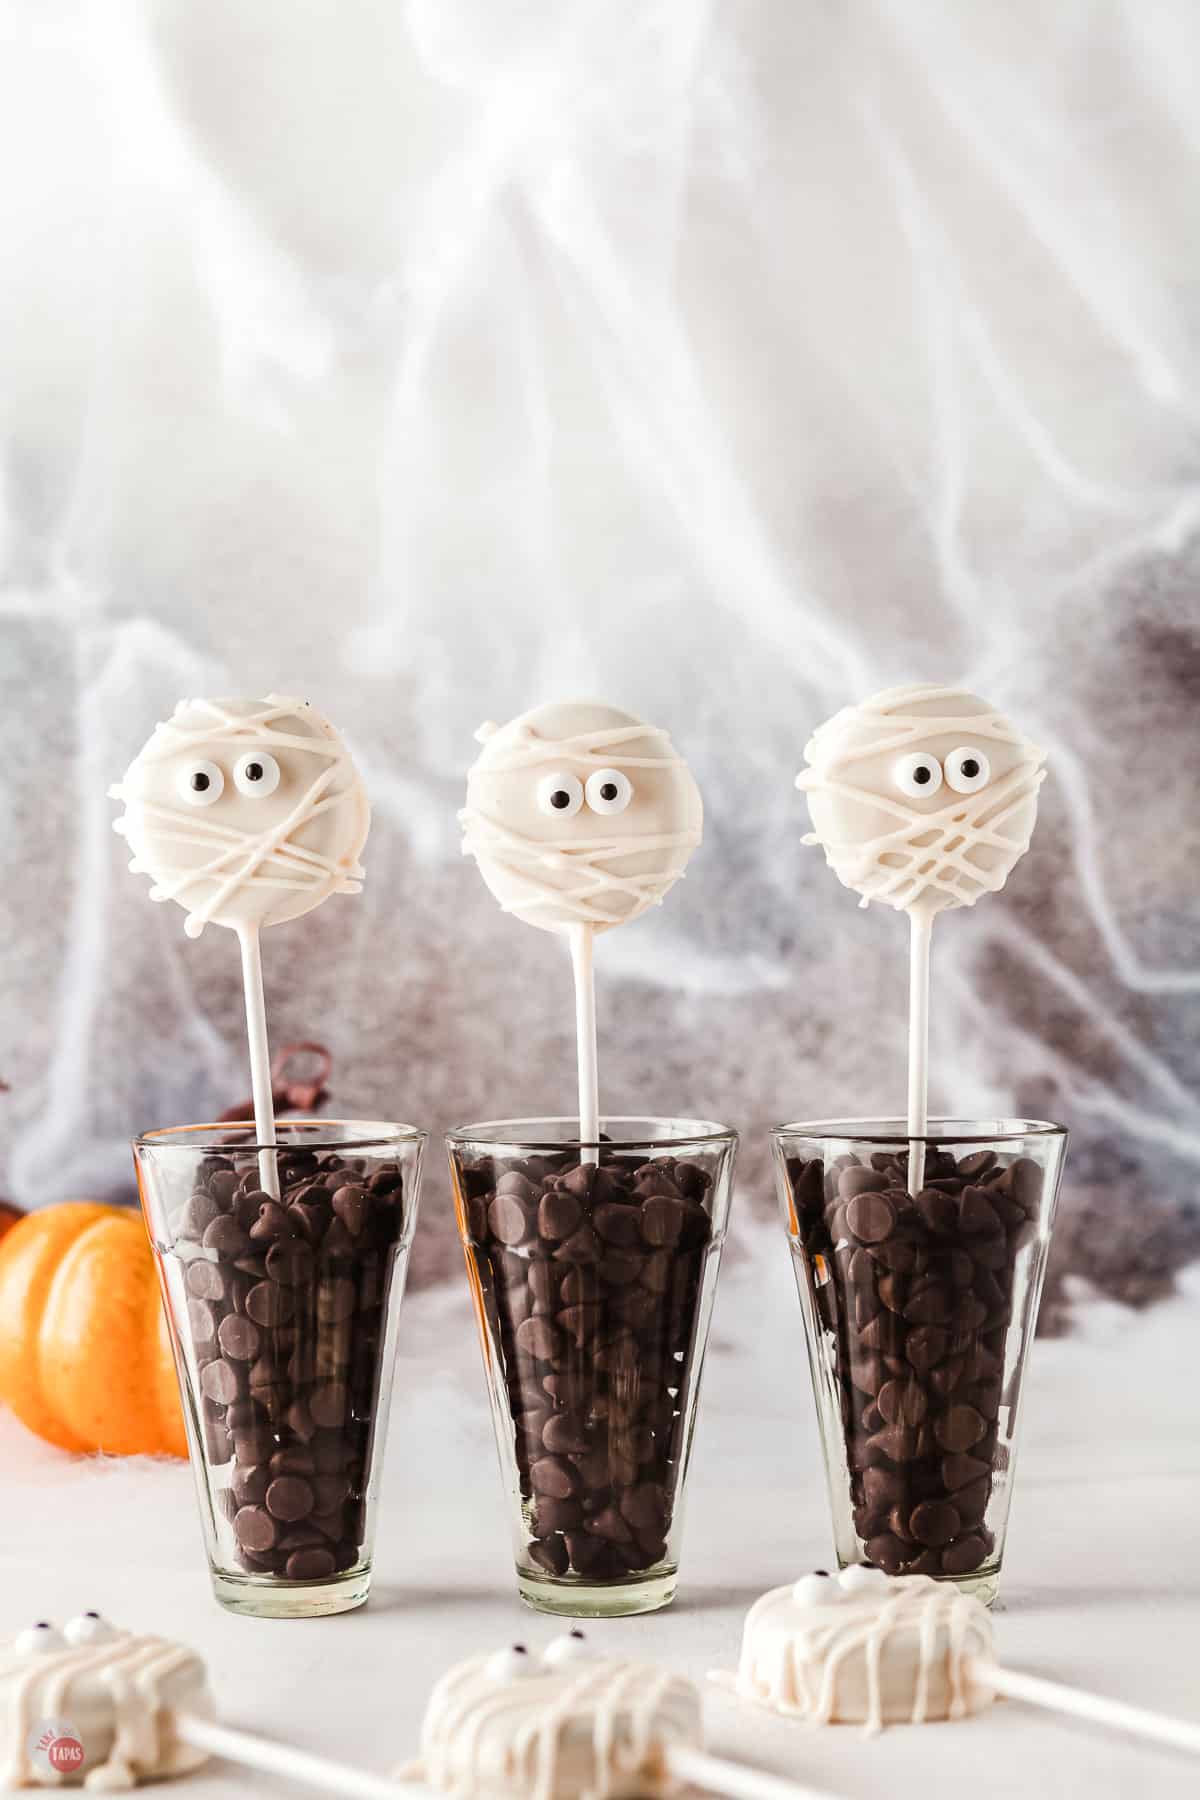
- Add the rest of the chocolate into a piping bag or zip top bag, and drizzle each cookie with a bit of chocolate to make them look like the mummy wrapping. Let set and enjoy!
For the full recipe and detailed instructions, please refer to the recipe card at the bottom of the post.
Storage
Once dipped and cooled, you can store wrap them in a decorative plastic bag or seal in an airtight container. They will last up to 2 weeks. Great for making ahead of time!
Decorations
I love how easy it is to decorate these oreo pops as mummies with a simple drizzle of melted white chocolate and some candy eyes.
Just place the melted chocolate in a zip top bag and cut a little of the corner off. You can also just drizzle from a spoon.
If you don’t have candy eyes, you can use chocolate chips. Want to really jazz them up? Decorate them like Jack Skellington with edible markers or melted dark chocolate like these Pumpkin Macarons.
If you are giving these as gifts or party favors, place them in individual plastic bags and tie with a black ribbon. Super fun!!
Frequently Asked Questions
Cookies are shelf stable and so is the white chocolate. If you only use these ingredients then they do not require any refrigeration. Just be sure to store them in an airtight container to keep away any moisture.
Tools For Making Oreo Pops

Looking for more Halloween treats to make? Check out all these easy and festive ideas!
Recipe Tips & Tricks
- If you don’t like the microwave option for melting the chocolate, you can always use a double boiler method.
- White chocolate chips not available, try candy melts or almond bark.
- Want bigger mummies? Try using double stuffed or mega stuffed oreos. You will probably need more white chocolate to cover them all.
- If you want a different color you can add a gel or oil based food coloring. Do not use water based ones or it will cause your chocolate to seize up.
- To help the chocolate set faster, you can freeze the oreo pops for 15 minutes, after you add the stick to the middle, and before you do the first dip. The cold cookies will help the chocolate stick better faster.
- Shake or the let the excess drip off before setting on the parchment paper to set up or you will get an extra ring or flap around the cookie and it will be uneven.
If you love this recipe as much as I do, please leave us a ⭐️⭐️⭐️⭐️⭐️ five-star review in the comment section below. Thanks!
Grab your favorite ghouls and goblins (kids of all ages) and whip up these fun and festive Mummy Halloween Oreo Pops for your holiday!

Mummy Oreo Pops
Equipment
Ingredients
- 1 1/2 cups white chocolate chips
- 1 tablespoon coconut oil
- 15 Oreo cookies
- 4 tablespoons white chocolate chips to seal cookies
- Candy eyeballs
Instructions
- Prepare a baking sheet with parchment paper on a baking tray and set aside.
- In a small bowl melt the 4 tablespoons of white chocolate in the microwave for 20 second intervals.
- Open the Oreo in half and place a teaspoon of white chocolate on the cream side of the Oreos.
- Place the lollipop sticks into the cream and chocolate on that side and close the Oreo.
- Chill in the refrigerator for 10 to 15 minutes, to seal completely.
- Once they are sealed, place the rest of the chocolate and coconut oil in another bowl, and melt in the microwave for 20 second intervals until melted. Make sure you do not burn the chocolate.
- Dip oreos pop in the melted white chocolate and set it on your baking sheet to dry.
- Repeat for a second coating of white chocolate and place two eyes onto each Oreo.
- Let the chocolate set completely.
- Add the rest of the chocolate (leftover from the dipping) into a piping bag or zip top bag, and drizzle each cookie with a bit of chocolate to make them look like the mummy wrapping.
- Let cool to set. Enjoy!
Notes
- If you don’t like the microwave option for melting the chocolate, you can always use a double boiler method.
- White chocolate chips not available, try candy melts or almond bark.
- Want bigger mummies? Try using double stuffed or mega stuffed oreos. You will probably need more white chocolate to cover them all.
- If you want a different color you can add a gel or oil based food coloring. Do not use water based ones or it will cause your chocolate to seize up.
- To help the chocolate set faster, you can freeze the oreo pops for 15 minutes, after you add the stick to the middle, and before you do the first dip. The cold cookies will help the chocolate stick better faster.
- Shake or the let the excess drip off before setting on the parchment paper to set up or you will get an extra ring or flap around the cookie and it will be uneven.
Nutrition
©TakeTwoTapas.com. Content and photographs are copyright protected. Sharing of this recipe is both encouraged and appreciated. Copying and/or pasting full recipes to any social media is strictly prohibited.


It’s not Halloween time just yet, but my girls and I saw this and wanted to taste test before sharing with friends in October. These were a huge hit, and my kids had a blast making them!
Made these with my nephew and he loved them! Easy for him to help make!
These are darling! My niece is making them for her boys’ daycare class this year! Thanks for the great idea!