Air Fryer Blooming Onion
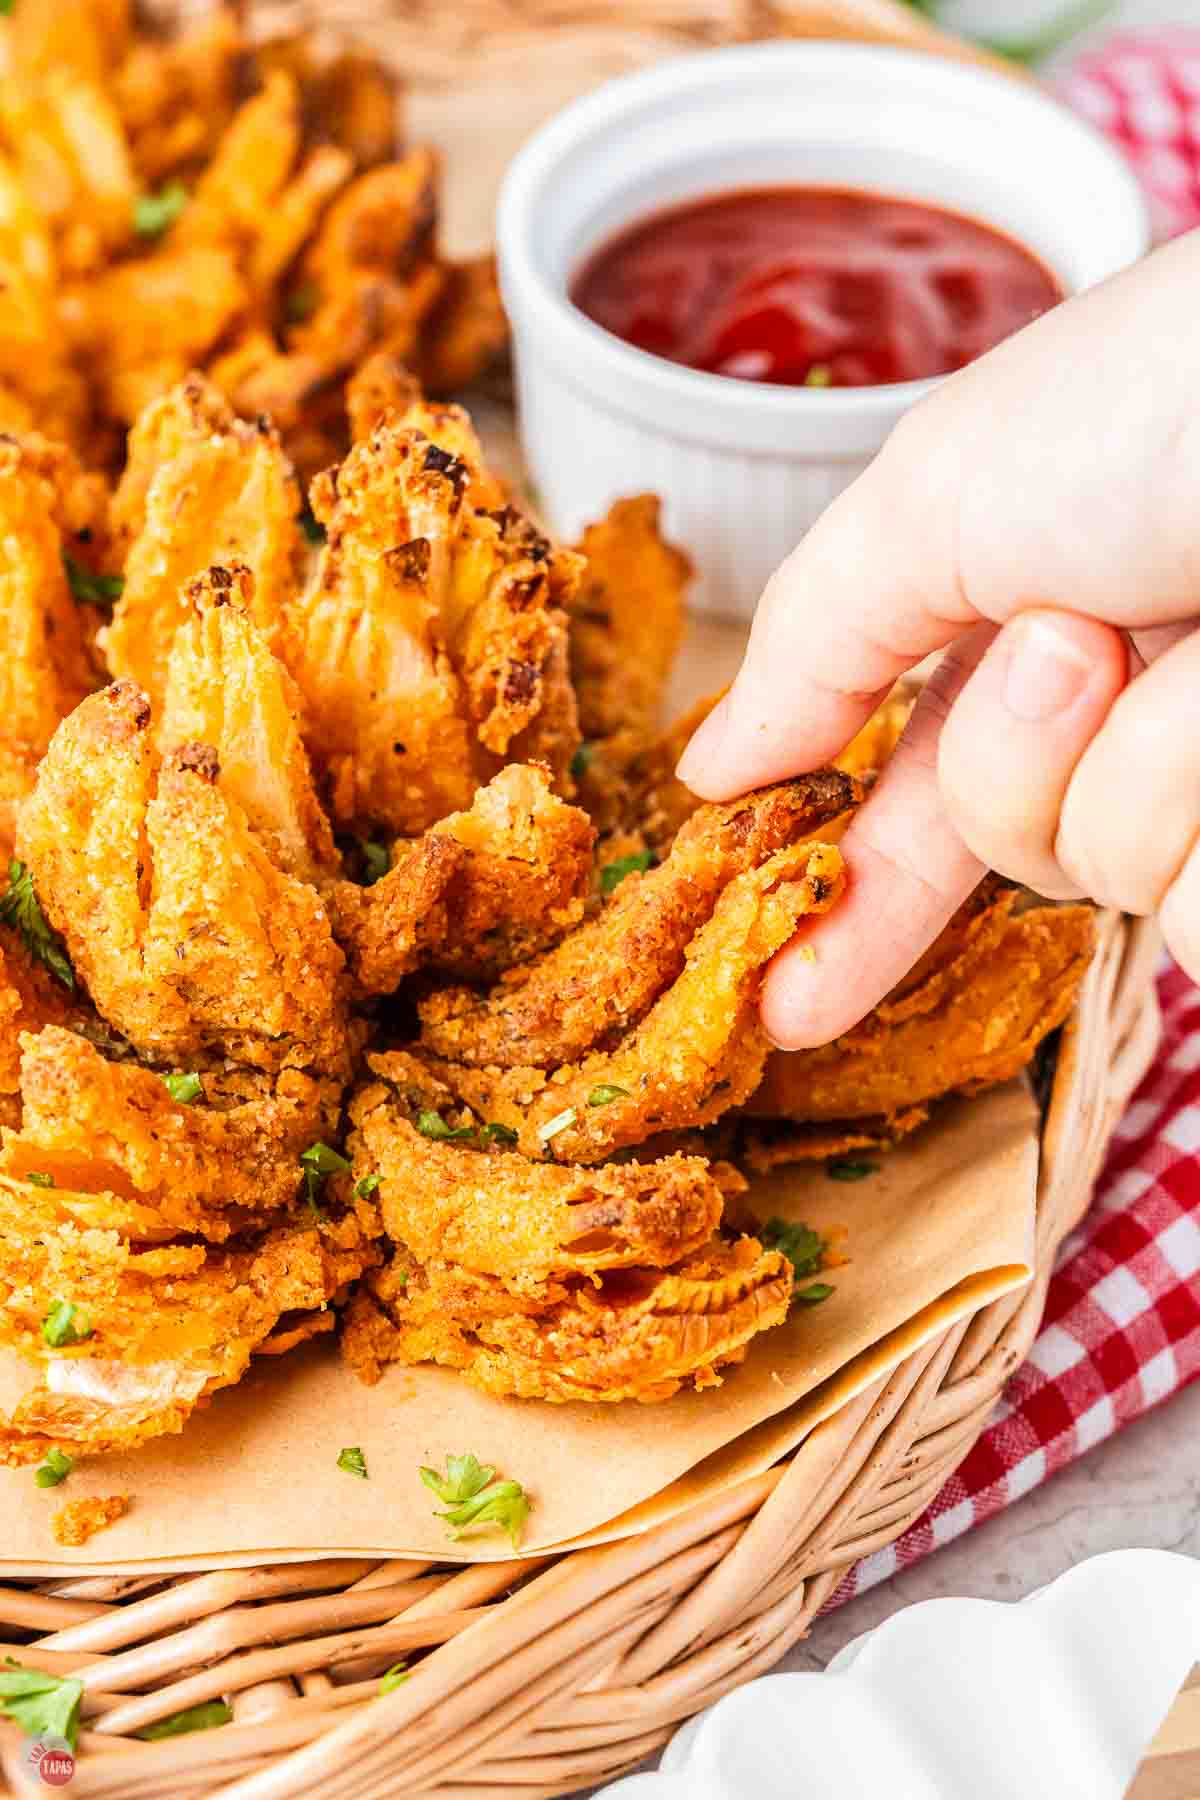
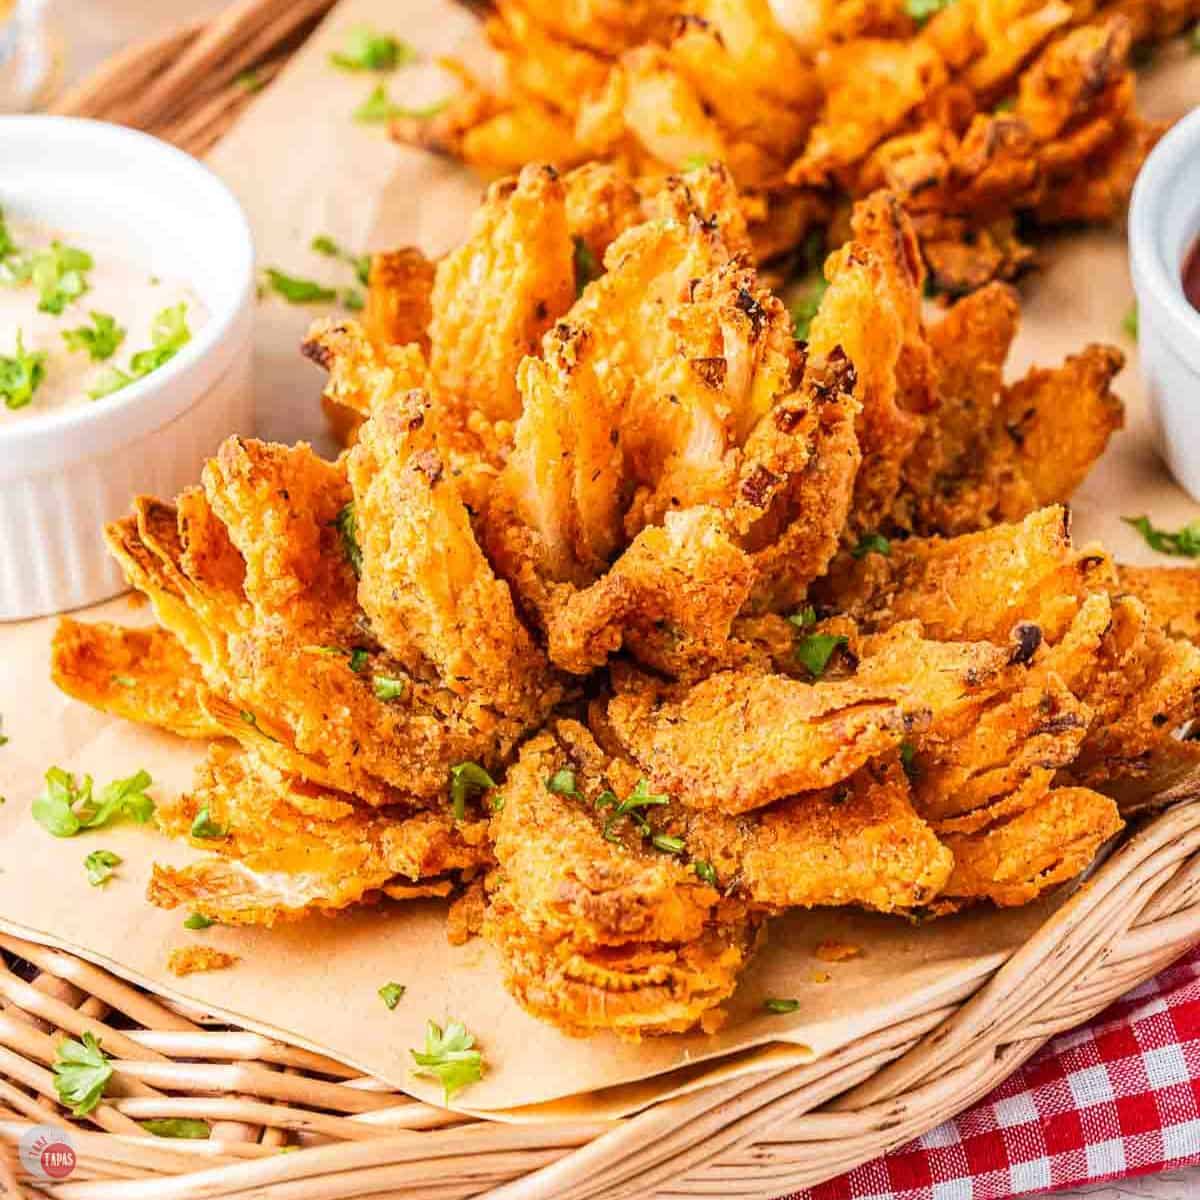
This Air Fryer Blooming Onion gives you that restaurant appetizer at home in about 45 minutes and serves up to 10 as a shared starter. One large sweet onion fanned out, breaded, and air fried until crispy and golden with no deep frying and far less mess. It is a guaranteed showstopper for game day, cookouts, and parties. Serve it with homemade blooming onion sauce for the full experience.
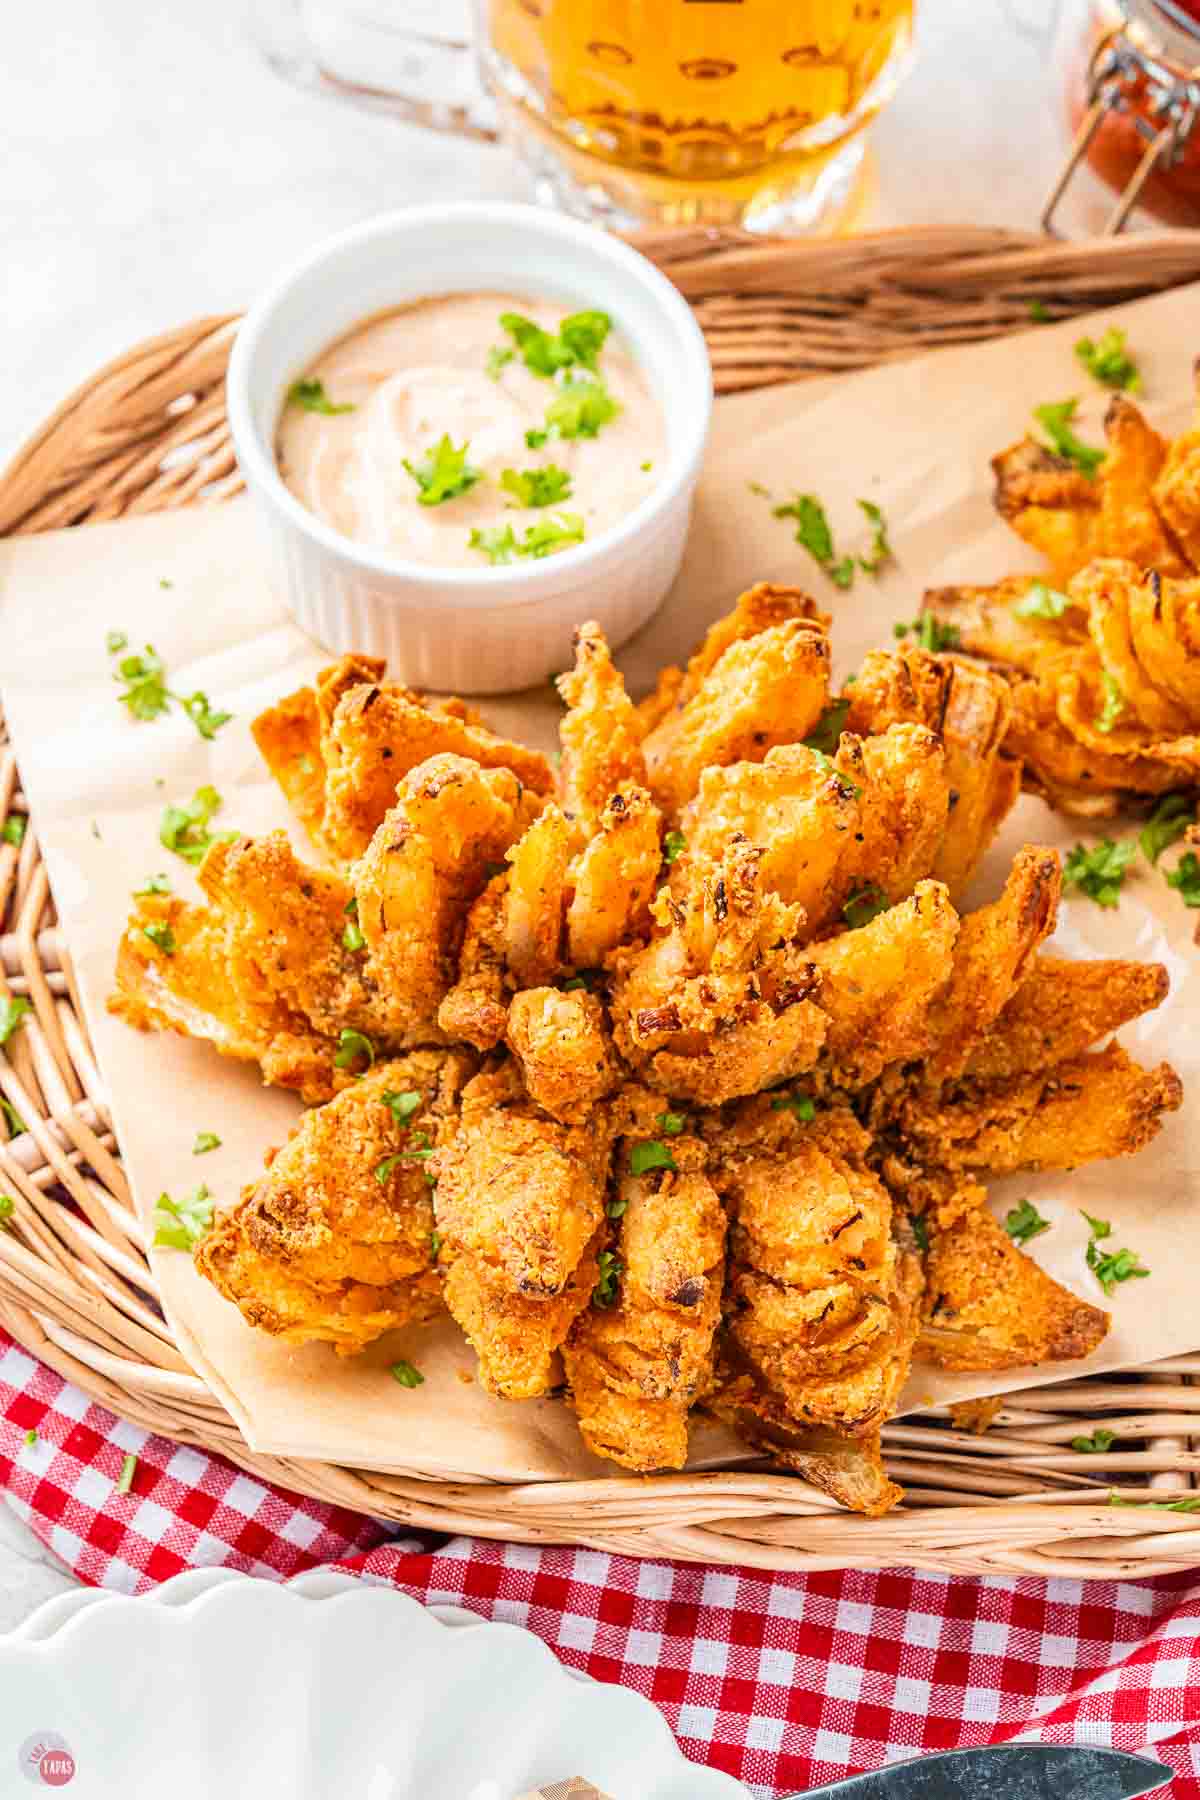
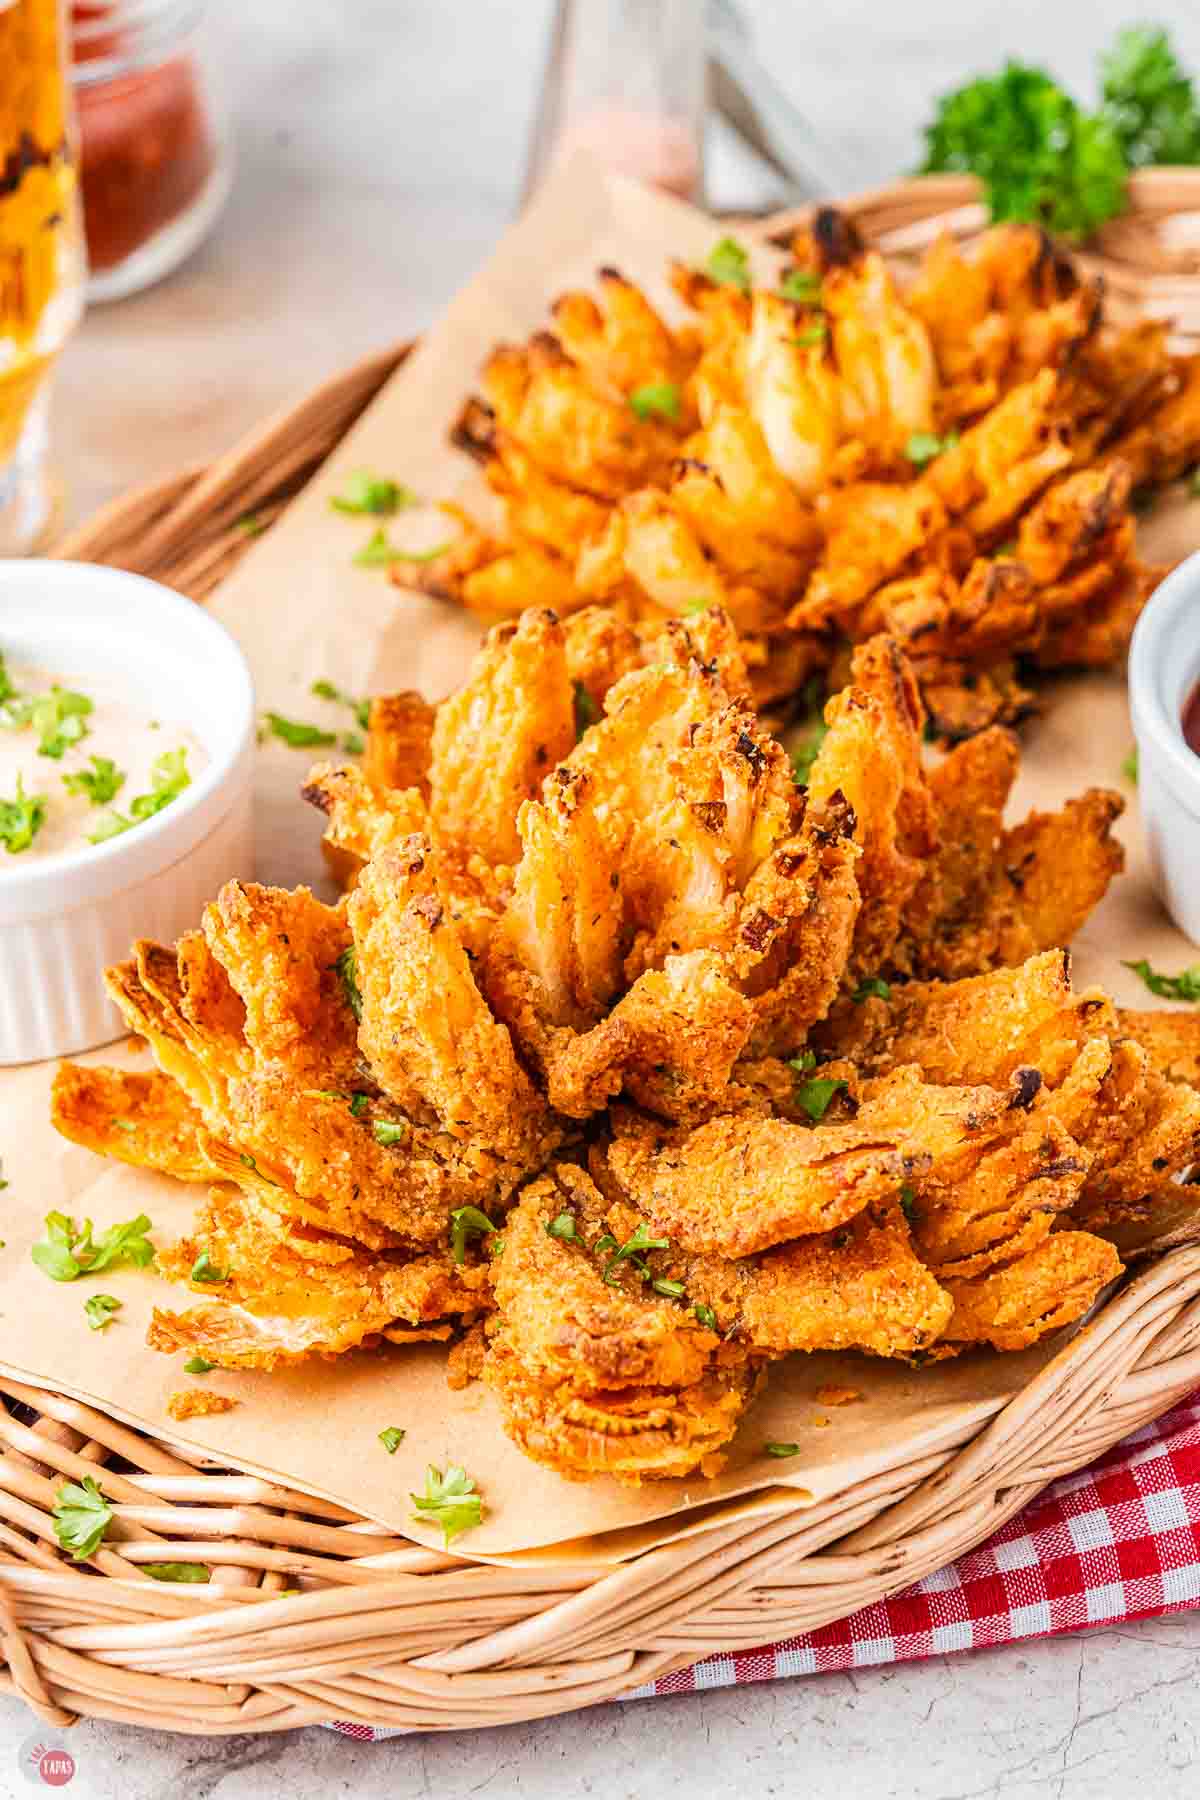
This is the appetizer that makes everyone gather around the table before dinner even starts. A blooming onion is that big, fanned out, crispy onion you have probably ordered at Outback a hundred times.
Now you can make it at home in the air fryer with way less oil and almost no mess.
My husband used to swear it was a restaurant only kind of dish, but one bite of this version and he stopped arguing.
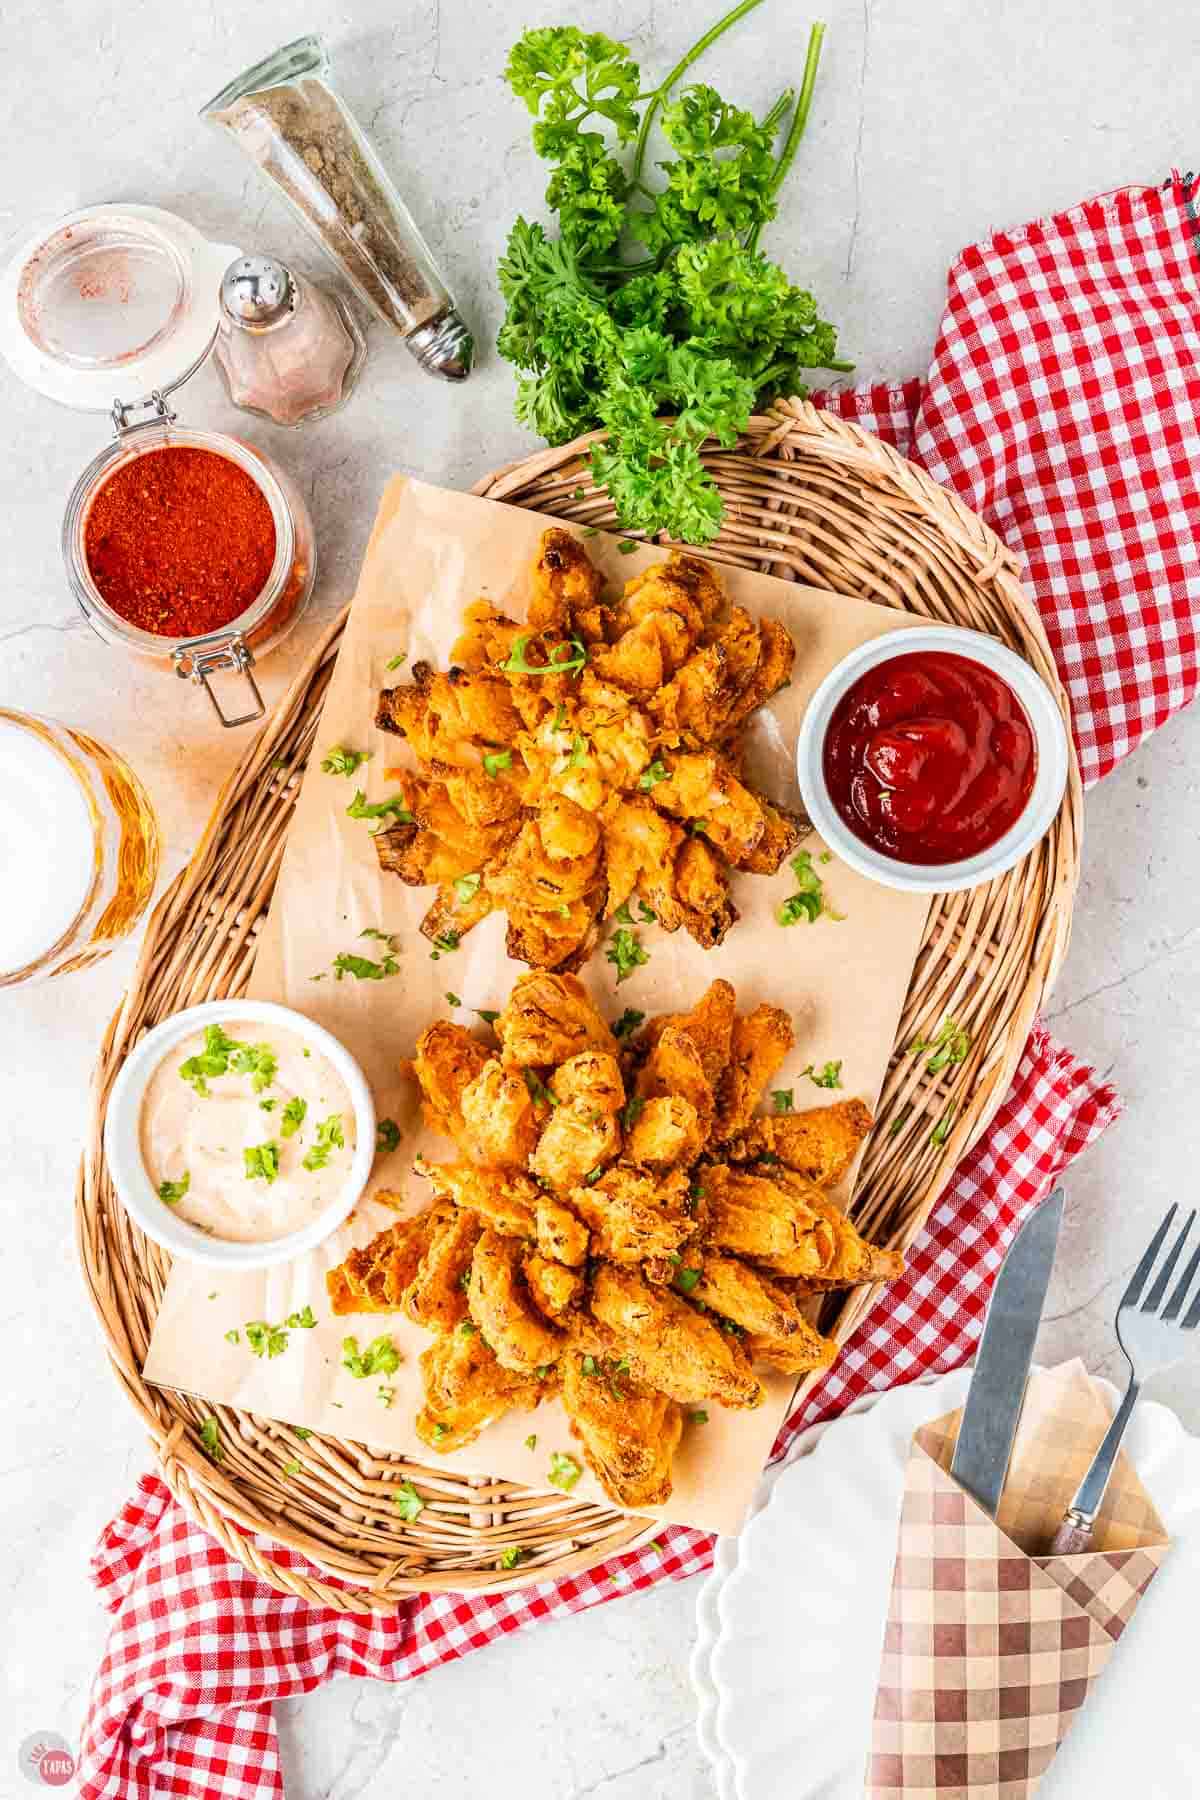
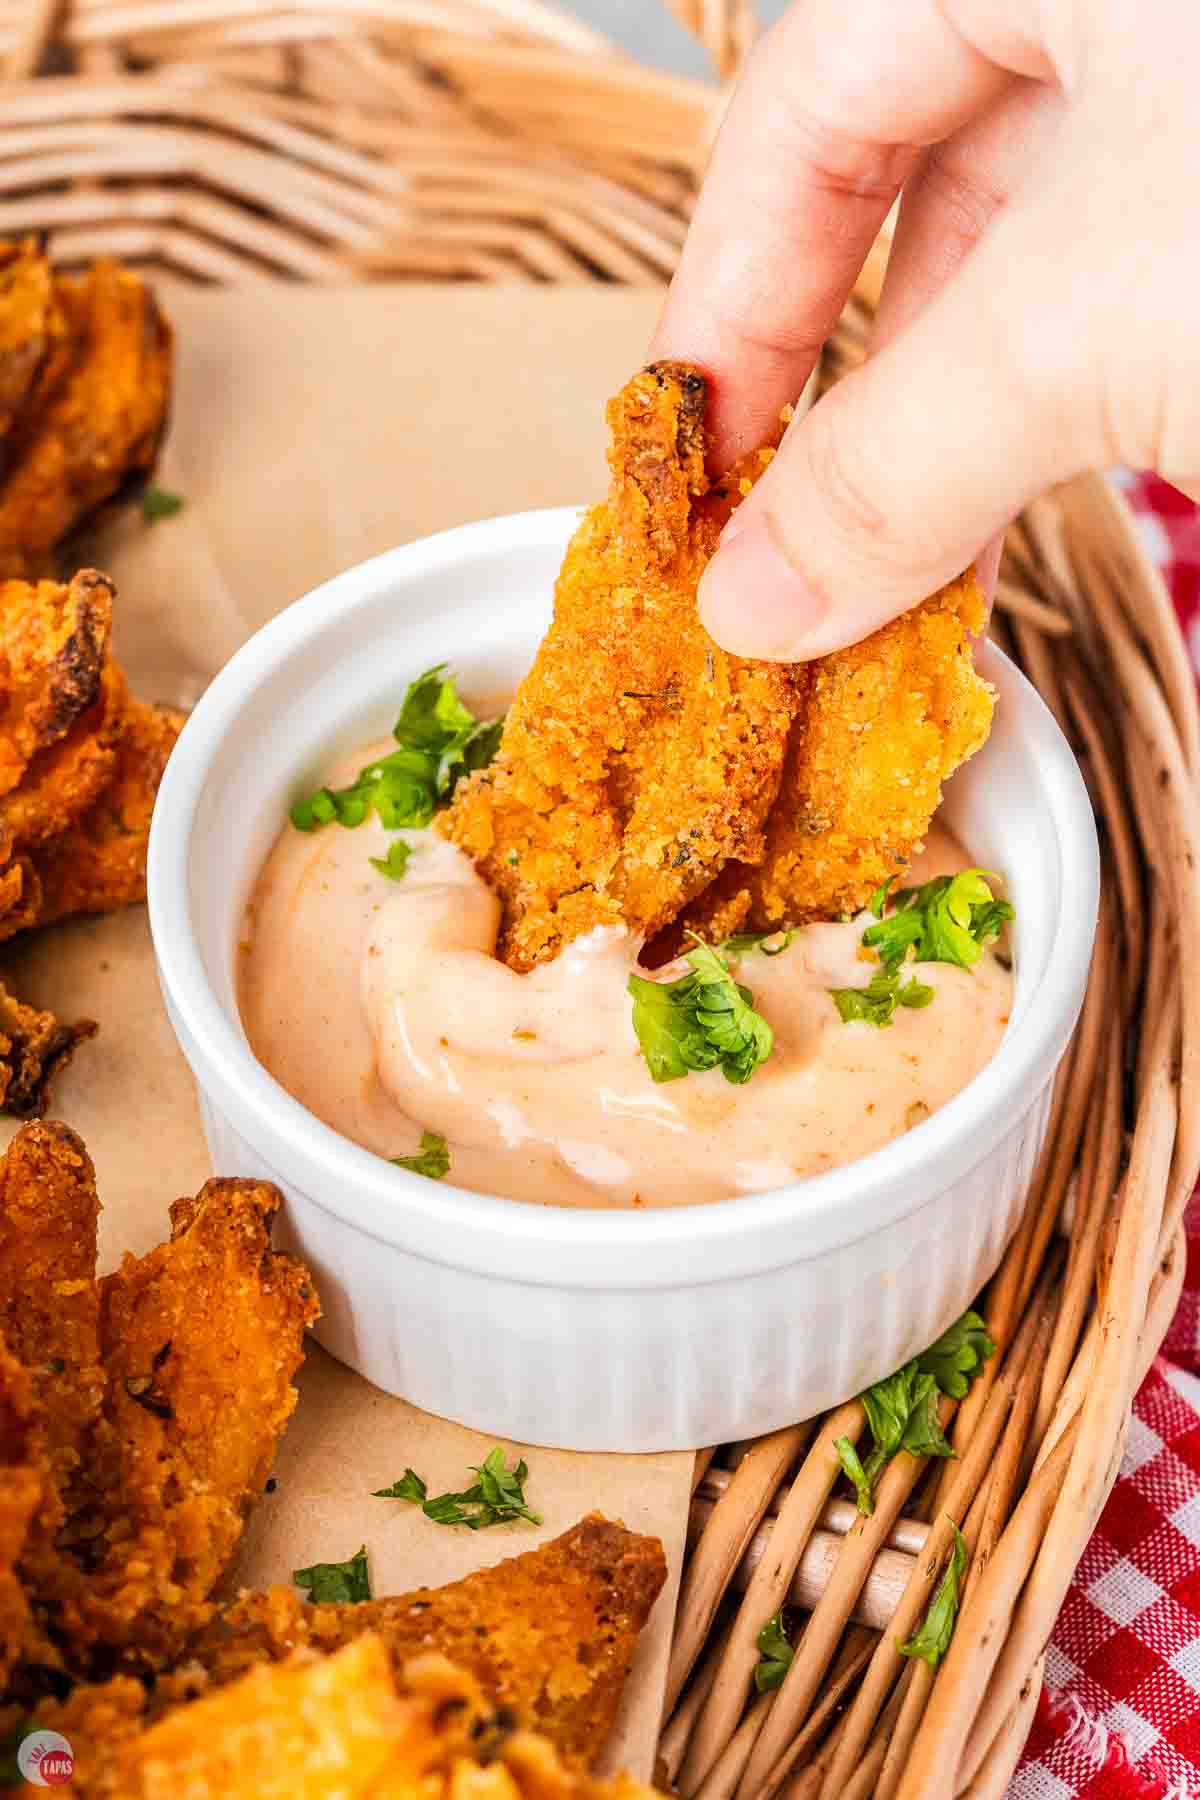
The air fryer is the real hero here. You get that same super crunch without standing over a pot of hot oil, and you can serve it with my Blooming Onion Dipping Sauce for the full effect.
It is a showstopper on any spread, which is why it earned a spot in my 22 Best Summer Appetizers. Set it out next to my Big Mac Sliders and you have a copycat party menu people will not stop talking about.
Grab a big sweet onion and let’s get blooming!
More Air Fryer Appetizers
- Air Fryer Fried Pickles – Crispy, tangy, first to go
- Air Fryer Pizza Rolls – Childhood favorite, no grease
- Air Fryer Chicken Tenders – Kid approved, picky eater friendly
- Air Fryer Corn Dogs – Game day finger food
To get this blooming onion in air fryer recipe started, we need to talk about the most important part of the dish, THE ONION itself!
What Kinds of Onions Does Outback Use?
As long as it’s big it will work, right? Not always true.
Yellow and white onions are very strong in flavor which can be a bit much for some.
I prefer to use large Vidalia onions because they are milder and sweeter. Meaning they are perfect for more people to enjoy. Just be sure they are large.
This post may contain affiliate links. As an Amazon Associate, I earn from qualifying purchases at no additional cost to you. Read my disclosure policy.
See recipe card for complete information on ingredients and their quantities.
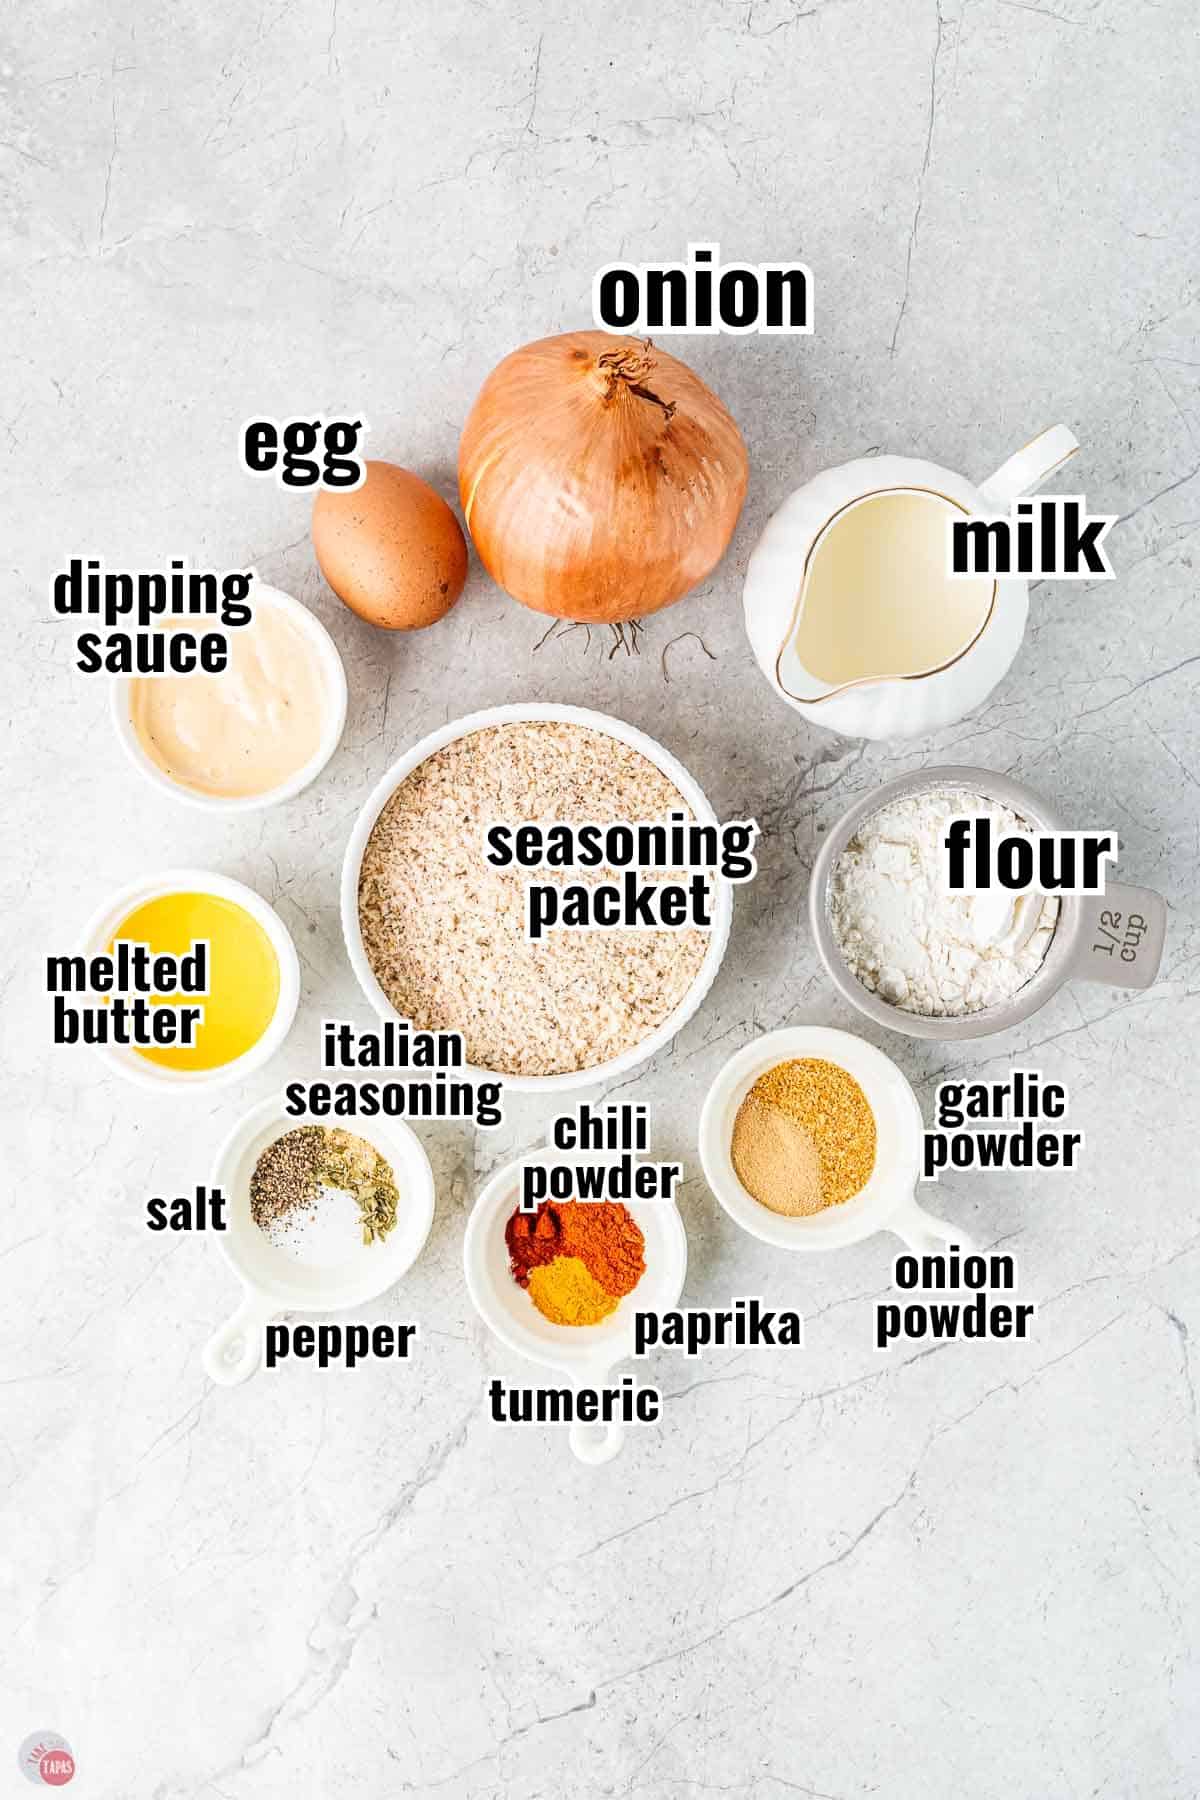
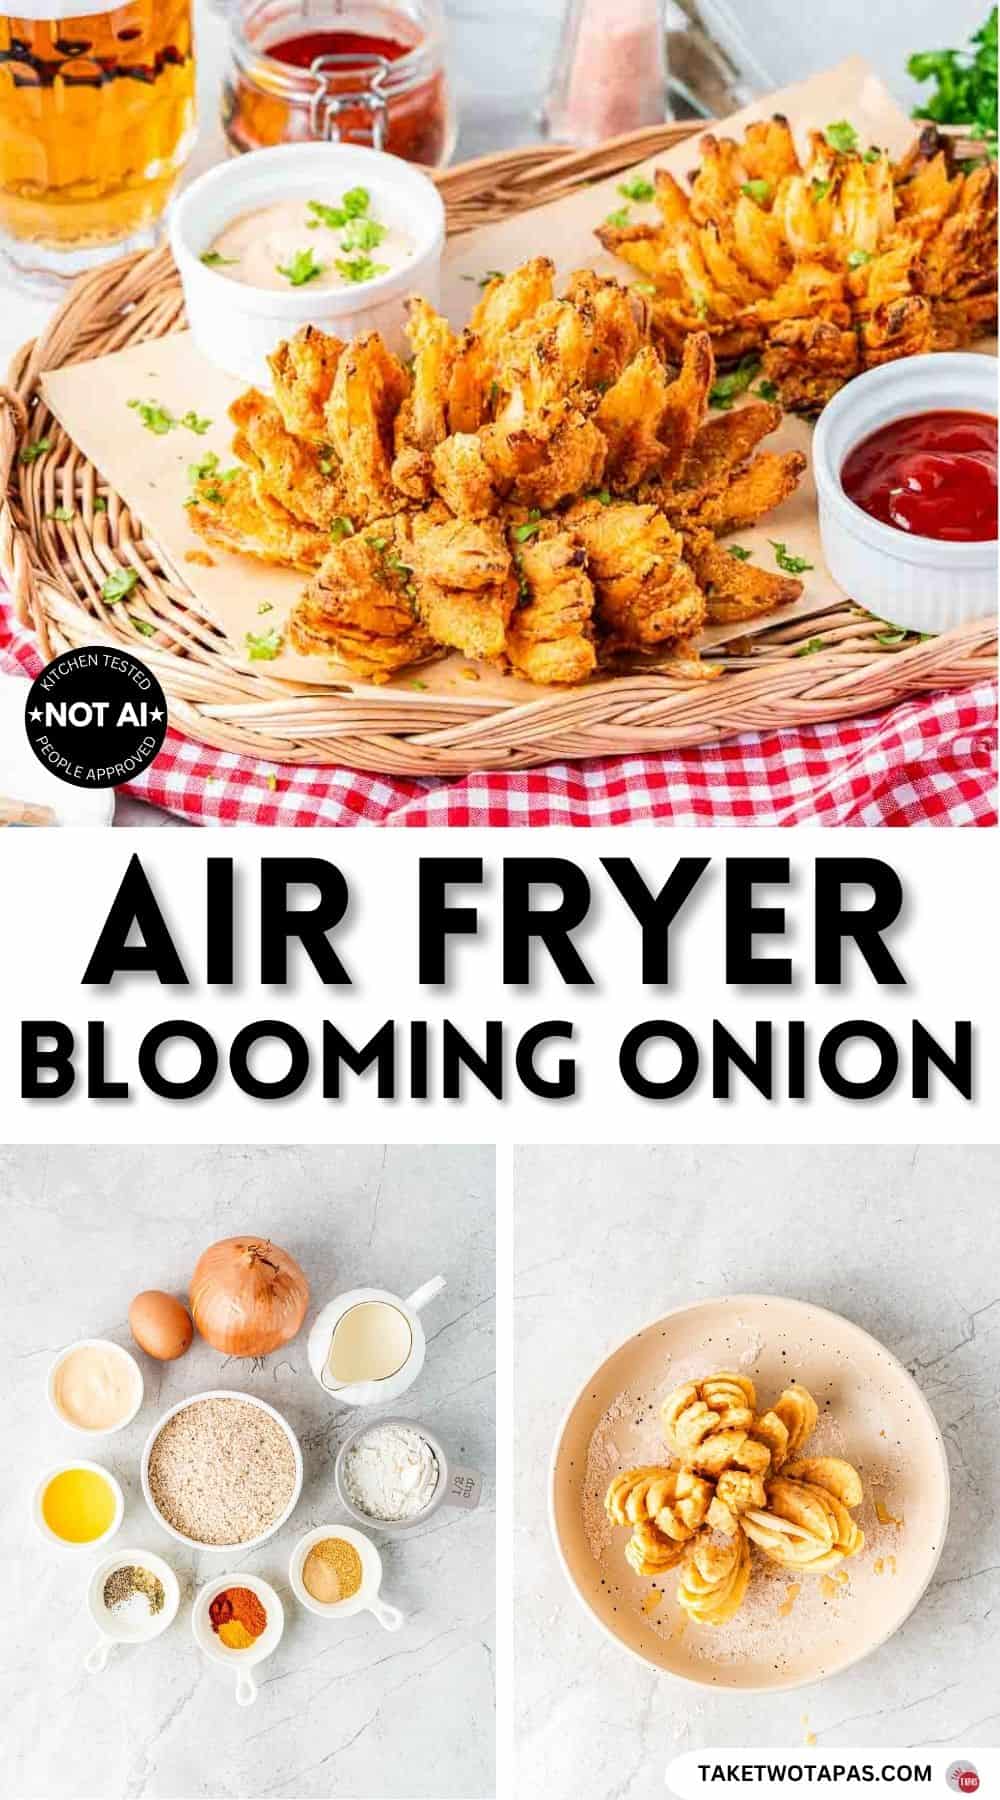
Ingredient Notes
Sweet Onion – I use large Vidalias because they are milder and sweeter, which makes the onion friendlier for a crowd. Yellow or white work too, but they are sharper and stronger in flavor. Whatever you grab, make sure it is big so it fans out into a full bloom.
Seasoned Coating Mix – This is a packaged seasoned breadcrumb or fish fry coating from the grocery store, and it adds the second layer of crunch. Canadian and gluten free readers, you can grind up gluten free crackers in a food processor with your own spices for the same effect.
Italian Seasoning – A little goes into the flour dredge for that classic savory flavor. My Homemade Italian Seasoning works perfectly here.
Milk – Helps the egg wash coat the petals. Swap some or all of it for beer if you want a slightly different, deeper flavor.
For more insider tips, tricks, and a behind the scenes look, follow me on Pinterest, Facebook, Instagram, & X.
Now that you have all your ingredients ready, let’s get started. The most important part of the recipe is how to prepare the onion so it “blooms” correctly.
How Do You Cut An Onion For A Bloomin’ Onion?
I would be sarcastic and say “very carefully,” but there is a technique that will get you the perfect onion bloom every time. The key is even spacing so the petals fan out evenly, and never cutting through or too close to the root, which is what holds the whole thing together.
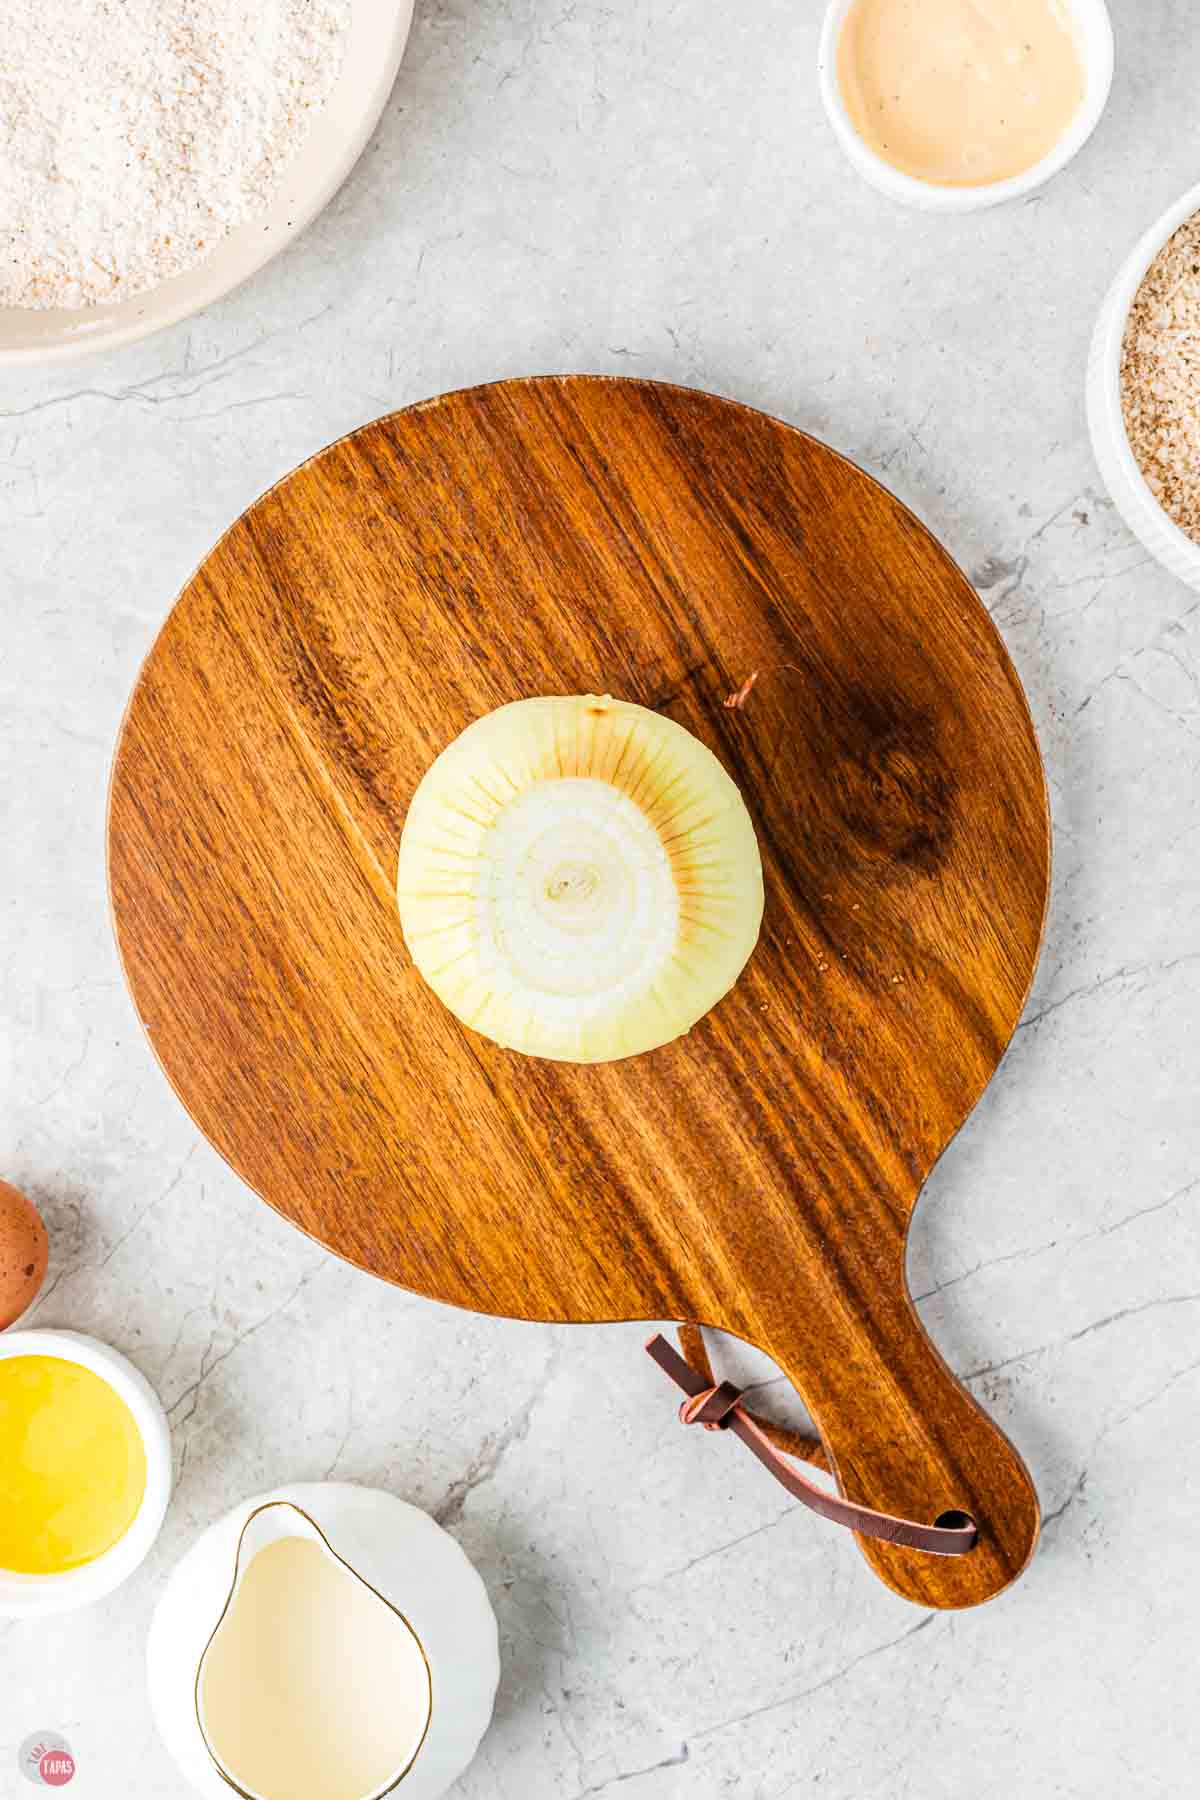
- Start by cutting off 1/2 inch from the top of the onion, then peel the outer skin from the onion.
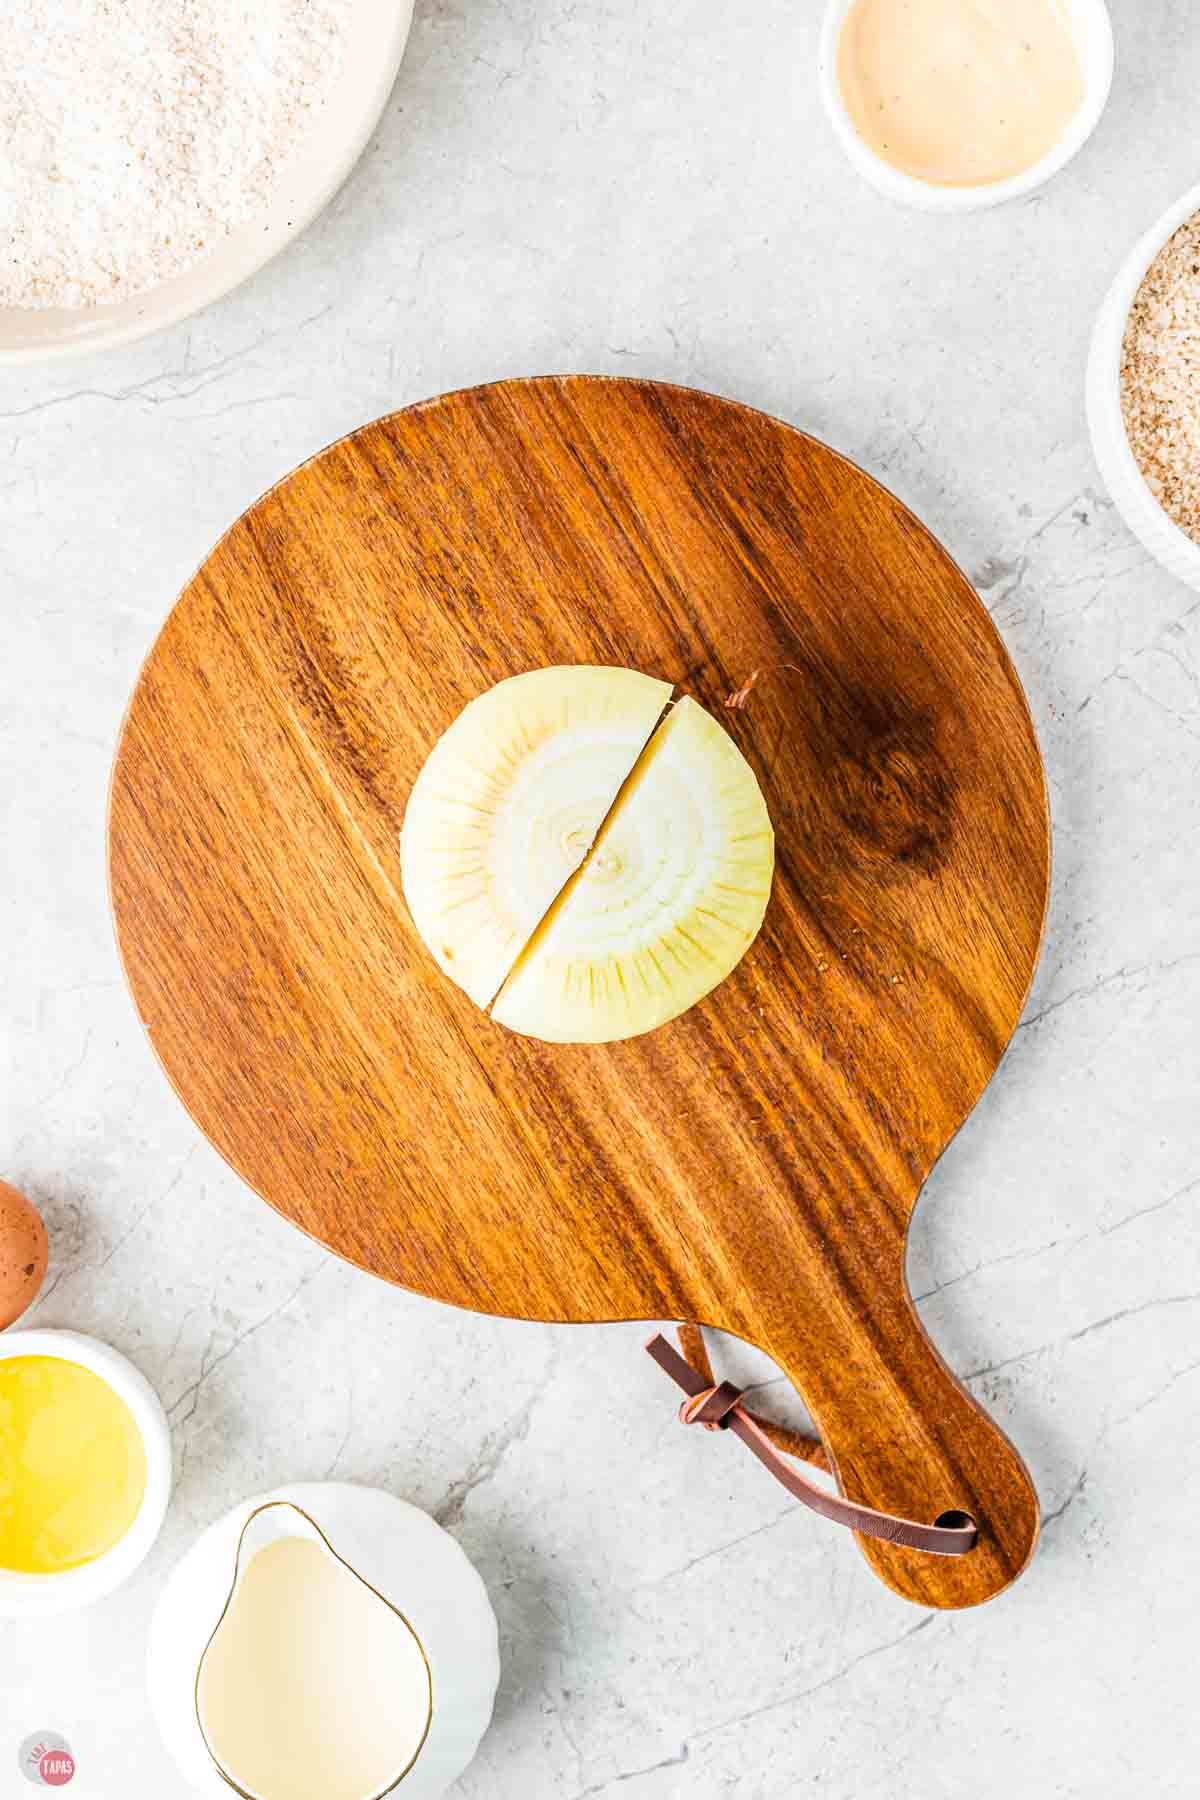
- Place the onion cut-side down. Starting about 1/2 inch from the root, make a downward cut all the way through to the board. Make sure your knife cuts into the middle of the onion. All your cuts should meet in the middle. DO NOT CUT THROUGH THE ROOT OR TOO CLOSE TO THE ROOT.
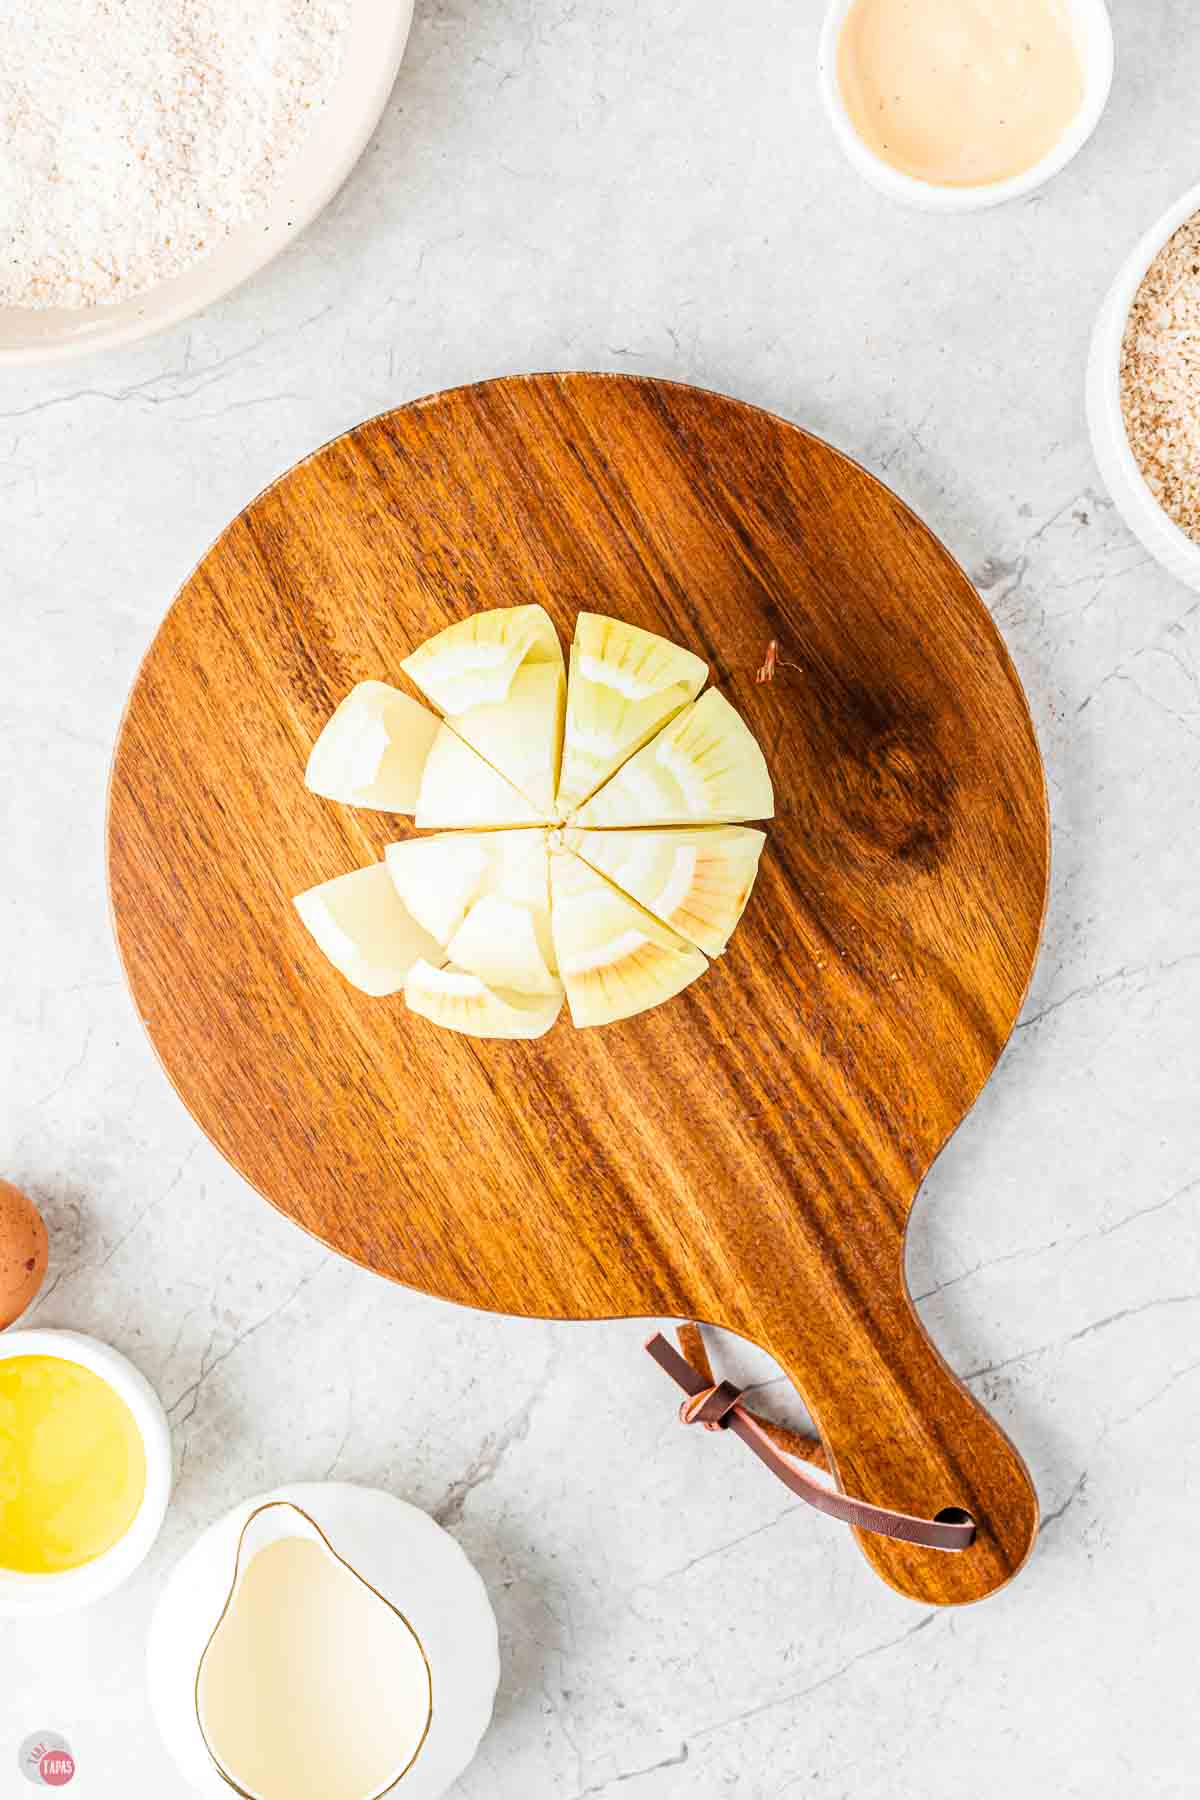
- Repeat to make four evenly spaced cuts around the onion. Make 1 additional cut between each section until you have 8 evenly spaced cuts.

- Turn the onion over and set aside for 5 minutes to allow the petals to relax. Prior to breading use your fingers to gently separate the outer pieces.
Now that the onion is open it’s time to bread it to get that crispy coating. If any of the “petals” are stuck together, gently separate them so the onion can be in “full bloom.”
How To Make an Air Fryer Blooming Onion
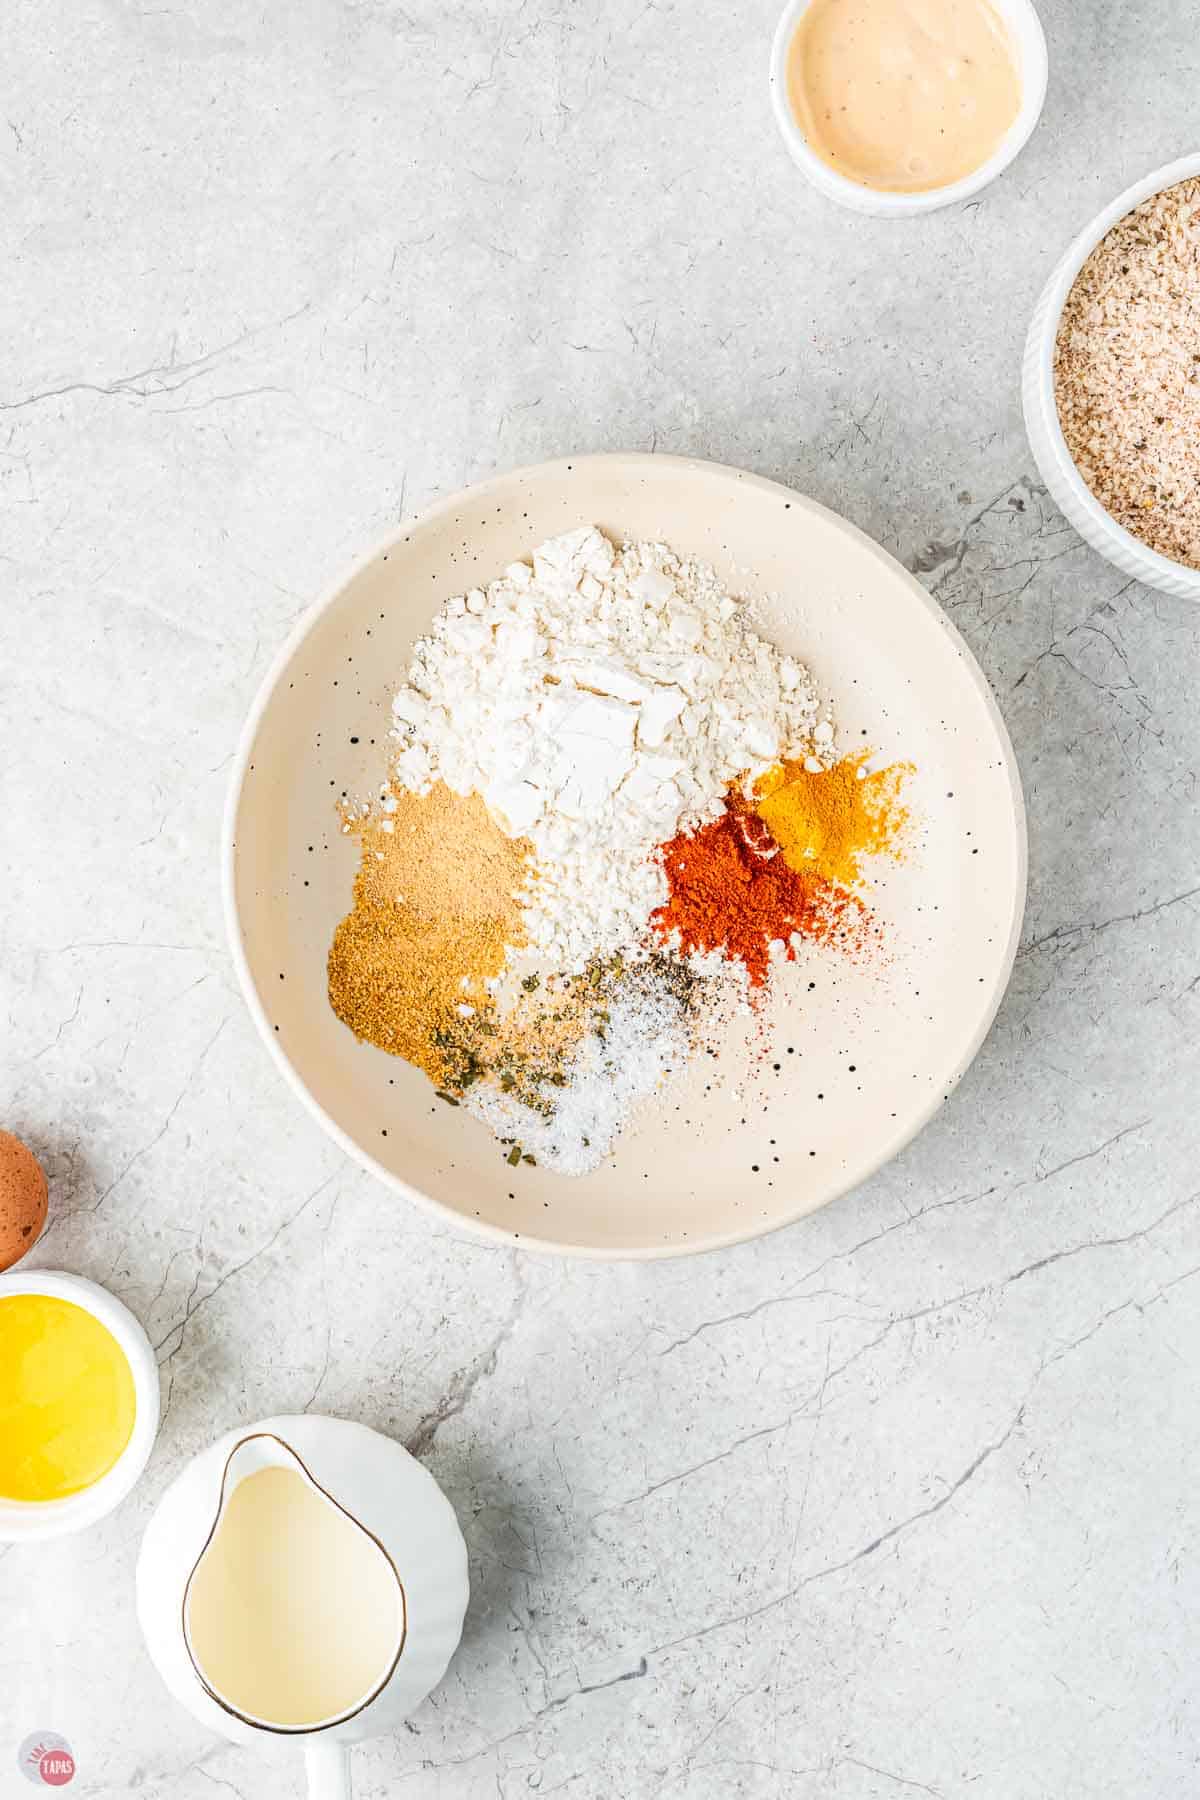
- Make the dredges and washes. Whisk the flour and spices in a large bowl.
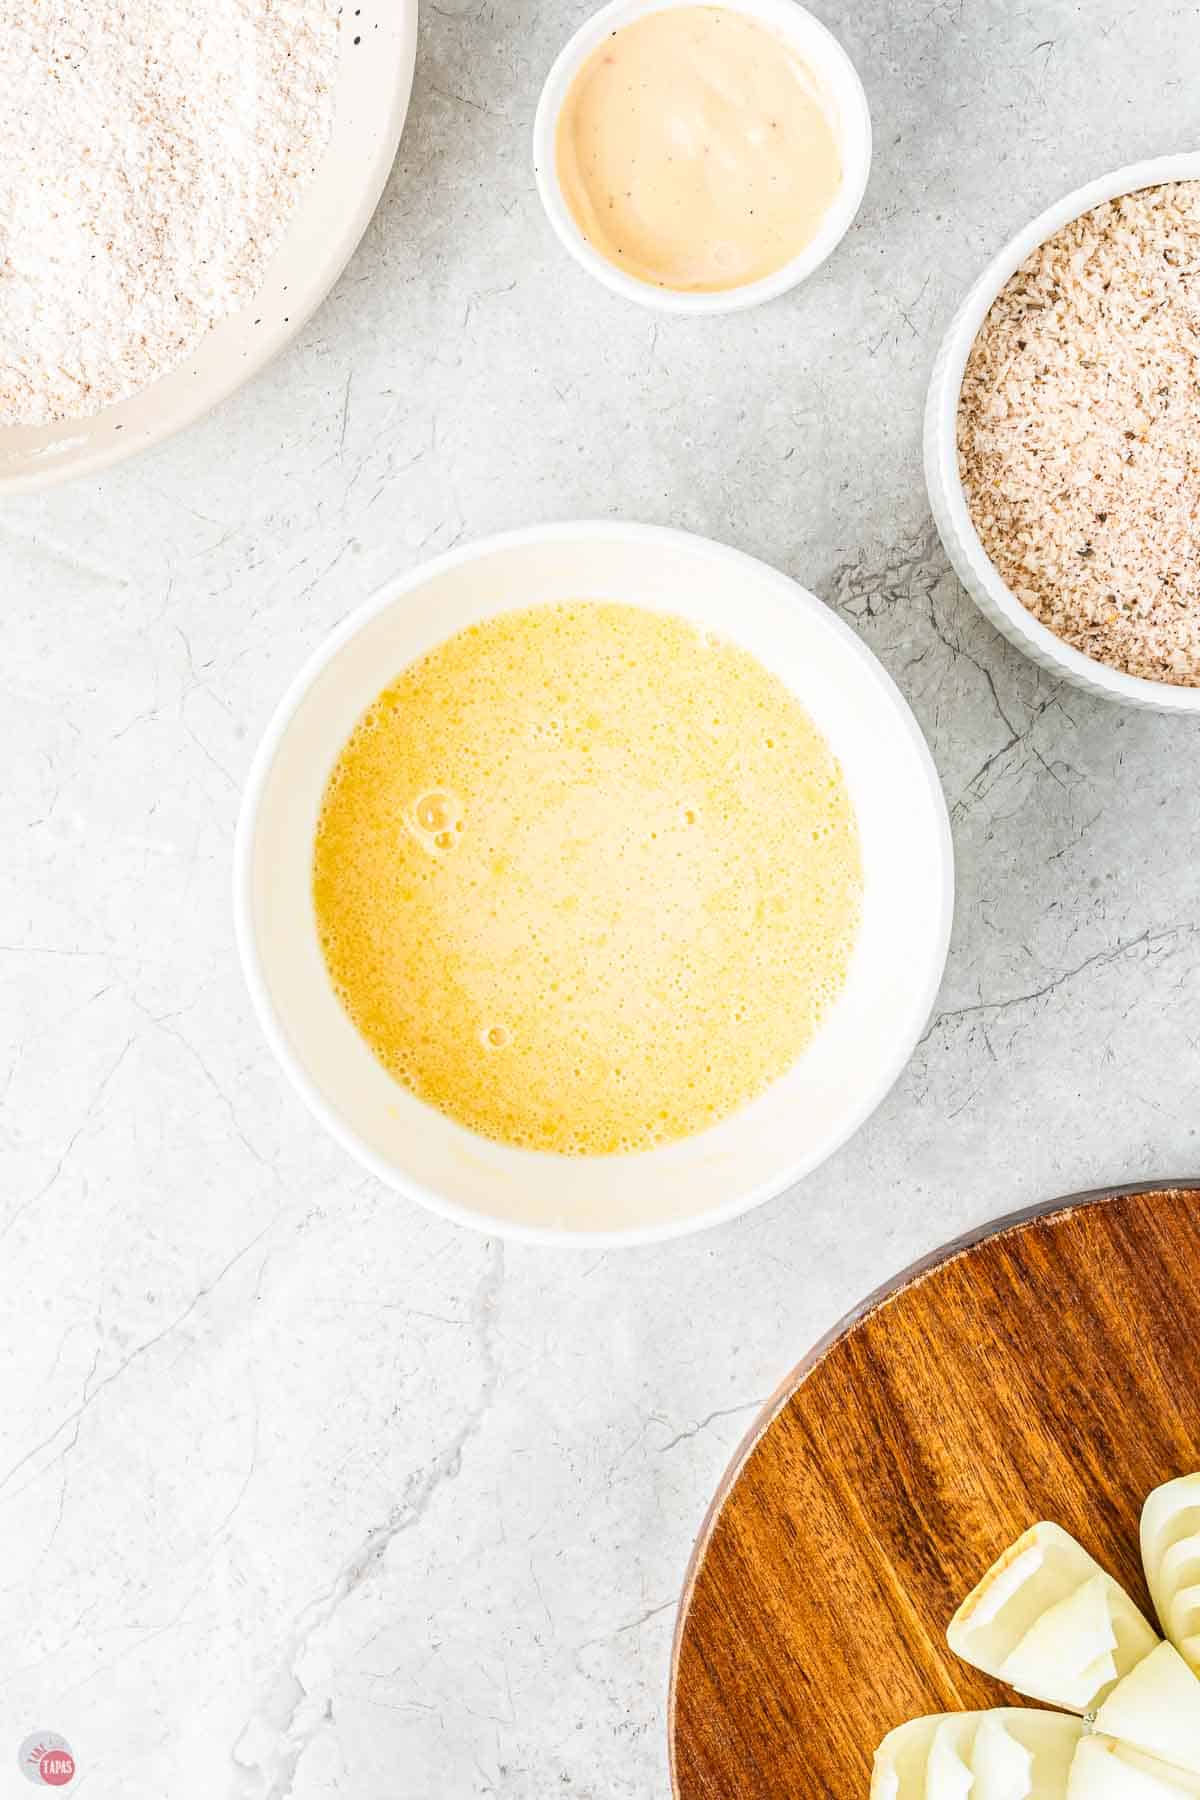
- In a small deep bowl, whisk the egg, butter, and milk.
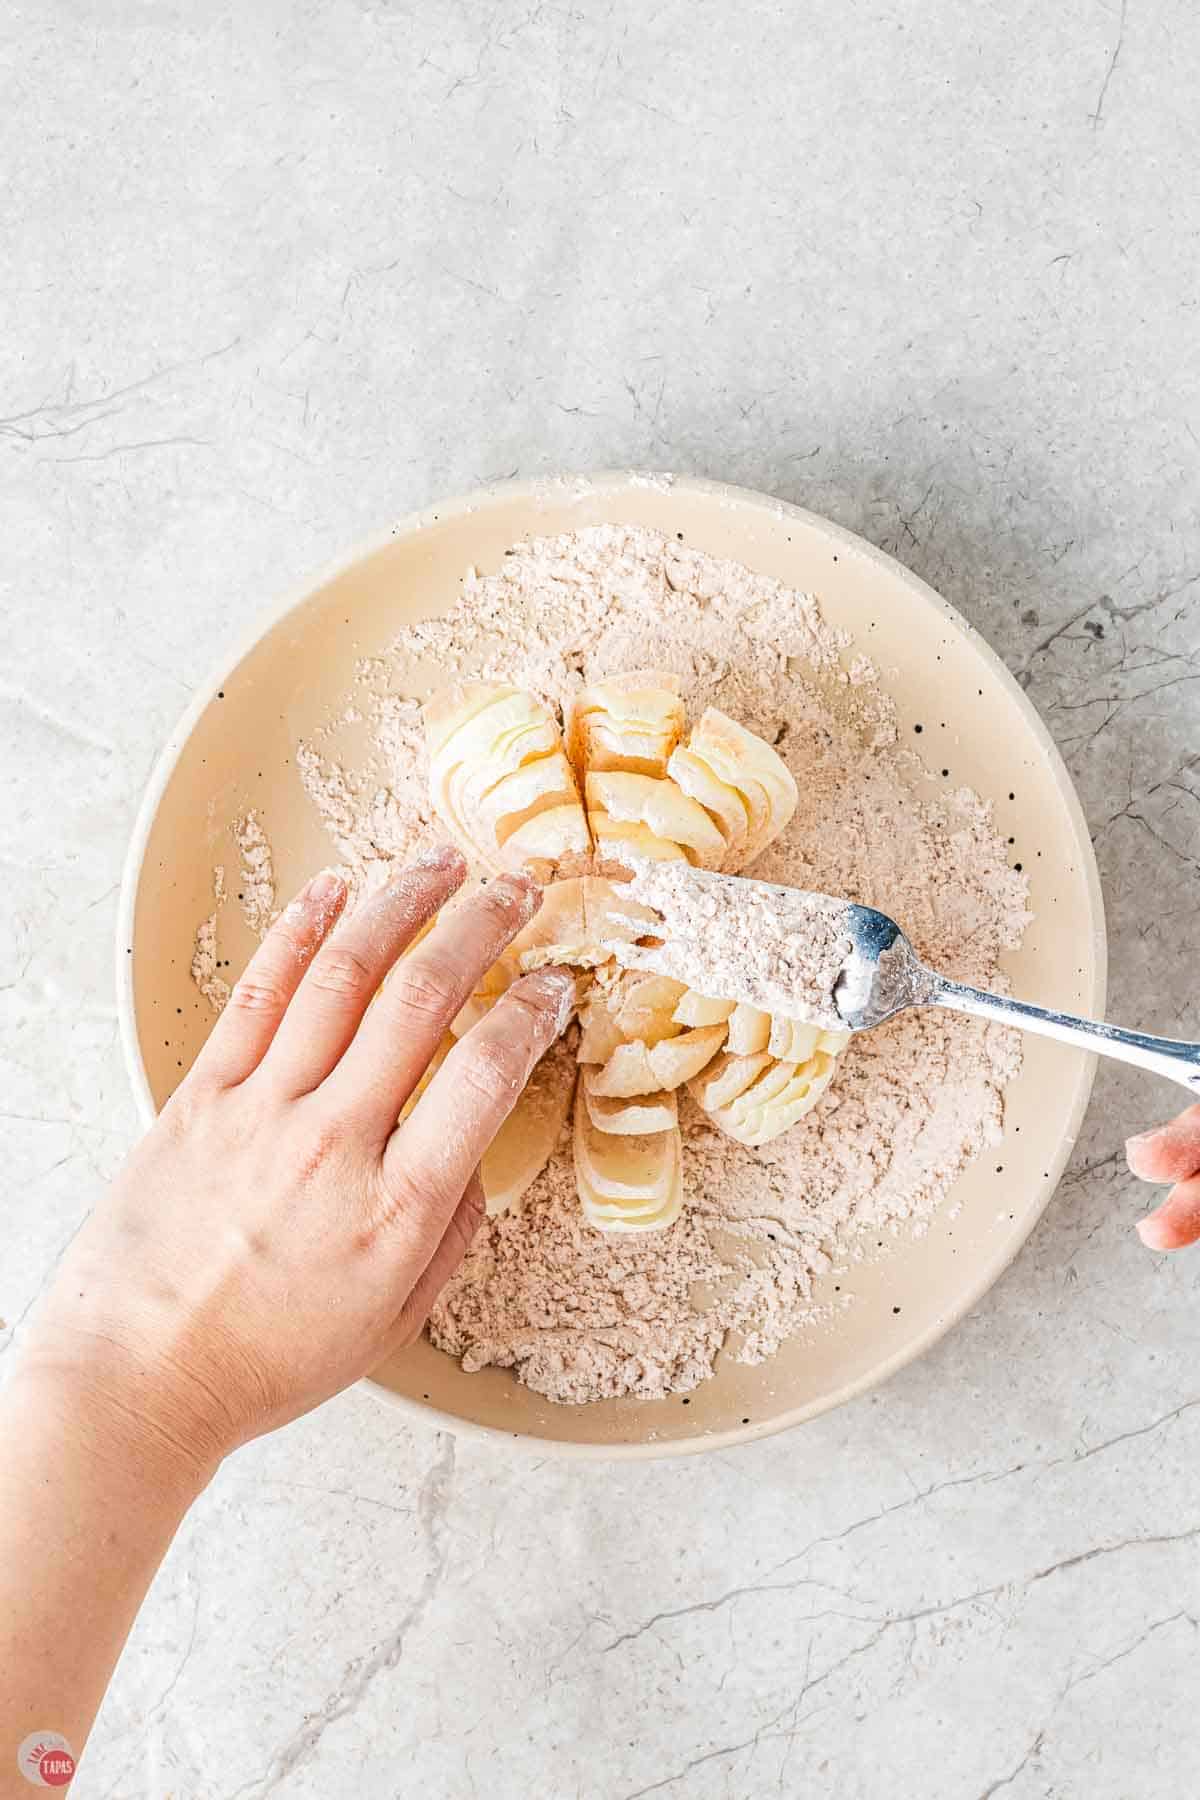
- Bread the onion. Place the onion in a large clean bowl, cut-side up and separated. Sprinkle the flour mixture over the onion getting in between the layers.
I used a fork to sprinkle the flour mixture, and used my fingers to separate each individual layer and sprinkle the flour between every petal. Dump the remaining flour over the whole onion. Let it sit for a few minutes.
Turn the onion over and gently pat off the excess flour back into the bowl. Reserve the remaining flour. You want to make sure the flour coats the petals without leaving large clumps of flour in between the petals.
Why Won’t the Coating Stick to My Onion?
The most common reason the flour will not stick is an egg wash that is not fully mixed. If there are still clumps of egg yolk or egg white, the coating has nothing smooth to grab onto and it pulls away during cooking.
Here is how to fix it:
Whisk the egg wash completely smooth before you start, with no streaks of yolk or white left.
Dry between the petals first so the egg has dry onion to cling to, not slippery moisture.
Work in small sections. Brush the egg wash onto one part of the onion, then immediately sprinkle the flour on that section while it is still wet. The flour sticks to wet egg every time.
Do not let the onion sit too long between the egg wash and the flour. The longer it waits, the more the egg drips off and the less the flour has to hold onto.
It takes a little longer to bread one section at a time, but it is the difference between a fully coated, crispy bloom and bare patches that never crisp up.

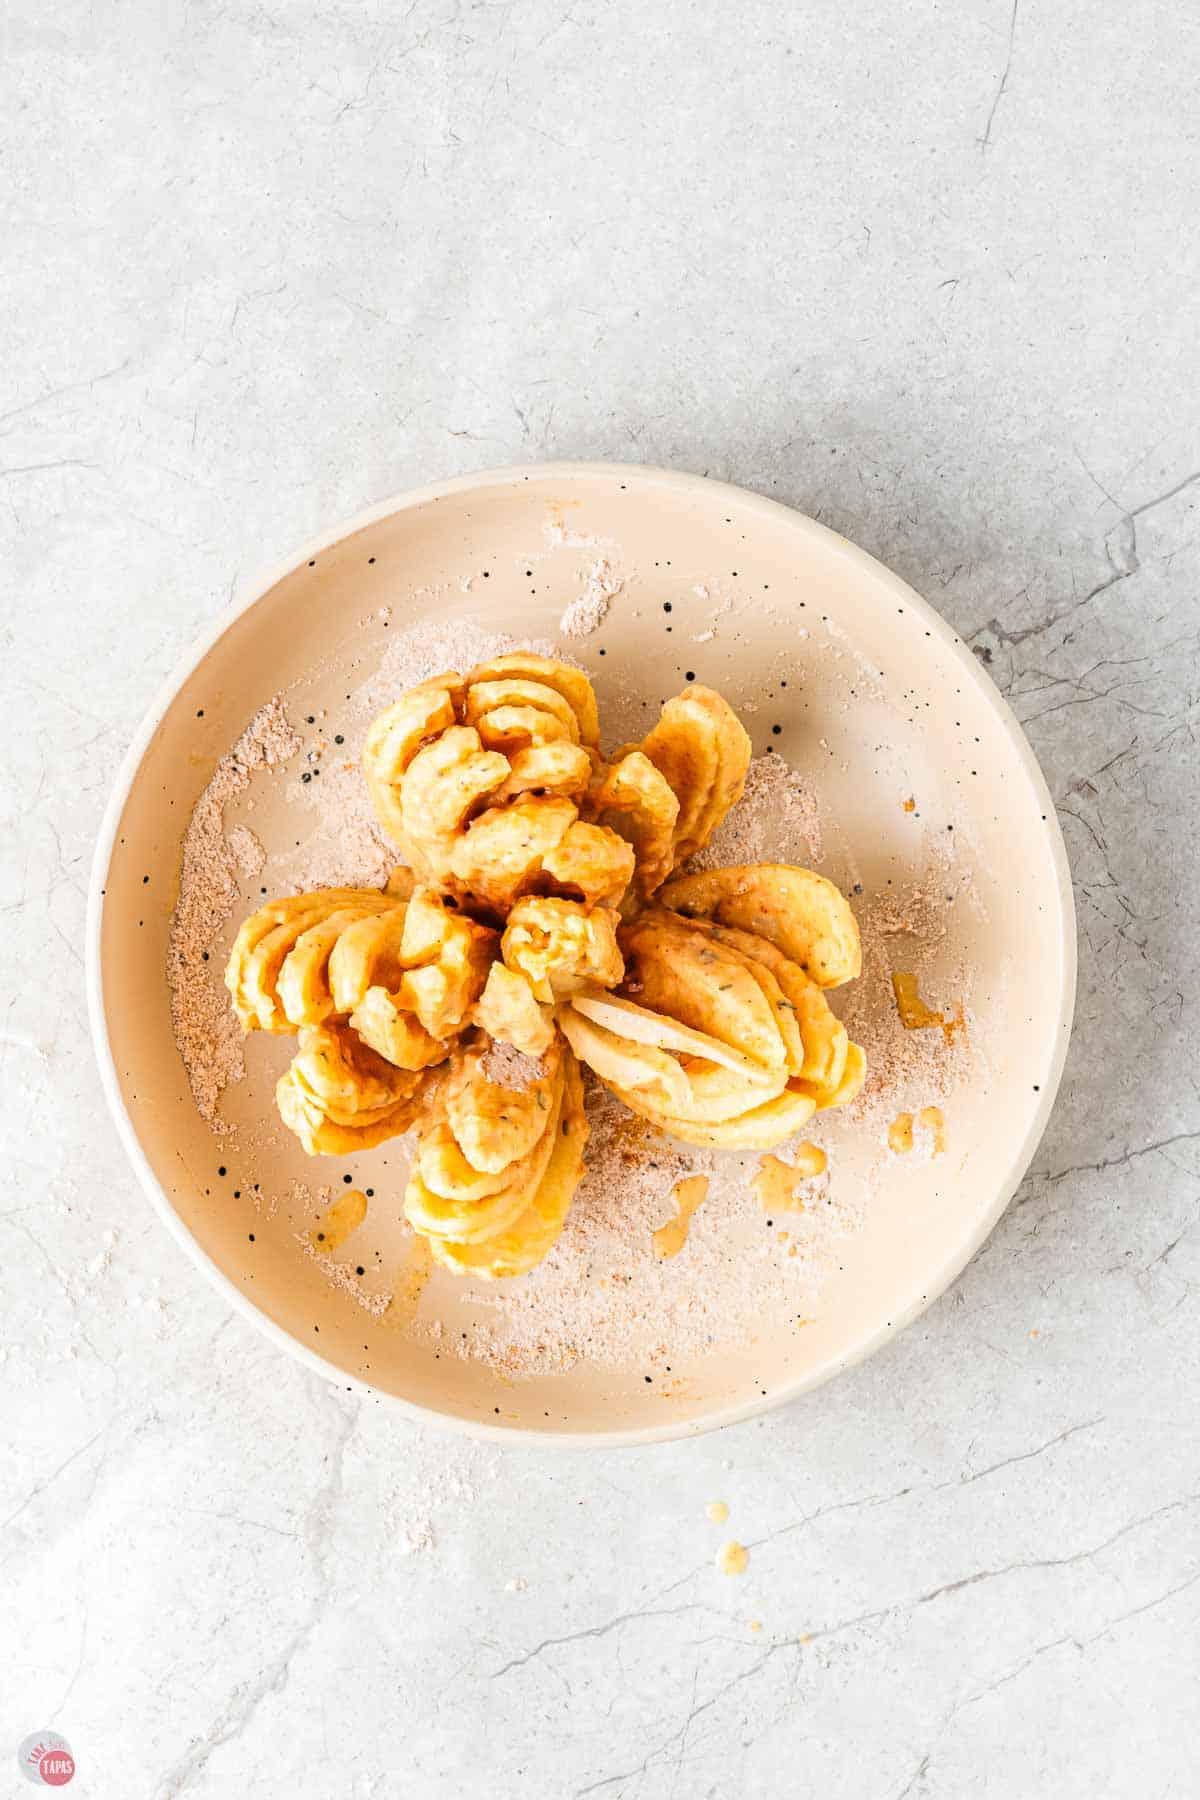
- Egg wash the onion. Transfer the onion into a large bowl and pour the egg mixture over the onion and coat evenly. Pouring over the onion helps it to get in between the petals and coat the flour.
Open each petal to make sure the egg mixture soaks every bit of flour between the petals. Let the onion sit in this mixture for a few minutes. Remove the onion from the bowl and let the excess drip off.

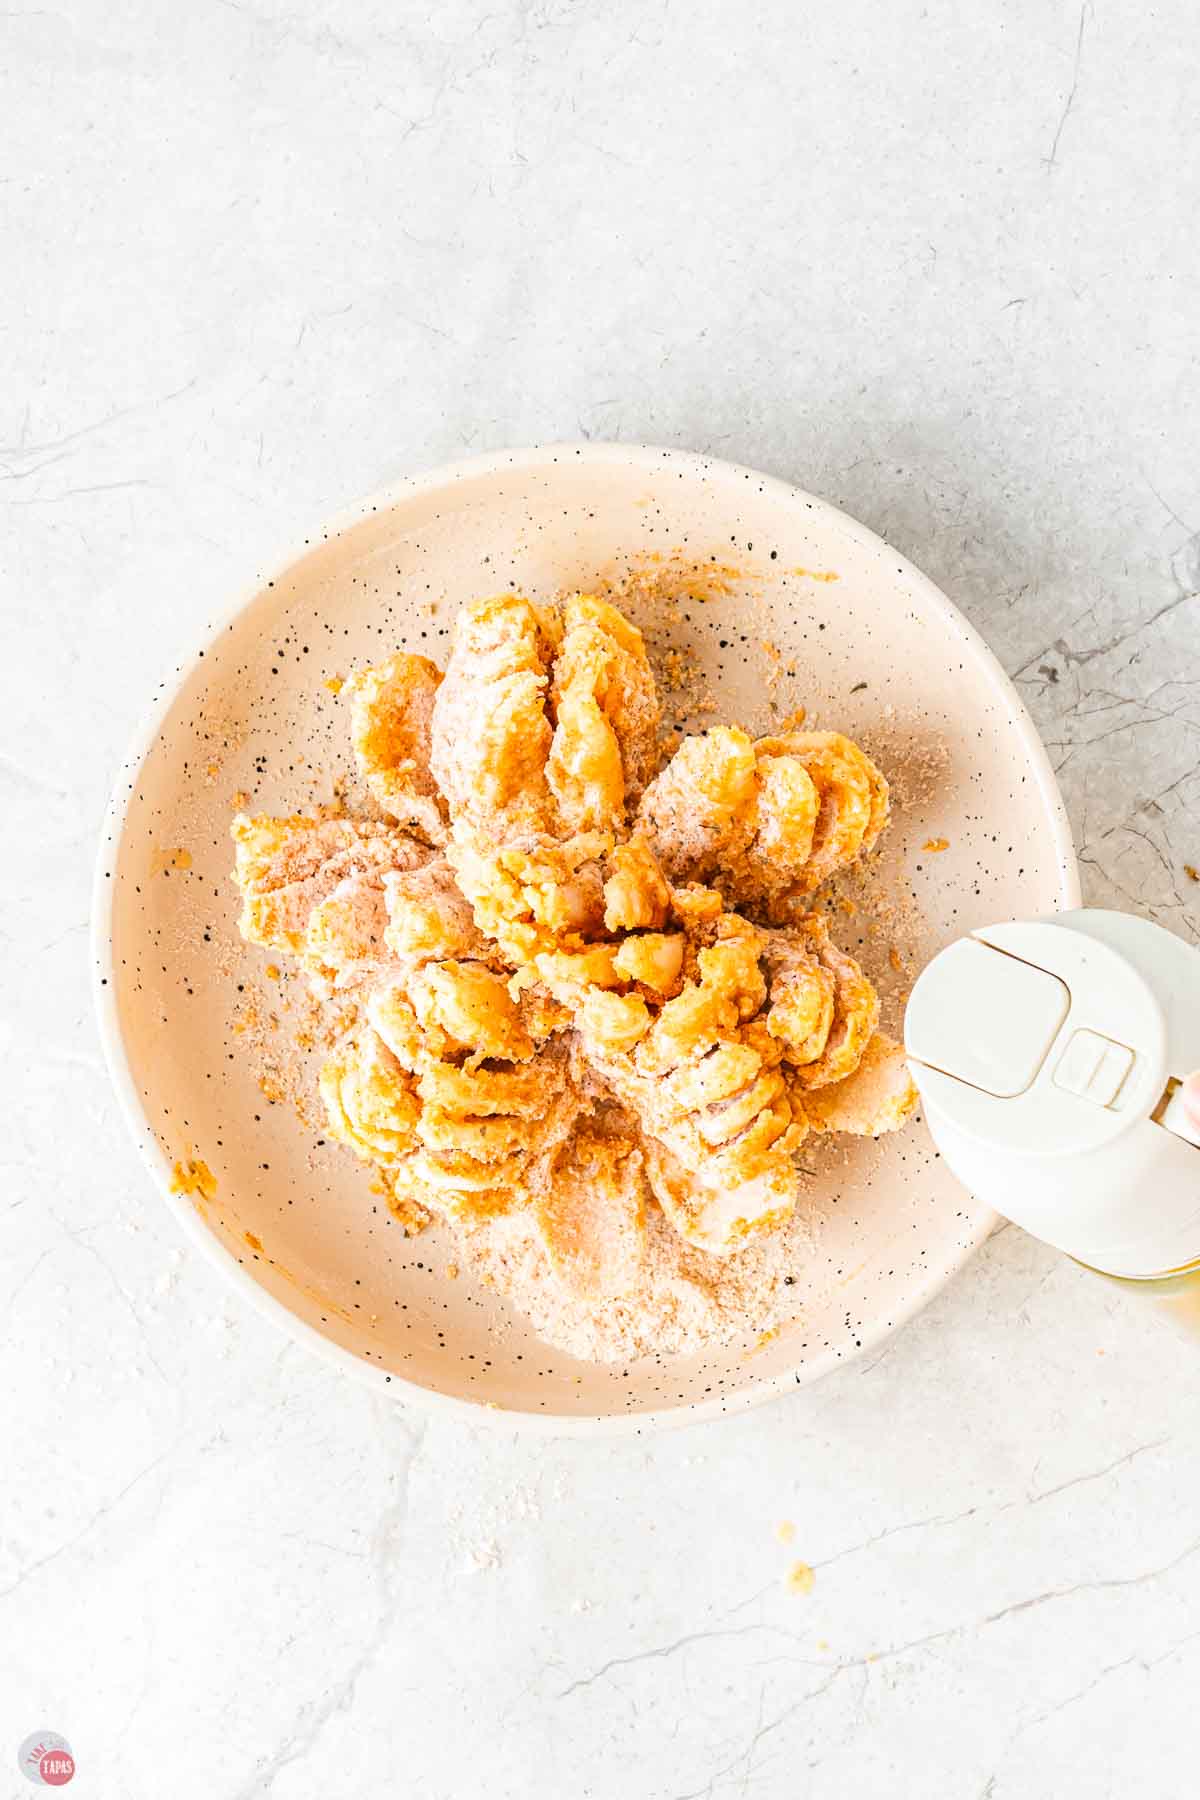
- Second coat of breading. Add the packet of seasoned coating mix to the leftover flour mixture.
- Place the wet onion into an empty bowl or onto the aluminum foil and sprinkle the reserved flour and coating mixture over it.
Do not sprinkle in between those petals as it will be difficult to spray with cooking oil afterwards. However, sprinkle the flour and breading mixture over every part of the onion that is exposed to the air.
I will even brush more egg mixture over drier parts of the onion to get as much mixture there as possible. Place the onion into the refrigerator to set while you preheat the air fryer.
- Prepare the onion for frying. Preheat the air fryer to 300F. After ten minutes, remove the onion from the refrigerator and spray generously with cooking oil.
Be sure to soak all the flour mixture you can see. You can also check in between the petals and wet any other flour spots you see. Don’t skimp on the cooking oil. This is necessary to get the onion to crisp up.
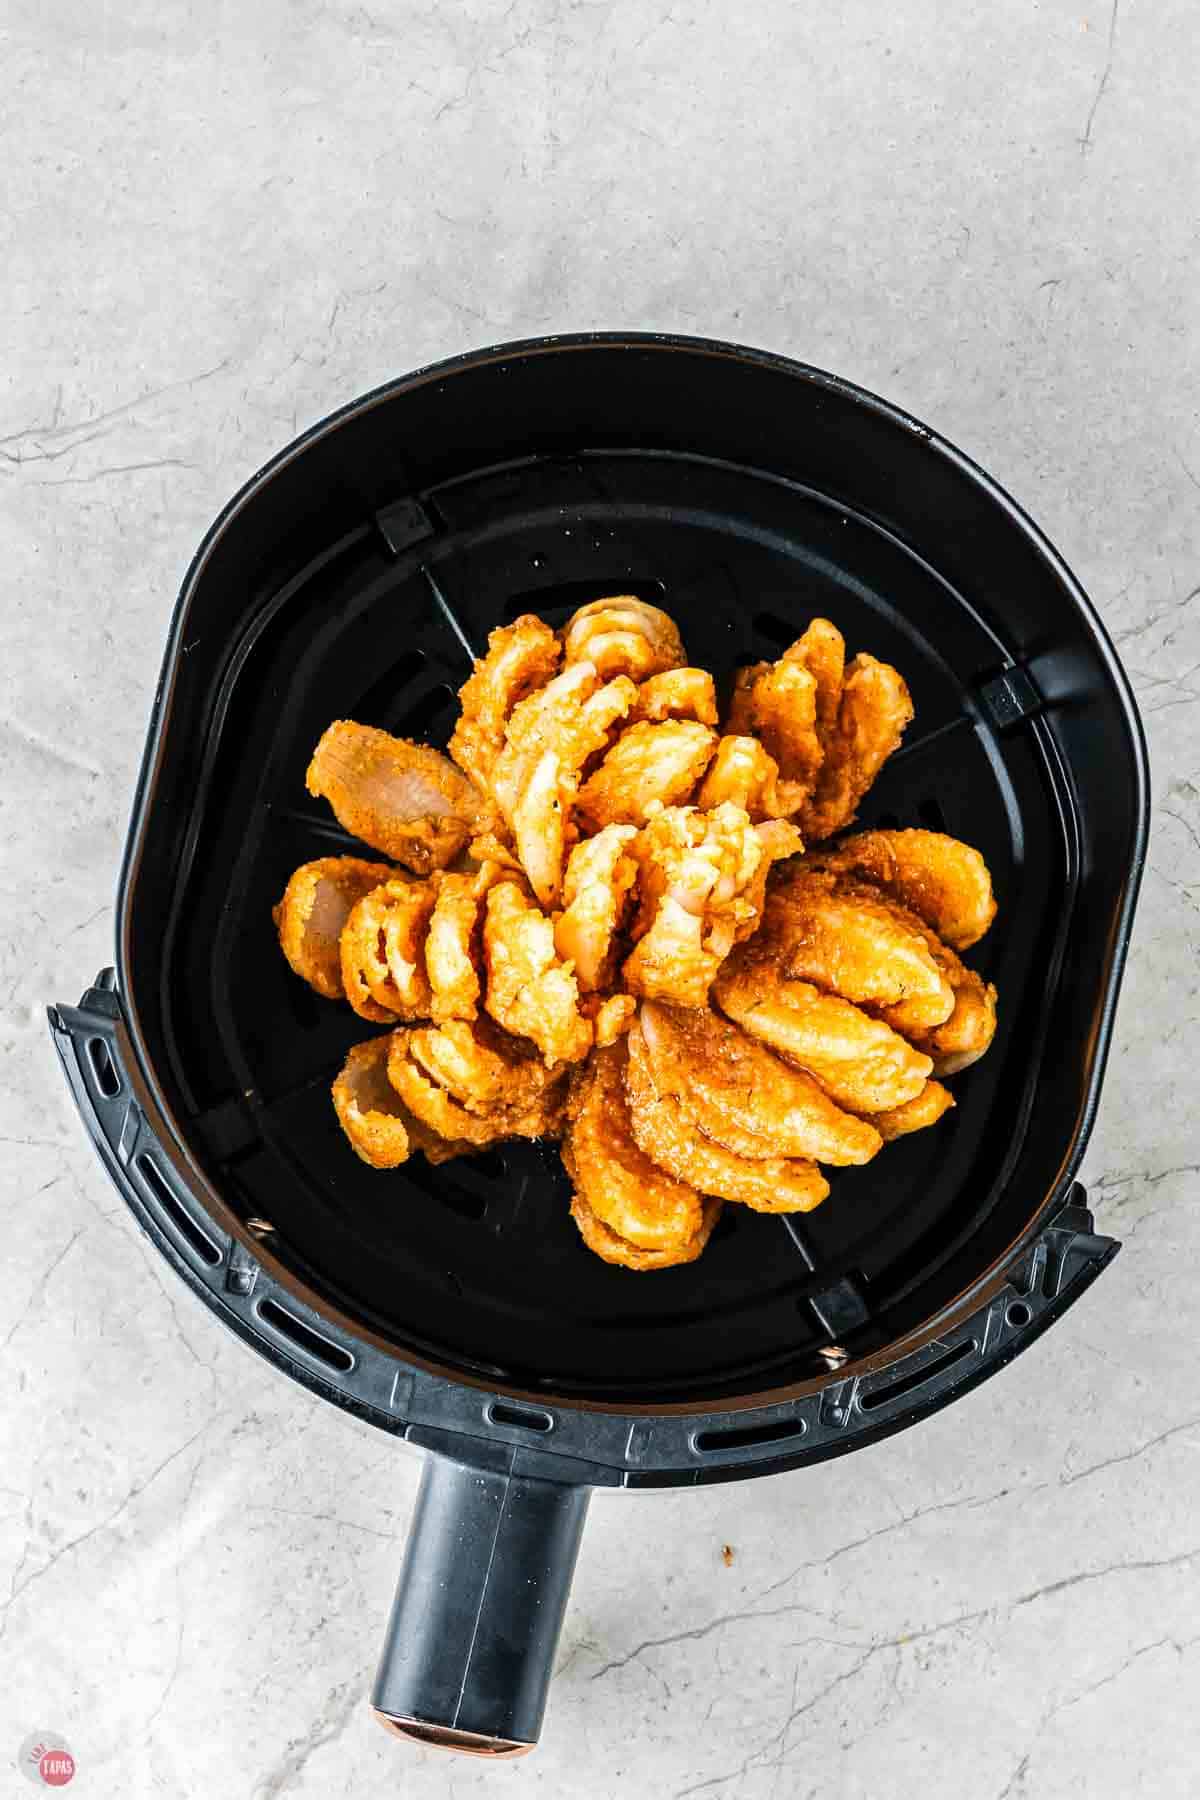
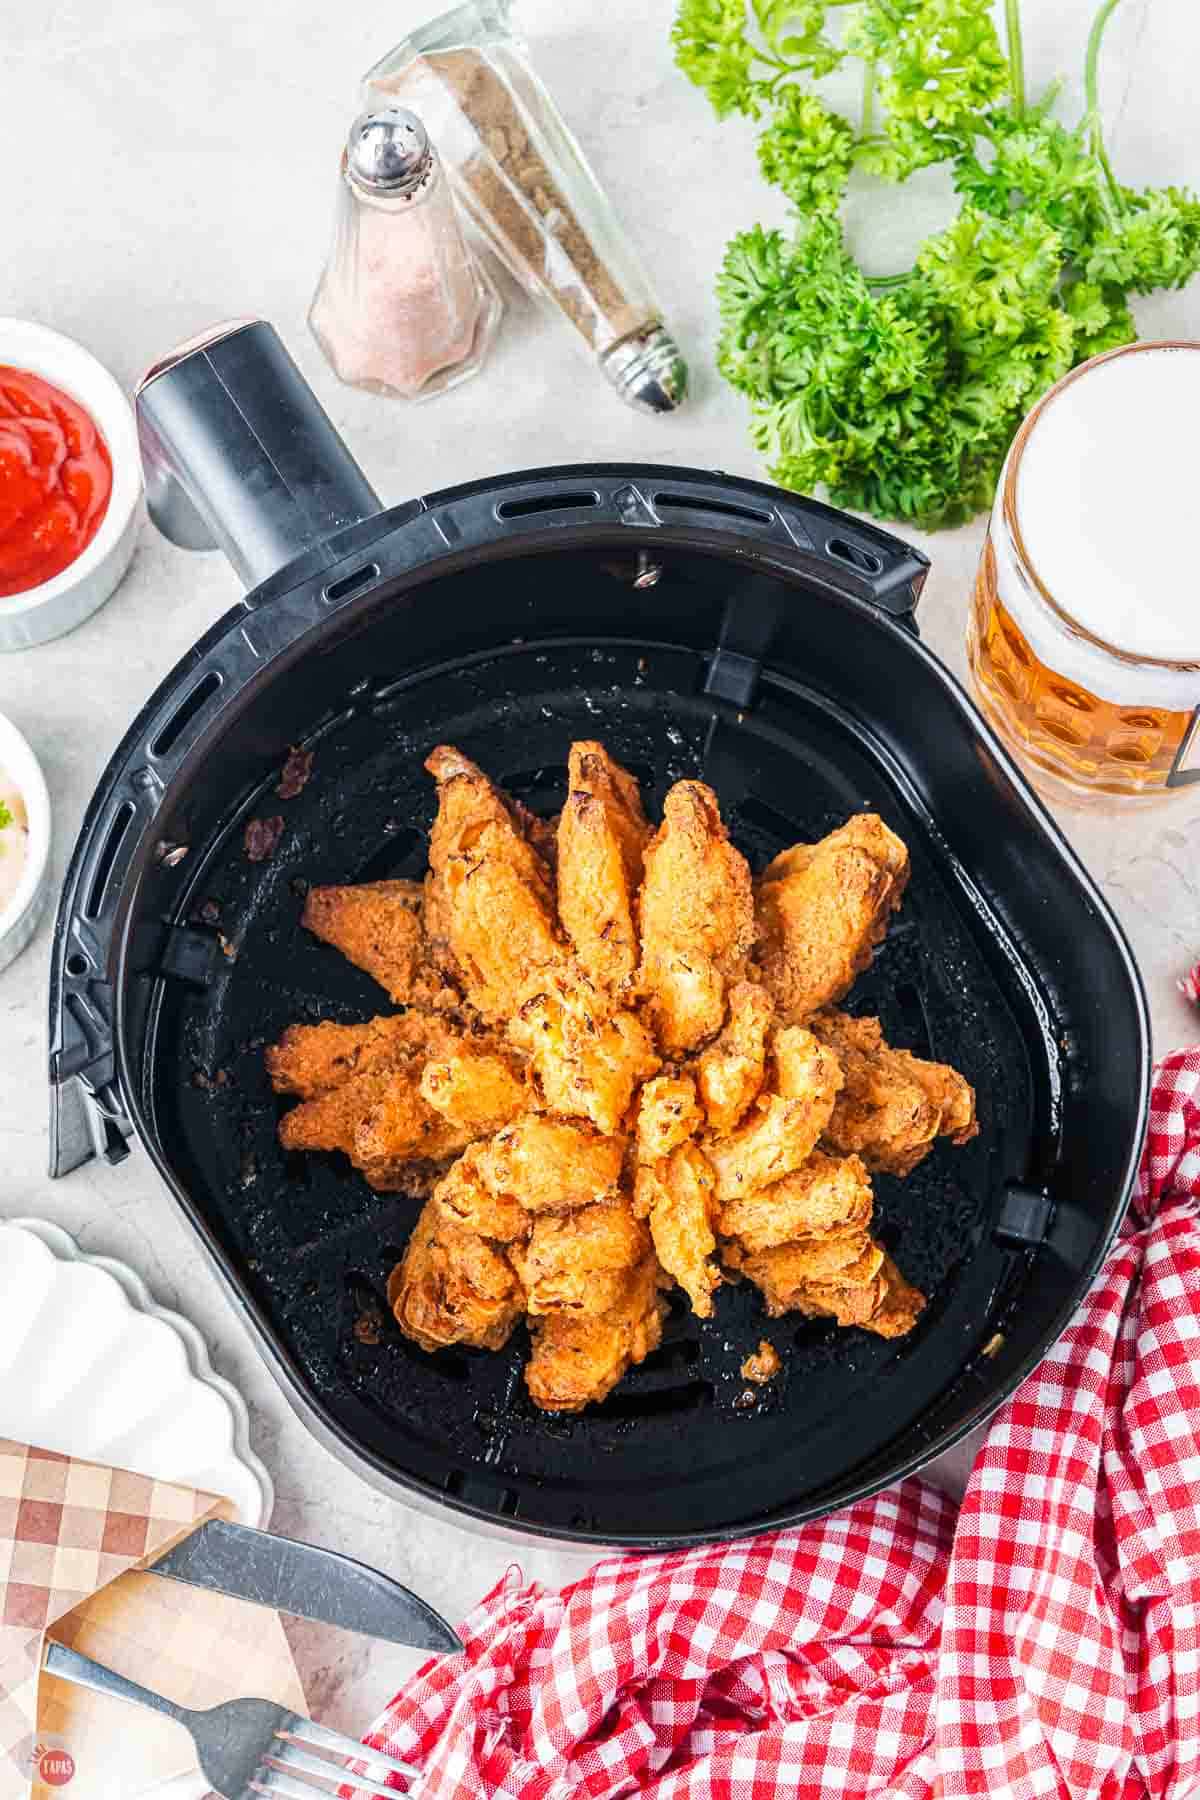
- Air fry the onion. Place the onion bloom in air fryer basket cut side up (on a piece of foil if desired).

- Air fry for 20 minutes at 300 degrees, spraying the onion with cooking oil a few times as it cooks. Remove onion and season with salt and pepper.
For the full recipe and detailed instructions, please refer to the recipe card at the bottom of the post.
Storage & Reheating
Best Fresh: A blooming onion is at its crispiest straight out of the air fryer, so serve it right away if you can.
Refrigerator: Store leftovers in an airtight container for 1 to 2 days. They will soften as they sit.
Reheat: Pop it back in the air fryer at 350°F for 3 to 5 minutes to crisp it up again. Skip the microwave or you will end up with a soggy onion.
Make Ahead: You can cut and bread the onion ahead, then keep it in the fridge until you are ready to spray and air fry.

Variations
Beer Batter: Swap some or all of the milk in the egg wash for beer for a richer, slightly tangy flavor.
Gluten Free: Use a gluten free coating mix, or grind gluten free crackers with your own spices for the second breading.
Spicy Bloom: Add extra chili powder or a pinch of cayenne to the flour mixture for some heat.
Stronger Flavor: Use a yellow or white onion in place of the sweet Vidalia for a bolder, more savory bite.
Different Seasoning: Swap the Italian seasoning in the dredge for my Homemade Cajun Seasoning for a Creole twist.
Who Created The Blooming Onion?
Originally created at Outback Steakhouse, similar recipes are popping up everywhere.
Chili’s has the Awesome Blossom or Onion Peels from Applebee’s. You don’t have to wait until you visit one of these restaurants, I am going to show you how to make this famous bloomin’ onion in an air fryer.
More Party Appetizers
- Nachos Supreme – Loaded, shareable, copycat favorite
- Fried Mac and Cheese Balls – Crispy outside, cheesy center
- Pigs in a Blanket – Classic crowd pleaser
- Firecracker Crackers – Spicy, crunchy, addictive
Frequently Asked Questions
This is the most common hiccup, and it usually comes down to the egg wash. If there are still clumps of unmixed yolk or white, the coating pulls away. Whisk the egg wash completely smooth, and dry between the petals first. For the best results, brush the egg wash onto one small section at a time and sprinkle the flour on while it is still wet so it has something to grab.
Yes! Use a gluten free flour for the dredge and skip the packaged coating mix. Grind up gluten free crackers in a food processor with a little salt, pepper, and your favorite spices for that second crispy layer.
You can. Just be sure to really open the onion and shake off any excess between coatings so you do not end up with clumps. The texture will be a little different but it works.
It is a packaged seasoned breadcrumb or fish fry coating, usually near the breadcrumbs at the grocery store. I use the “Shake ‘N Bake” seasoning packet. If you cannot find it, grind up crackers with seasoning as a homemade swap.
About 44 calories per serving, and roughly 700 for the whole onion. The dipping sauce and spritzing oil are not included in that count since the amounts vary.
Absolutely. Swap some or all of the milk for beer in the egg wash for a slightly different, deeper flavor.
A large sweet onion like a Vidalia is my favorite because it is mild and sweet. Yellow or white onions work but are much stronger in flavor.
Recipe Tips & Tricks
- Whisk the egg wash until it is completely smooth. Clumps of egg are the number one reason the coating pulls away.
- For tricky spots, brush egg wash on one section at a time and sprinkle the flour while it is still wet.
- Stick to 8 petals for maximum crispness. More slices look impressive but are much harder to coat evenly.
- Always slice the onion on a flat, stable surface like a cutting board. It is the safest way to cut.
- Do not skimp on the oil spray. It is what crisps the coating and gives you that deep fried texture.
- Use a fork to gently pry the petals open partway through cooking if they are not spreading.
This Air Fryer Blooming Onion recipe makes a crispy, golden kind of showstopper that disappears before anything else on the table. Make one for your next party and watch everyone crowd around it!
If you love this recipe as much as I do, please leave us a ⭐️⭐️⭐️⭐️⭐️ five-star review in the comment section below. Thanks!
Air Fryer Blooming Onion Recipe
Ingredients
- 1 large sweet onion
- ½ cup all-purpose flour
- 1 teaspoon garlic powder
- 1 teaspoon onion powder
- ½ teaspoon paprika
- ½ teaspoon Italian seasoning
- ½ teaspoon salt
- ¼ teaspoon chili powder
- ¼ teaspoon turmeric
- ¼ teaspoon black pepper
- ½ cup milk
- 1 large egg
- 2 tablespoons butter melted
- 2.5 ounces seasoned coating mix 1 packet
- salt & pepper optional
- blooming onion dipping sauce for serving
- oil for spritzing
Instructions
Prepare the onion
- Start by cutting off 1/2 inch from the top of the onion, then peel the outer skin from the onion.
- Place the onion cut-side down. Starting about 1/2 inch from the root, make a cut all the way through to the board. Make sure your knife cuts into the middle of the onion. All your cuts should meet in the middle.DO NOT CUT THROUGH THE ROOT OR TOO CLOSE TO THE ROOT.
- Repeat to make four evenly spaced cuts around the onion.
- Make 1 additional cut between each section until you have 8 evenly spaced cuts.
- Turn the onion over and set aside for 5 minutes to allow the petals to relax.
- Prior to breading use your fingers to gently separate the outer pieces.
- Now that the onion is open it’s time to bread it to get that crispy coating.
- If any of the “petals” are stuck together, gently separate them so the onion can be in “full bloom.”
Bread the onion
- Whisk the flour and spices in a large bowl. In a small deep bowl, whisk the egg, butter, and milk.
- Place the onion in a large clean bowl, cut-side up and separated.
- Sprinkle the flour mixture over the onion getting in between the layers. I used a fork to sprinkle the flour mixture, and used my fingers to separate each individual layer and sprinkle the flour between every petal.
- Dump the remaining flour over the whole onion. Let it sit for a few minutes.
- Turn the onion over and gently pat off the excess flour back into the bowl. Reserve the remaining flour. You want to make sure the flour coats the petals without leaving large clumps of flour in between the petals.
- Transfer the onion into a large bowl and pour the egg mixture over the onion and coat evenly. Pouring over the onion helps it to get in between the petals and coat the flour.
- Open each petal to make sure the egg mixture soaks every bit of flour between the petals. Let the onion sit in this mixture for a few minutes. Remove the onion from the bowl and let the excess drip off.
- Add the packet of seasoned coating mix to the leftover flour mixture. Place the wet onion into an empty bowl or onto the aluminum foil and sprinkle the reserved flour and coating mixture over it. Do not sprinkle in between those petals as it will be difficult to spray with cooking oil afterwards. However, sprinkle the flour and breading mixture over every part of the onion that is exposed to the air. I will even brush more egg mixture over drier parts of the onion to get as much mixture there as possible.
- Place the onion into the refrigerator to set while you preheat the air fryer.
Air fry the onion
- Preheat the air fryer to 300F.
- After ten minutes, remove the onion from the refrigerator and spray generously with cooking oil. This is important to help get that "deep fried" flavor and texture. Be sure to soak all the flour mixture with cooking oil that you can see. You can also check in between the petals and spray any other flour spots you see.
- Place on a piece of foil for easy removal after cooking.
- Air fry 20 minutes or until crispy and golden brown. Open and spray at least once with more cooking oil during the cooking process.
- Remove gently and serve with Blooming Onion Dipping Sauce.
Video
Notes
Nutrition
©TakeTwoTapas.com. Content and photographs are copyright protected. Sharing of this recipe is both encouraged and appreciated. Copying and/or pasting full recipes to any social media is strictly prohibited.


I’m giving the recipe five stars because the parts that got crunchy were great and your sauce was terrific!
The issue is the flour did not adhere well to the onion overall. I even tried brushing more of the egg mixture on the exterior (all the parts exposed to air) and adding more of the flour mixture. I did spray it with oil several times while cooking as per the instructions Can you offer any suggestions on how to make the flour stick as in your photos? Or any suggestion as to what to do differently? My onion looked like yours in the photos so I don’t know what happened.
I would really like to try this again because the parts that had the crispy coating were yummy! Thanks!
I have often had problems and when I do it’s usually because my egg wash isn’t fully mixed. If there are still clumps of egg yolk or egg white, it will pull away from the onion. And If I take too long to get the egg on the onion, it can drip off and the flour has nothing to stick to.
Give these tips a try:
Dry the onion between the layers if you can. Then using a spoon or pastry brush, try brushing the egg wash on a small section at a time. While it’s still wet, immediately sprinkle the flour on that section. It might take a little longer to prep but the flour will stick to the egg as long as it’s on the onion.
Hope this helps!
Jennifer
I don’t usually comment but I followed this recipe exactly and it was excellent! The steps were written perfectly. I made the sauce too and it tasted exactly like the restaurants. We’ll worth the work!
Thank you so much! I am glad you liked it:)
Thank you.
5 minute prep time? That’s completely unrealistic. There’re 16 ingredients to pull; 11 need to be measured. 2 bowls are to be gathered. Butter needs to be melted. I count 3 steps to coat the onion, after the time consuming cutting.
and separating. There are 3 rounds of letting the onion “sit”.
Kindly post a video of you accomplishing this remarkable feat in 5 minutes; or alternatively give your readers realistic expectations. It’s as easy to be truthful as it is to mislead.
I’m sorry about that. It was a typo in the recipe card. I have corrected it:) thanks for letting me know:)
So you’re saying there’s 2,848 calories in total for one blooming onion even when air fried?!
Technically no, the recipe card generates based on all the ingredients and when I put oil for spritzing it doesn’t know how much oil. Same with the dipping sauce. I have removed them from the ingredient list and recalculated the calories. I added the removed items back in but didn’t include them in the calculation. I hope this helps. The total calories is now 700 total.
@Ryan, 16 servings per onion at 44 calories per serving so 16 x 44 = 704 cal per onion
The bloomin onion was orignally served in 1985 at New Orleans restaurant Russell’s Marina Grill, where future Outback Steakhouse founder Tim Gannon worked at the time.
AKA. He stole the concept and went on to tell people it was his idea.
Just sharing! Love this
This blooming onion came out SOOO crisp in the air fryer! Loved that it is healthier, too. Thanks for sharing such a great recipe!!
I was skeptical that an air fryer would do the trick but OMG!! I am so impressed with this recipe!! It was so much better than the one we order at our favorite pub, and healthier, too!! Thank you!
This came out really good but the first dry coating did not really stick. I am wondering if this needs a wet-dry-wet-dry breading process instead of dry-wet-dry. The flavor was spot on.
Where can you purchase the blooming onion sauce? Cant wait to make this
I have a recipe for sauce! https://www.taketwotapas.com/blooming-onion-dipping-sauce/
This recipe called for a pack of seasoned coating mix. What is this and how do I make it or where do I buy this? (I’m in Canada)
This is usually a seasoned coating mix like breadcrumbs or a fish fry coating that you can find in the grocery store. Similar to this item here: https://amzn.to/32FZUUX I hope that helps:)
@Wendy,
I have family members who are gluten intolerant, so I don’t use bread crumbs. I use my food processor to grind up any kind of gluten free crackers, add salt, pepper, and then whatever goes with what I am coating – cumin, chili powder, garlic powder, red pepper flakes. Hope this is helpful.
@cindy, Love this cleverness, Cindy! I’m a gluten-dodger, too.
Wow!!!! Turned out amazing!
And easy……enough to impress my mother in law too! Can’t wait to make it again
Thank you!
So excited to give this recipe a try! My family is going to absolutely love this and I can feel good about making something that is far healthier than the original Blooming Onion. Thanks for your tips on cutting the onion. So helpful!
Thanks for this awesome recipe i love blooming onions but i never had it in an air fryer.
Looks so great! Can I use a nut flour? Coconut or almond?
I personally haven’t tried it but I don’t see why not! Just be sure to really open the onion and shake off any excess between coatings and air frying so you don’t get a clumpy mess. Let me know how it turns out!