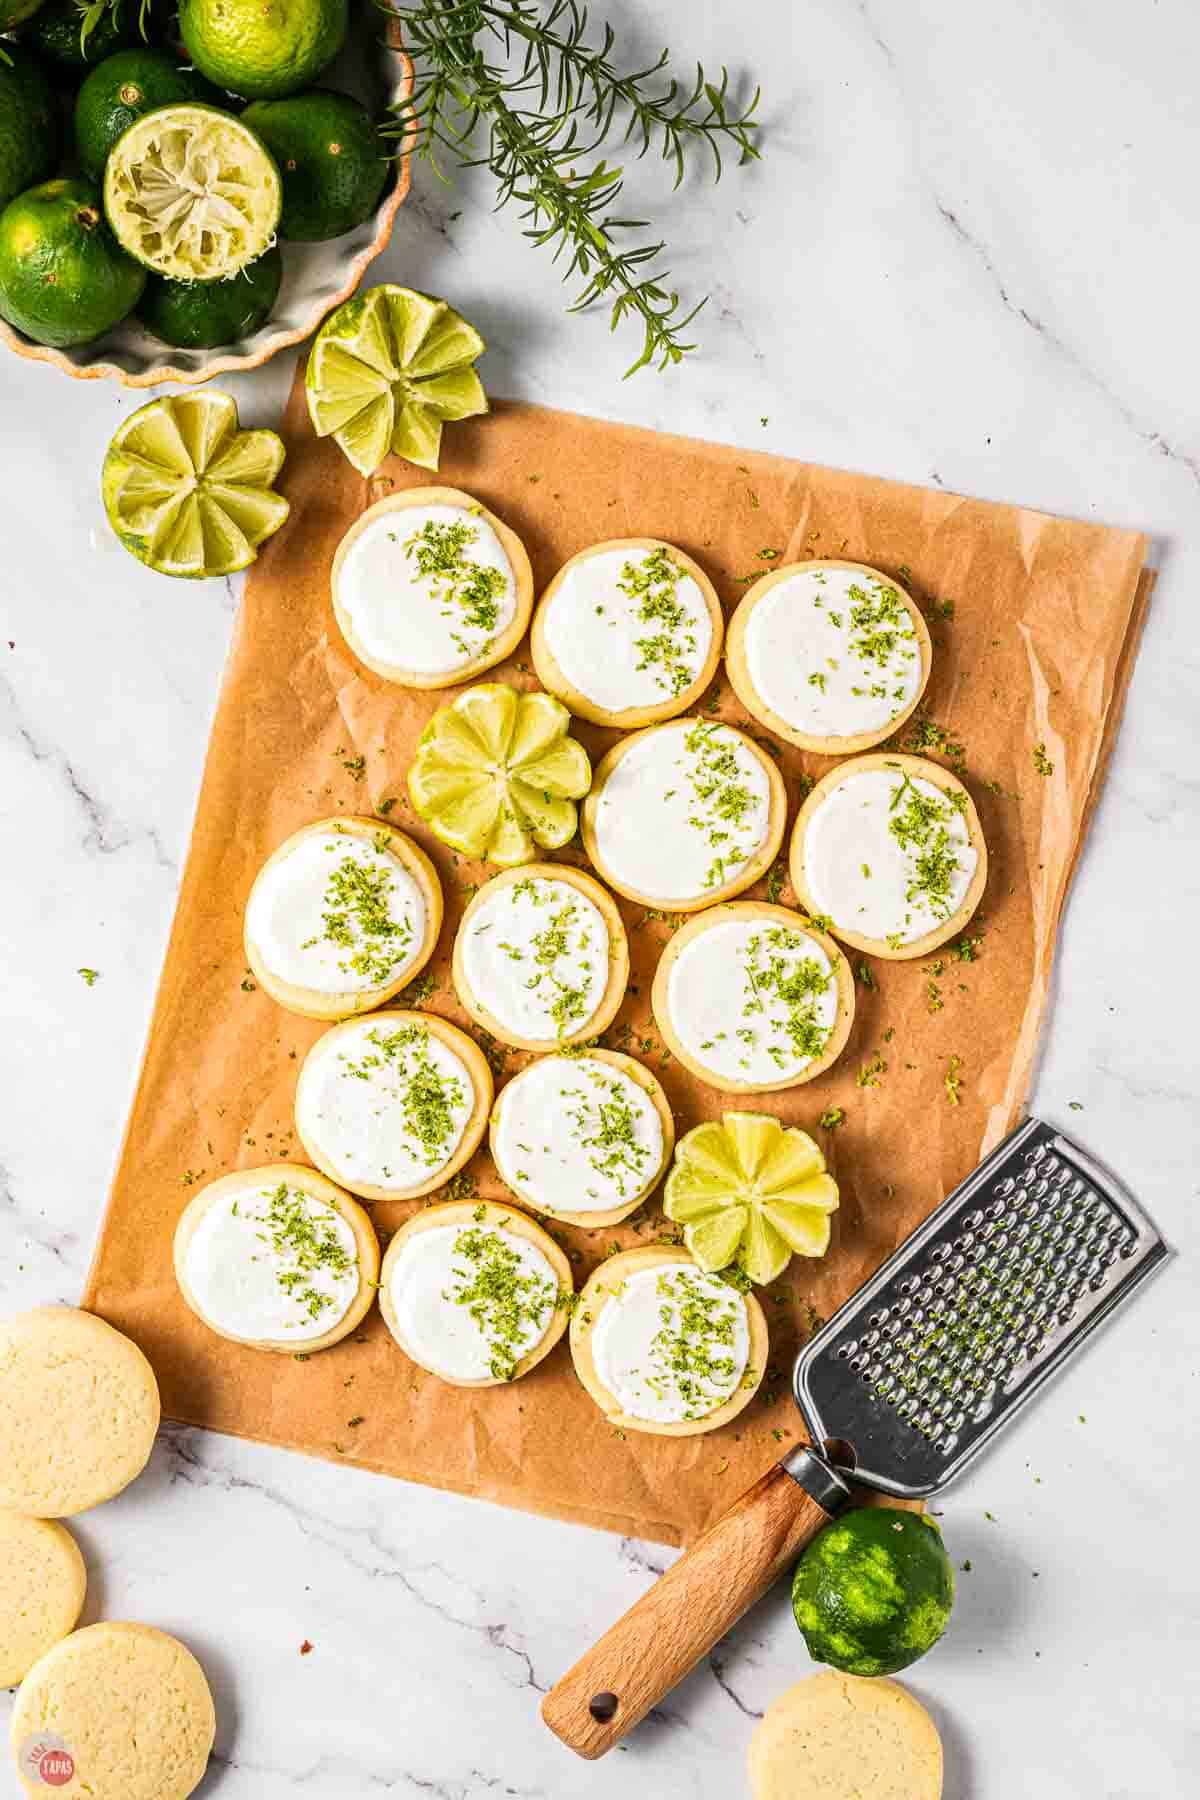
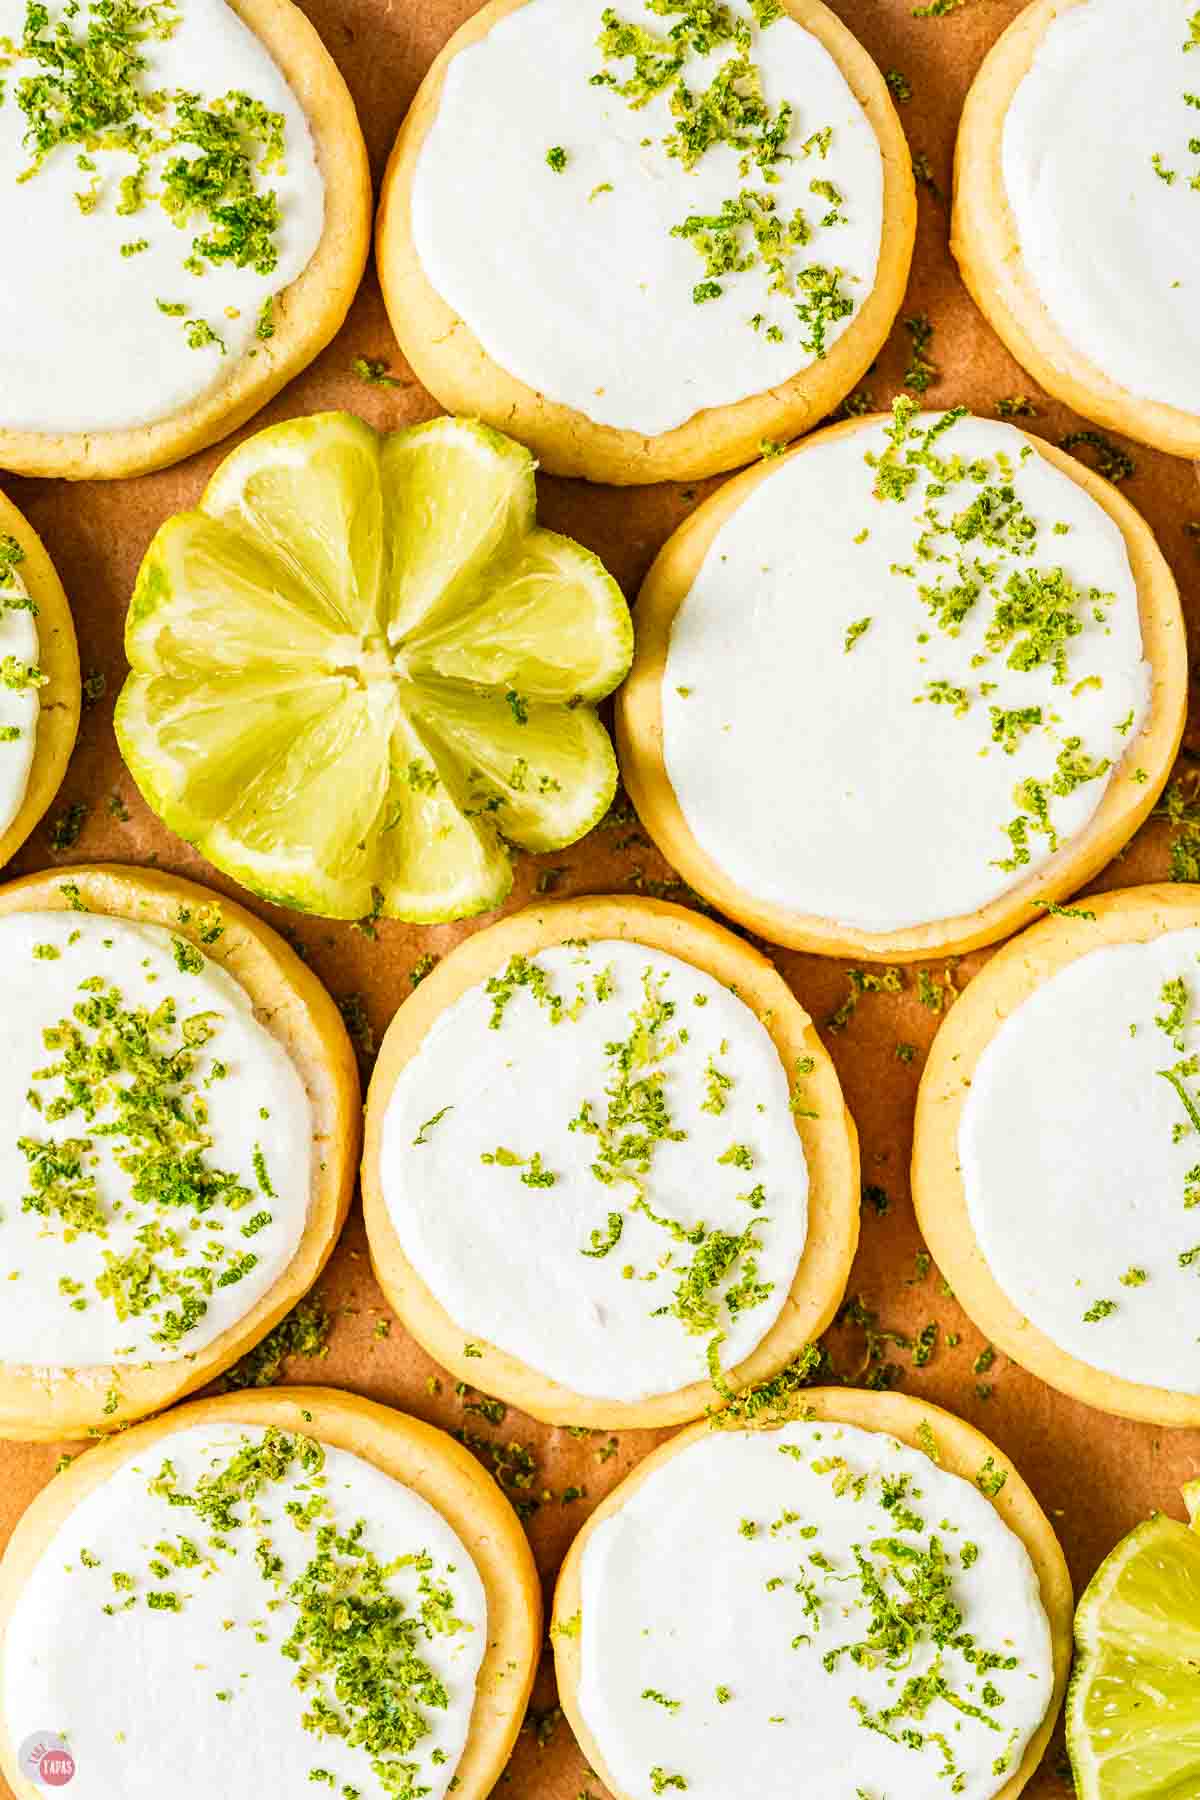
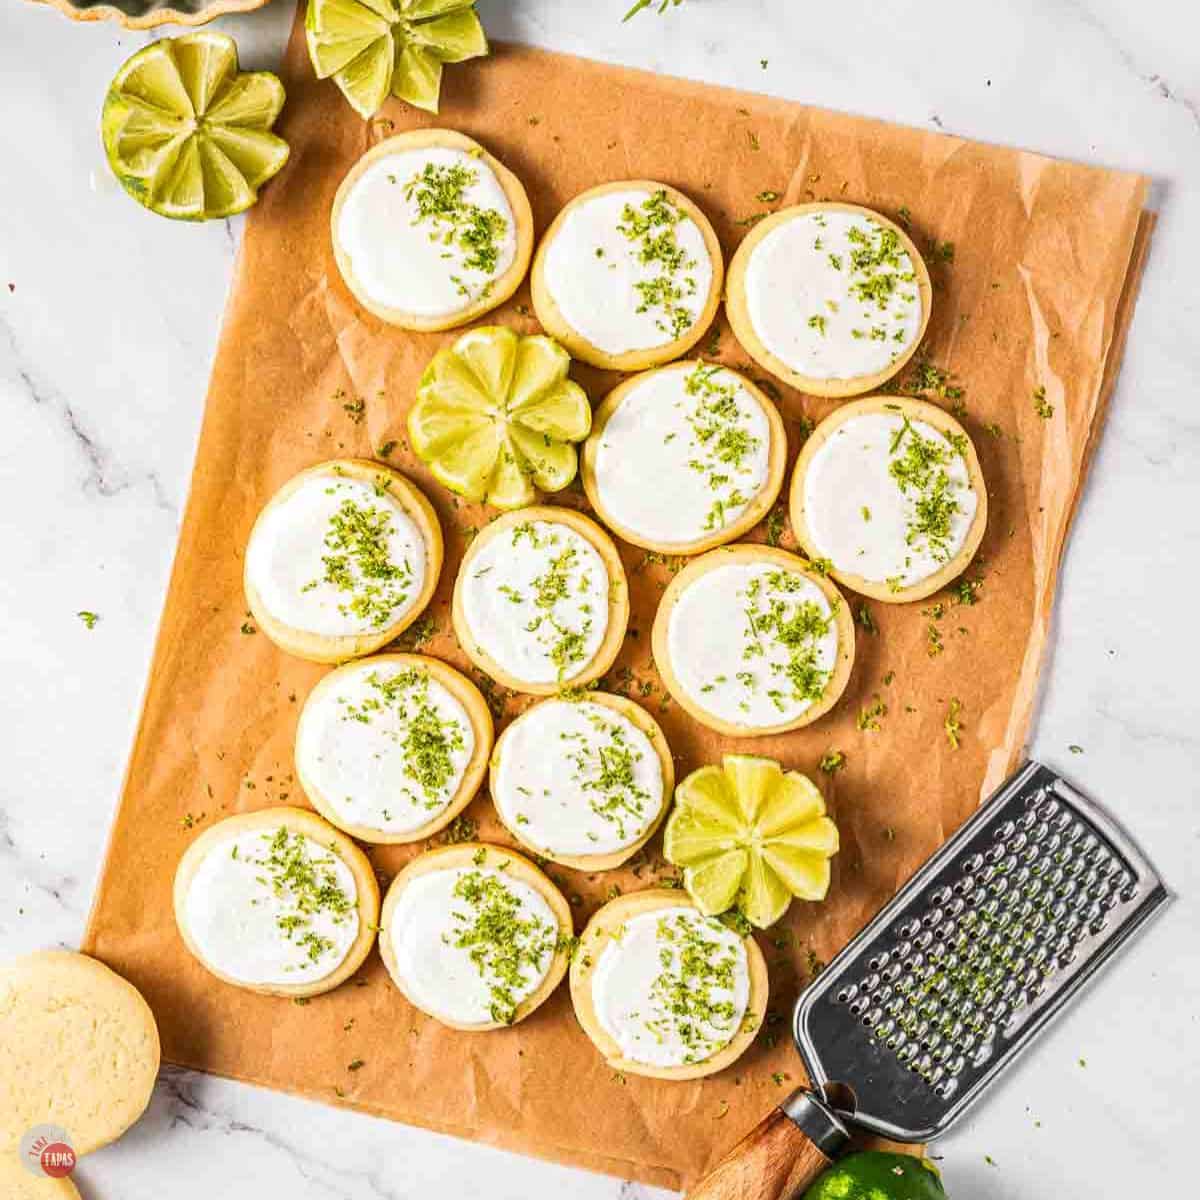
Key Lime Cookies
These key lime cookies are tender cookies get topped with a sweet key lime glaze. The perfect combination of bright, tangy citrus flavor and buttery shortbread. Like eating sunshine in cookie form!

What makes these cookies so great is the key lime flavor that is bright and tart. It’s the perfect contrast to the buttery shortbread cookie. Not only that, but the glaze makes them look so pretty!
I love a slice and bake cookie. You can make the dough, roll it into logs, and then slice off as many cookies as you’re in the mood for. Enjoy them plain, add your favorite flavors, and decorate them any way you want!
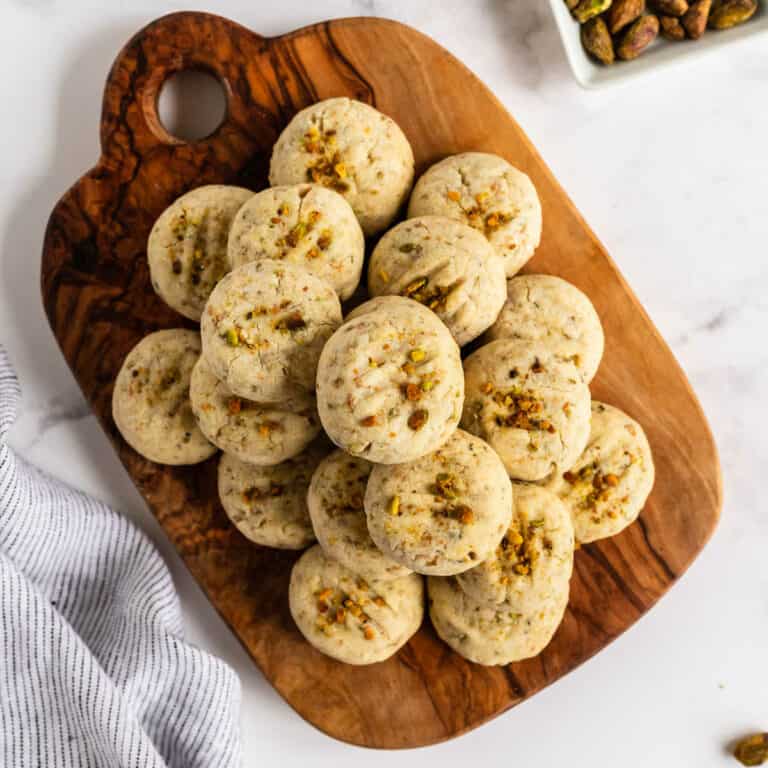
These cookies are perfect for summer gatherings, cookie platters, or anytime you want something light and citrusy. Pair them with lemon drop cookies, whipped shortbread cookies, and these Italian pistachio cookies for a complete spread!
If you can’t get enough lime flavor, try this key lime meringue pie, this lime coconut cooler, and keep this key lime curd!
This post may contain affiliate links. As an Amazon Associate, I earn from qualifying purchases at no additional cost to you. Read my disclosure policy.
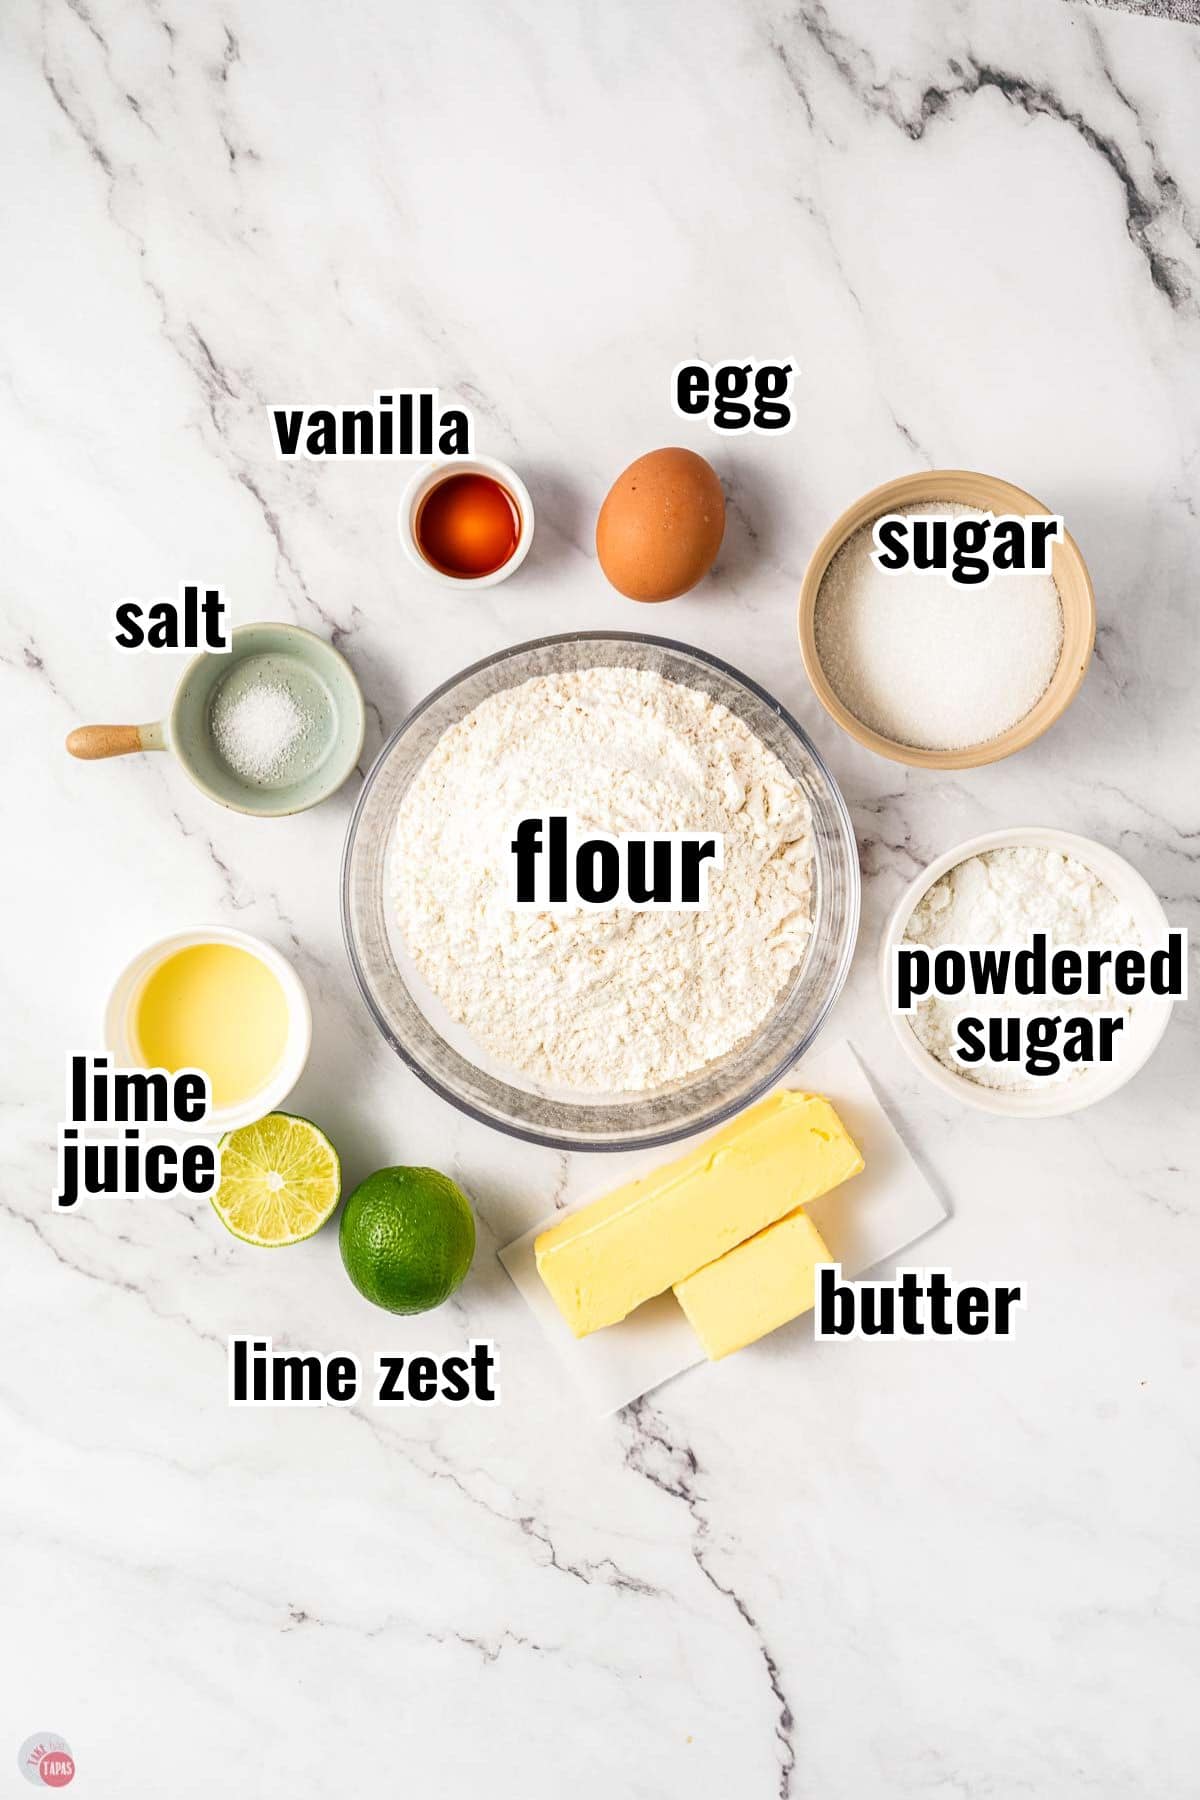
See recipe card for complete information on ingredients and their quantities.
Ingredient Notes
- Butter – Use unsalted butter for the cookies. If you only have salted butter, just omit the extra salt in the recipe. Bring the butter to room temperature for easier mixing.
- Key limes – Fresh key limes have the best flavor but if you can’t find them, use bottled key lime juice (link in recipe card). And zest regular limes for the garnish.
- Flour – I have only tested this recipe with all purpose flour. If you try it with other ones, leave me a comment and let me know how they turn out.
- Sugar – Use a combination of white granulated sugar for the dough and powdered sugar for the glaze.
For more insider tips, tricks, and a behind the scenes look, follow me on Pinterest, Facebook, Instagram, & X.
How To Make Key Lime Cookies
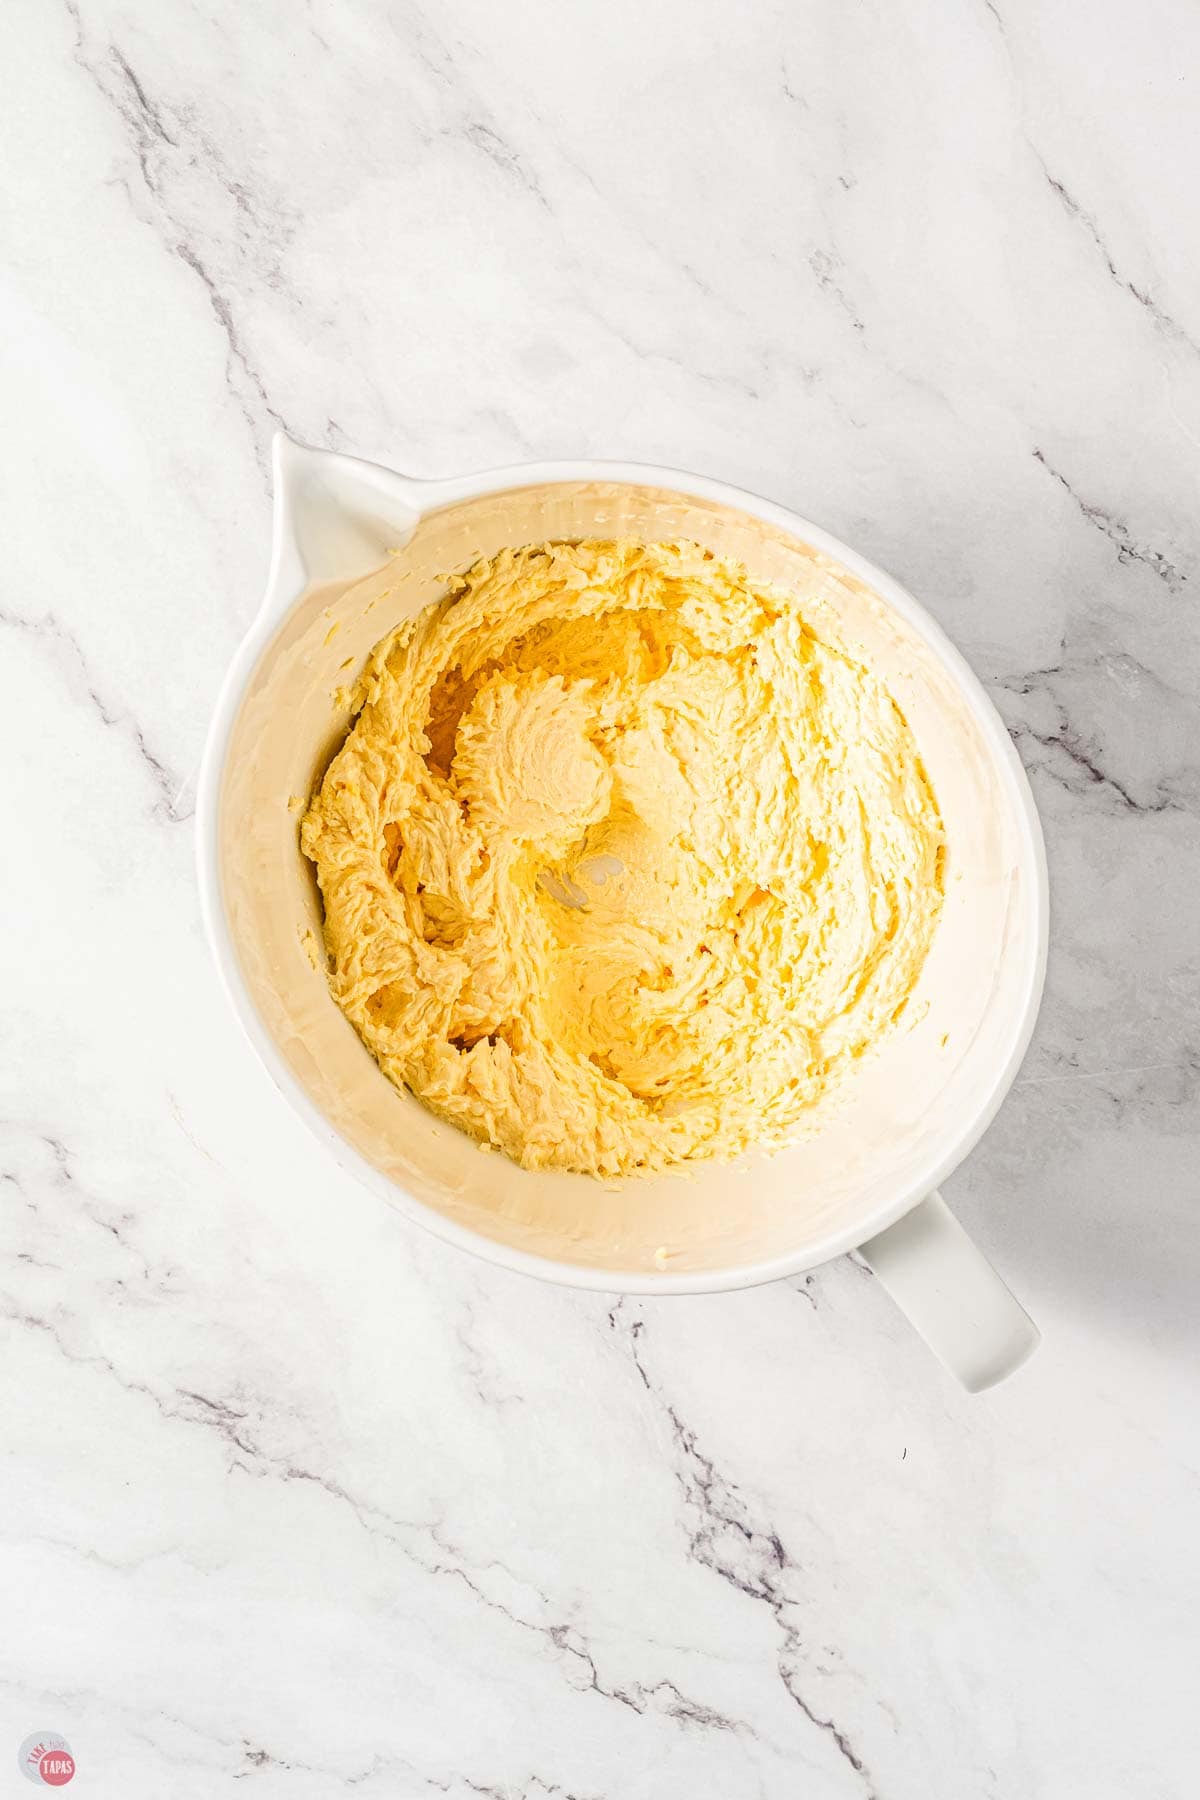
- Cream the butter and sugar together. Beat in the egg, vanilla, and key lime juice until fully incorporated.
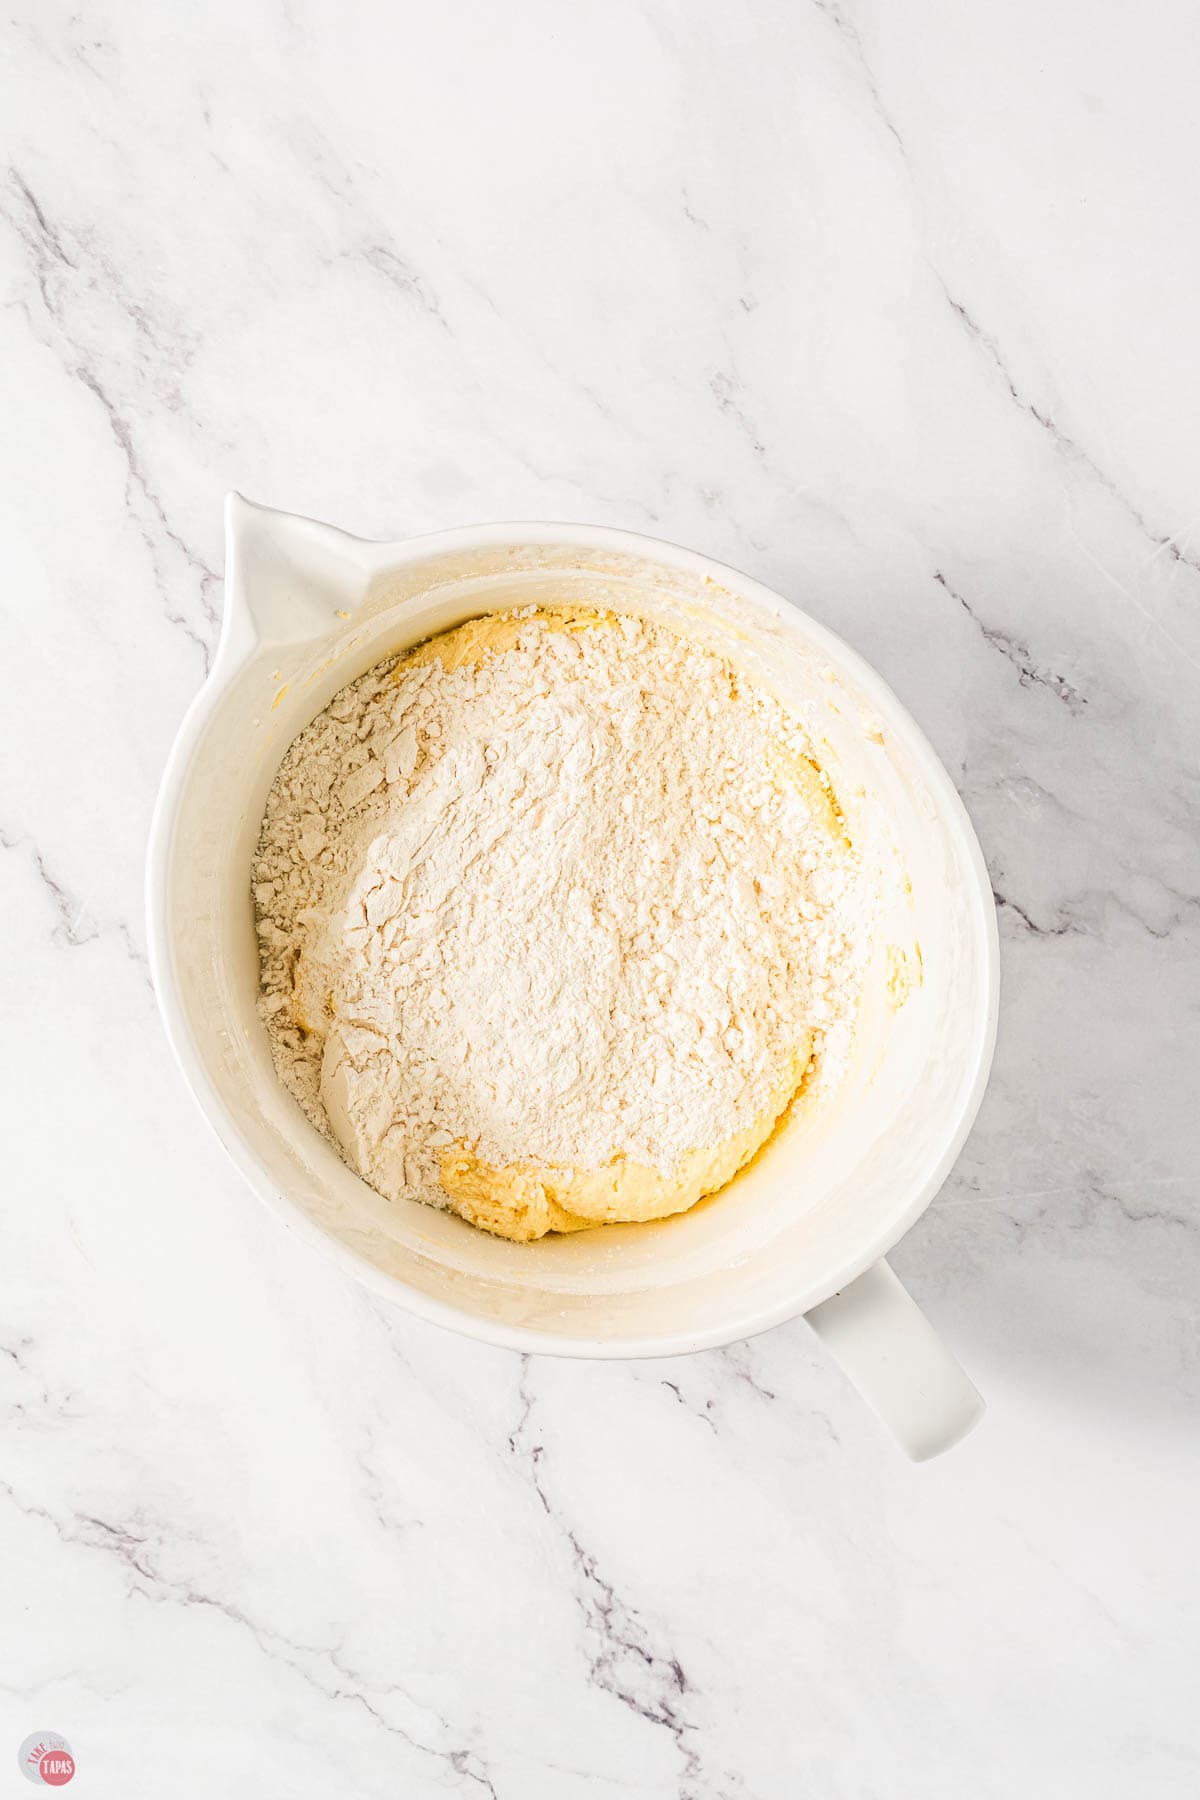
- Combine the flour and salt. Slowly add the flour mixture to the butter mixture until mixed. Don’t over mix or they will get tough.
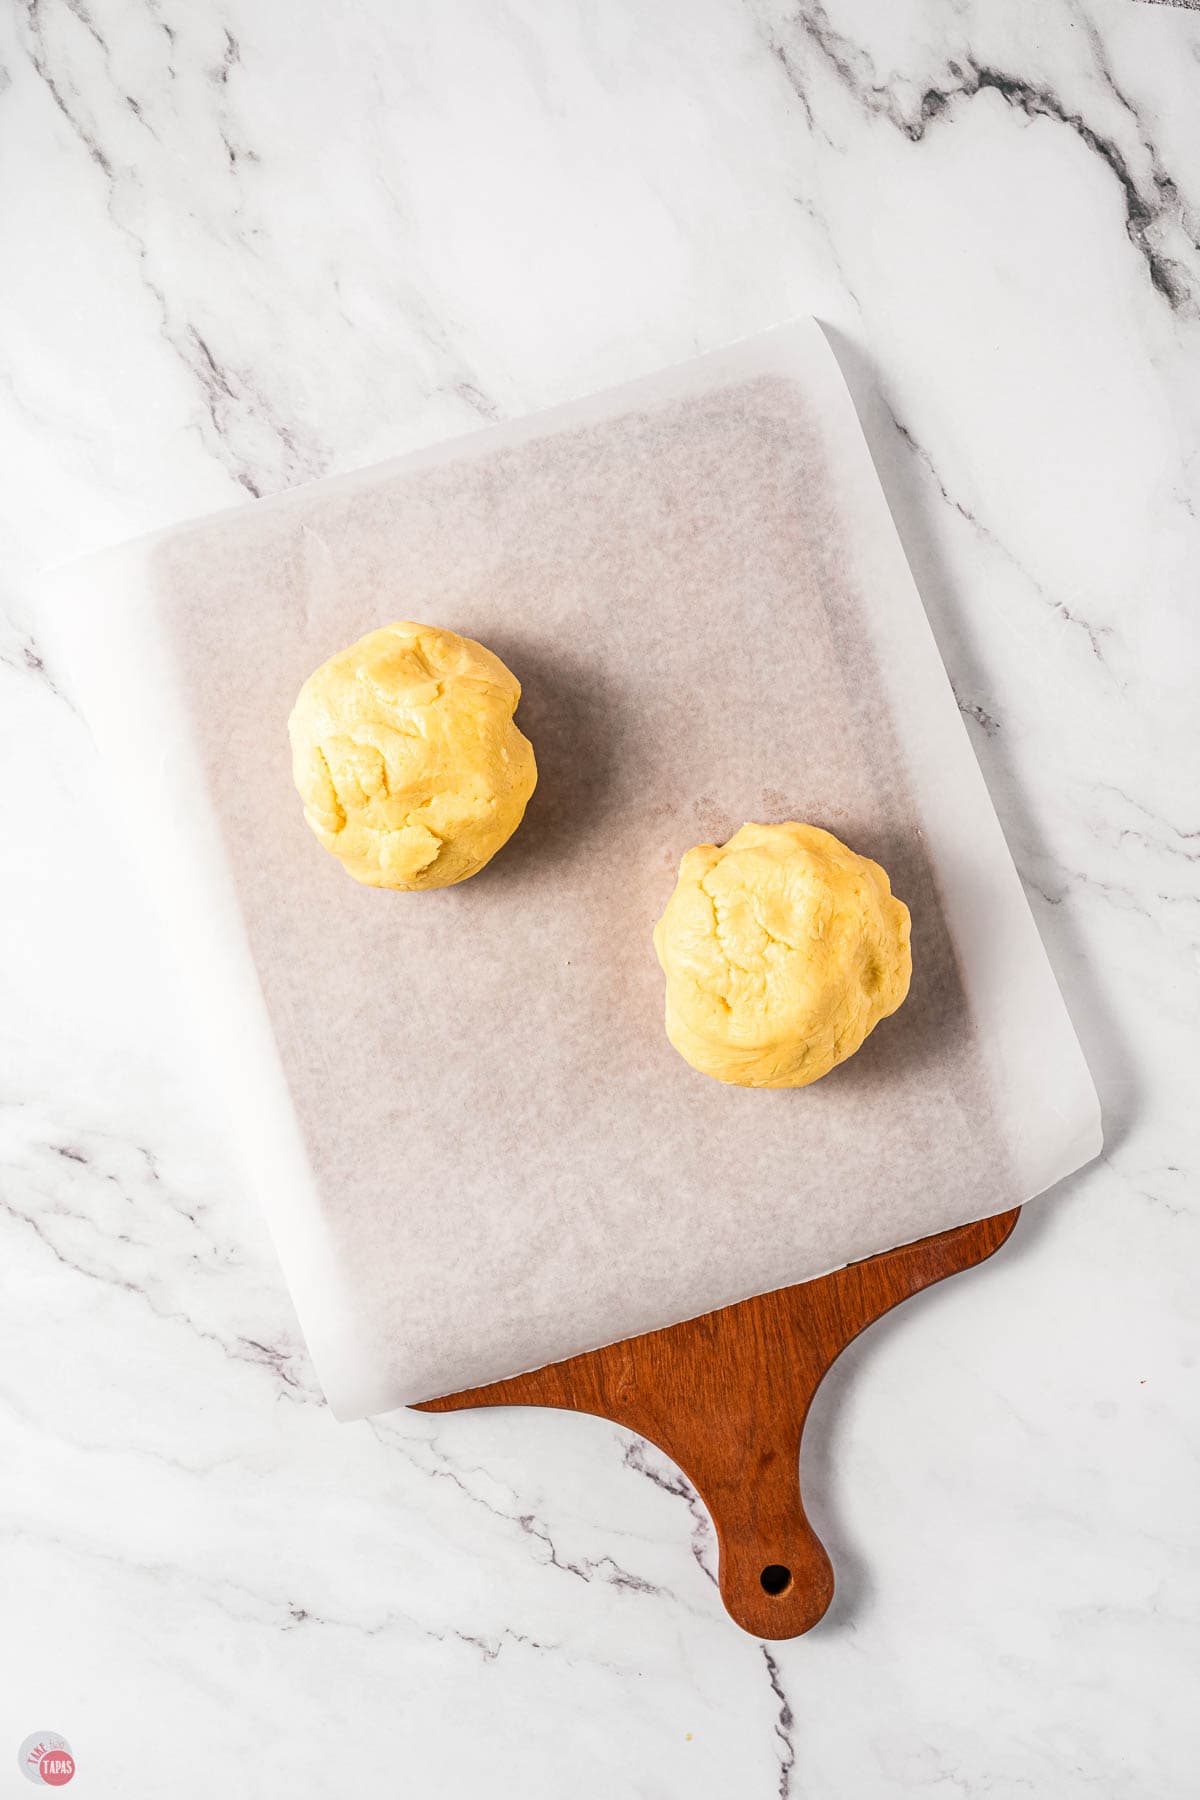
- Divide the dough into two sections. Roll each section into a log roughly 8-9 inches long and 2 inches in diameter.
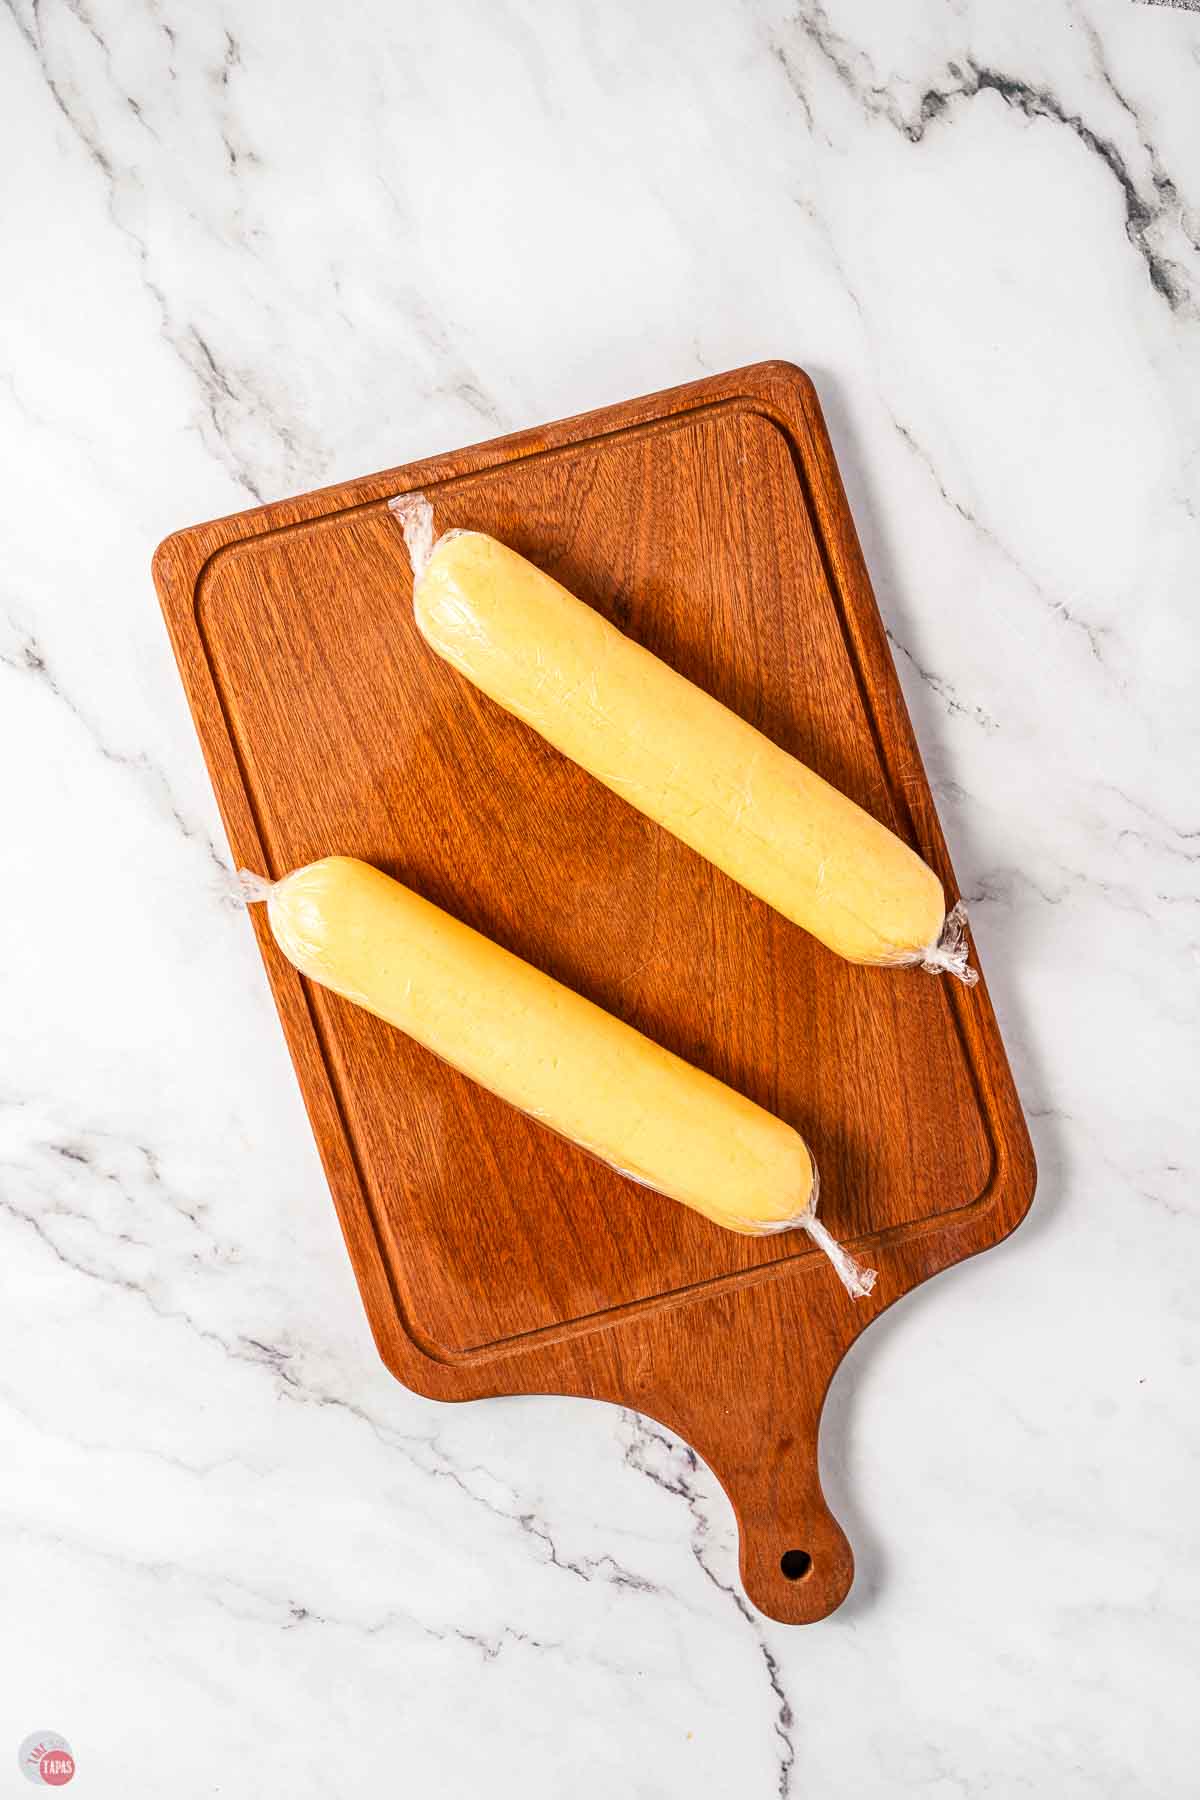
- Wrap in plastic wrap and chill for at least 2 hours. About 20 minutes before baking, preheat the oven to 350F.
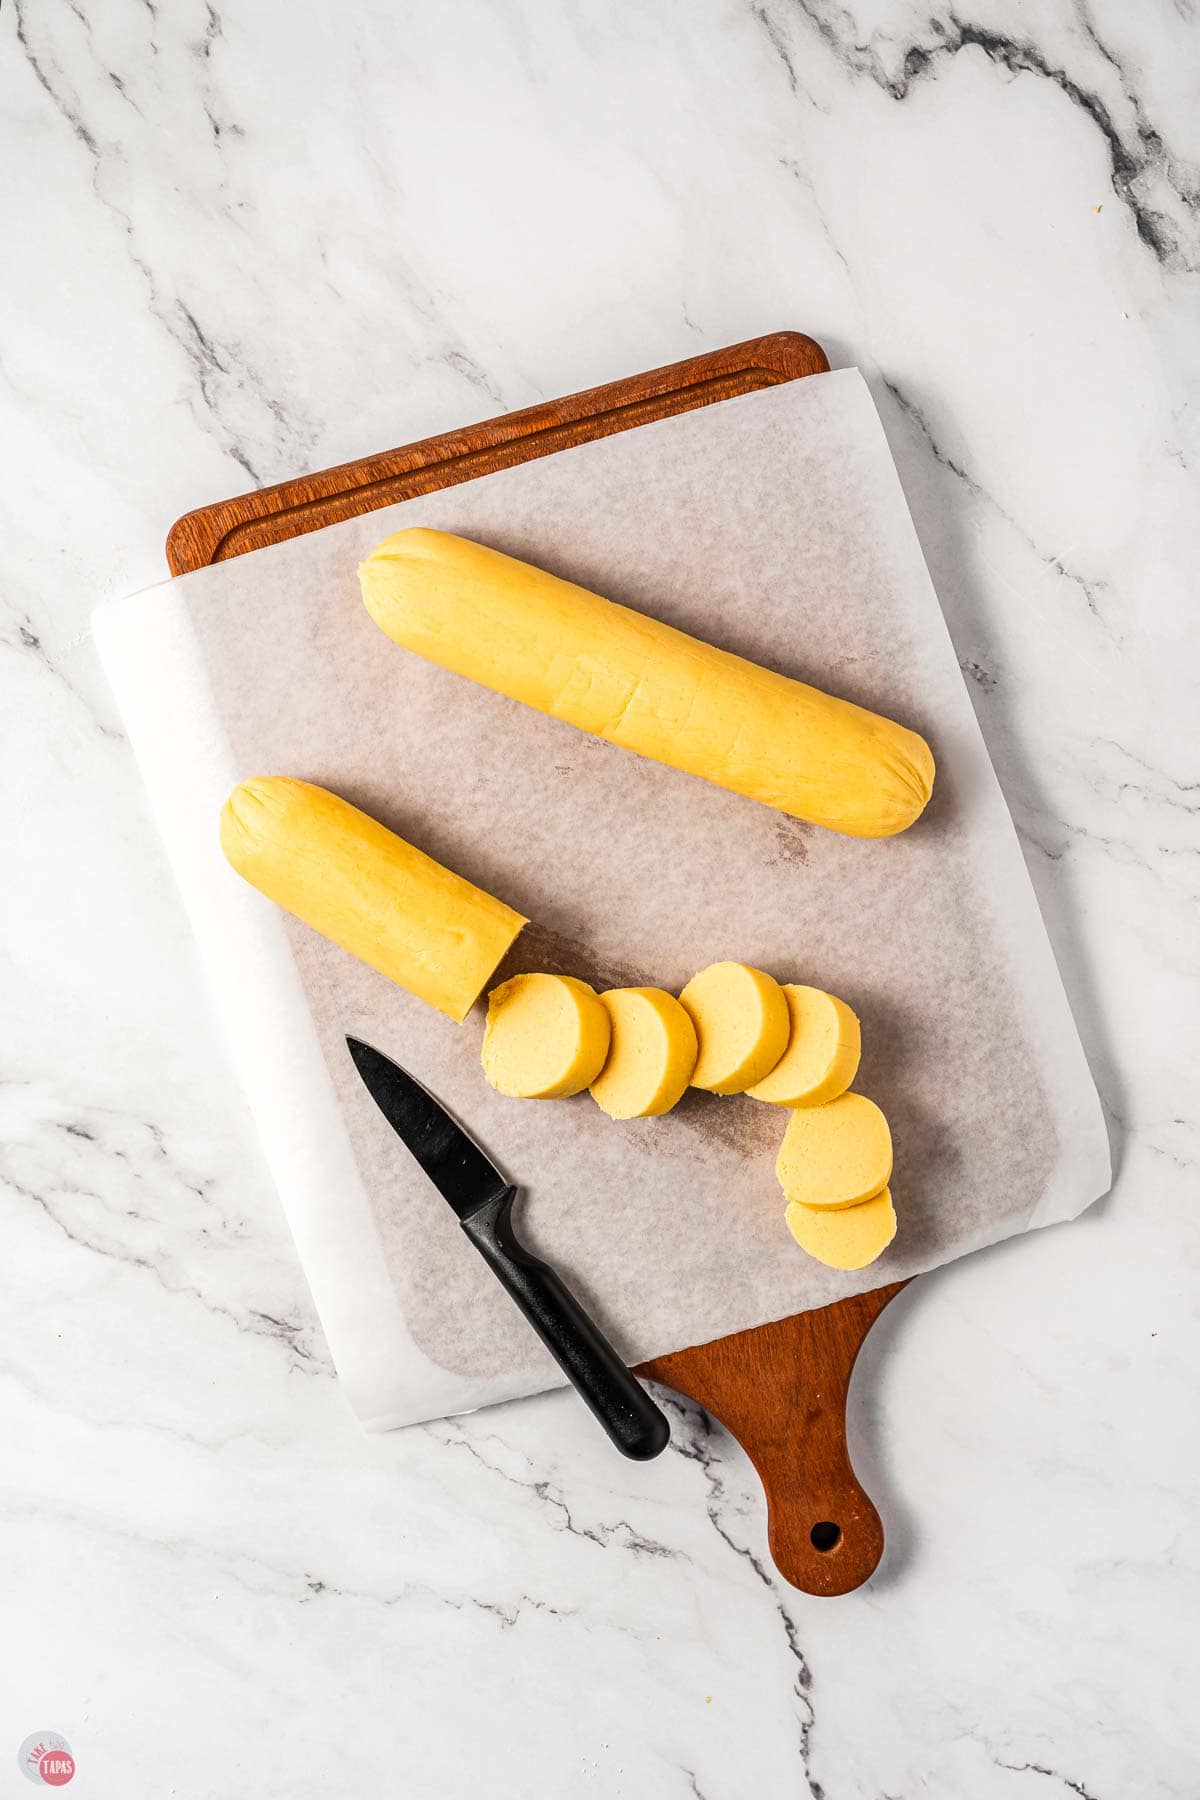
- Remove a log from the fridge, unwrap and slice into 12 slices. Place cookies flat on a baking sheet lined with parchment paper or a silicone baking mat, about an inch apart.

- Bake for 10-12 minutes or until the cookies are set and the edges are just starting to brown. Do not over bake. Remove and let cookies cool on the baking sheet for another 5 minutes.
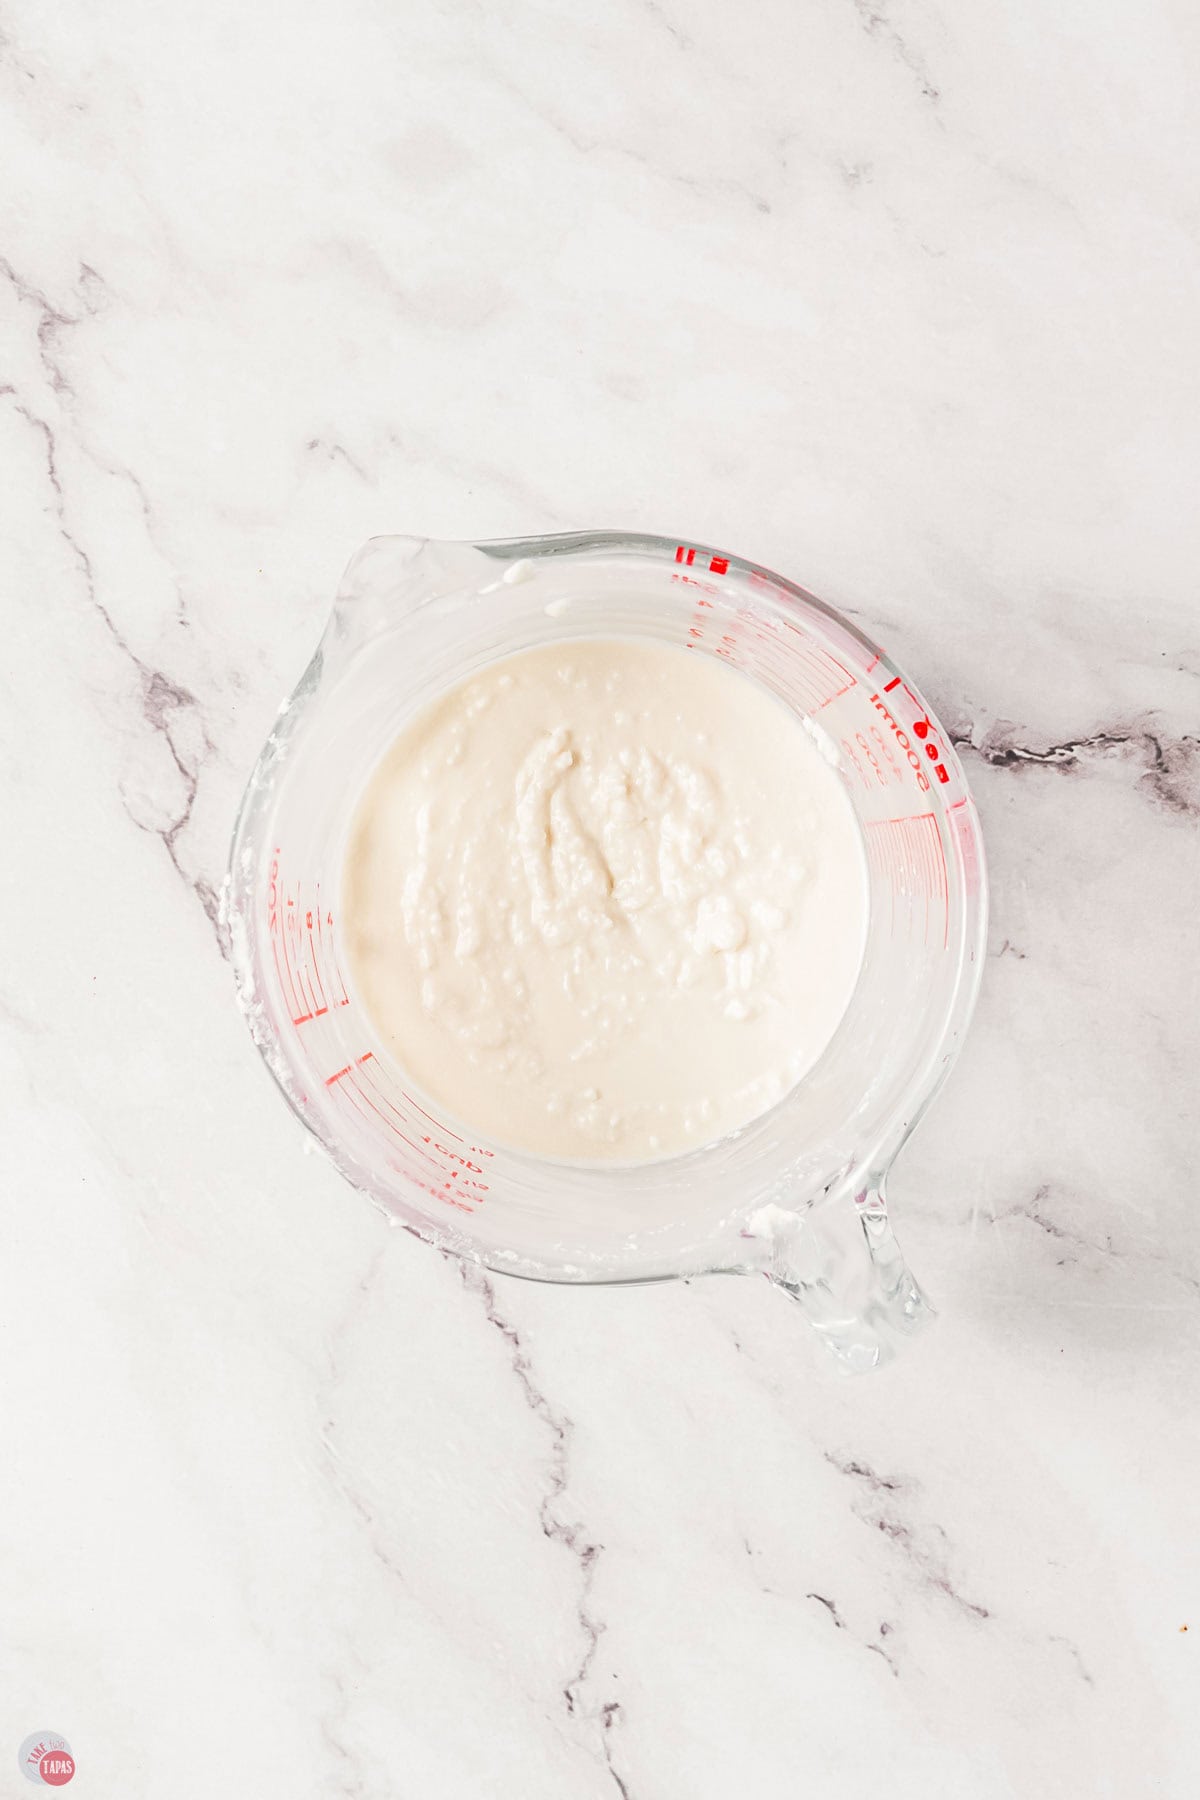
- While the cookies are cooling, make the glaze. Combine the powdered sugar, vanilla, and lime juice. Whisk until smooth.
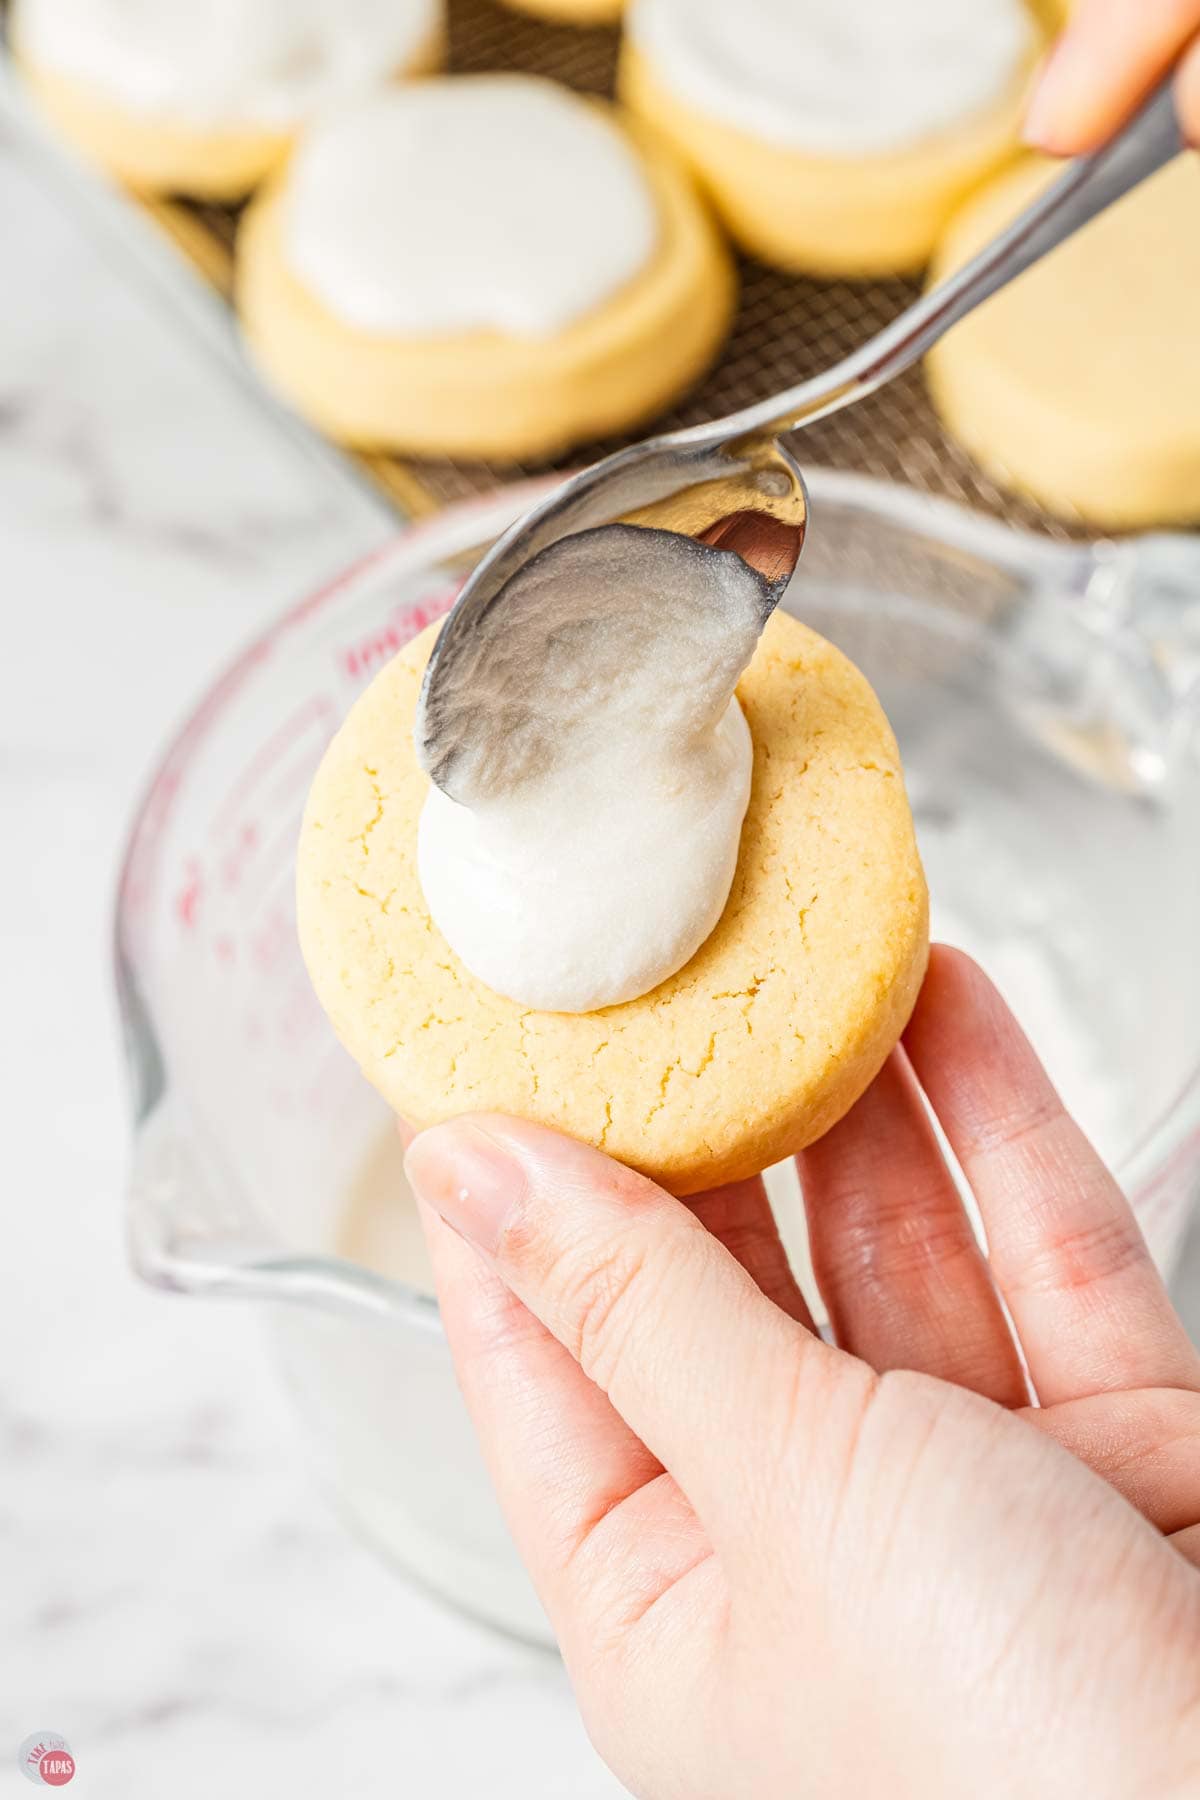
- Carefully dip the tops of each of the cooled cookies and let set up on a wire baking rack. When dry, store until ready to eat.
For the full recipe and detailed instructions, please refer to the recipe card at the bottom of the post.
Storage
These cookies will keep, at room temperature, in airtight container for up to a week. Layer with parchment paper if stacking them to prevent the glaze from sticking.
Freezer
Wrap the dough logs tightly in 1-2 layers of plastic wrap. They freeze beautifully for up to 3 months. Plus, you can slice and bake them directly out of the freezer. Just be sure to add a few extra minutes (1-2) when baking them. Or you can place them on the baking sheet, let sit at room temperature for 5 minutes and then bake.
Alternatively, you can bake the cookies, cool and freeze before glazing. Then whip up the icing a little bit before serving and decorate.
Frequently Asked Questions
Of course you can! Regular lime juice tastes very close. Key limes have a slightly sweeter, deeper flavor, but Persian limes taste just as delicious.
Chilling firms up the butter so the dough slices cleanly without smooshing. It also helps cookies hold their shape during baking instead of spreading too much. You can chill overnight if that’s easier and means you can prep ahead.
Aim for about ¼ to ⅓ inch thick slices. Too thin and they’ll bake too quickly and get crispy. Too thick and the centers might be underdone.
Nope! The cookies are delicious and full of lime flavor when left plain. But the glaze adds extra lime flavor and makes them look prettier. Your call!

Recipe Tips & Tricks
- Chill properly – Refrigerate dough logs at least 2 hours (or overnight) so they slice cleanly without smooshing. Wipe knife clean if it gets sticky.
- Slice evenly – Aim for ¼ to ⅓ inch thick slices for even baking. I like to cut the logs in half, then half again, until you get 12 slices.
- Don’t over bake – Remove the cookies when edges just start to brown. The cookies set and firm up as they cool.
- Perfect glaze – Let the cookies cool completely before icing. Dip tops carefully, or spoon icing on, and let set on wire rack. Dry the glaze completely before storing to avoid smearing.
If you love this recipe as much as I do, please leave us a ⭐️⭐️⭐️⭐️⭐️ five-star review in the comment section below. Thanks!

This key lime cookie recipe is the best combination of buttery shortbread cookies and a sweet and tart glaze on top that’s full of key lime flavor!
Key Lime Cookies Recipe
Ingredients
Cookie Dough
- ¾ cup butter unsalted, softened
- ⅔ cup sugar
- 1 large egg
- 2 teaspoons vanilla extract
- 2 tablespoons key lime juice
- 2 ¼ cups all purpose flour
- ¼ teaspoon salt
Key Lime Glaze
- 1 cup powdered sugar
- 2 tablespoons key lime juice
- ½ teaspoon vanilla extract
Instructions
- Cream the butter and sugar together. Beat in the egg, vanilla, and key lime juice until fully incorporated.
- Combine the flour and salt. Slowly add the flour mixture to the butter mixture until fully incorporated.
- Divide the dough into two sections. Roll each section into a log roughly 8-9 inches long and 2 inches in diameter.
- Wrap in plastic wrap and chill for at least 2 hours.
- When ready to bake, preheat the oven to 350F.
- Remove a log from the fridge, unwrap and slice into 12 slices.
- Place cookies flat on a baking sheet lined with parchment paper or a silicone baking mat, about an inch apart.
- Bake for 10-12 minutes or until the cookies are set and the edges are just starting to brown. Do not overbake.
- Remove and let cookies cool on the baking sheet for another 5 minutes.
- Remove and cool completely.
- Make the glaze while the cookies are cooling.
- Combine the powdered sugar, vanilla, and lime juice. Whisk until smooth.
- Carefully dip the tops of each of the cooled cookies and let set up on a wire baking rack.
- When dry, store until ready to eat.
Notes
- Chill properly – Refrigerate dough logs at least 2 hours (or overnight) so they slice cleanly without smooshing. Wipe knife clean if it gets sticky.
- Slice evenly – Aim for ¼ to ⅓ inch thick slices for even baking. I like to cut the logs in half, then half again, until you get 12 slices.
- Don’t over bake – Remove the cookies when edges just start to brown. The cookies set and firm up as they cool.
- Perfect glaze – Let the cookies cool completely before icing. Dip tops carefully, or spoon icing on, and let set on wire rack. Dry the glaze completely before storing to avoid smearing.
Nutrition

This recipe is part of The Sweetest Season, an annual virtual cookie swap co-hosted by Erin of The Speckled Palate and Susannah of Feast + West. Every year, food bloggers get together to share new holiday cookie recipes to make and give.
This year we are raising money for Cookies 4 Kids’ Cancer, which is a recognized 501(c)3 non-profit organization dedicated to funding research for new, innovative and less-toxic treatments for childhood cancer.
Since 2008, Cookies for Kids’ Cancer has granted nearly $18 million to pediatric cancer research in the form of 100+ research grants to leading pediatric cancer centers across the country. From these grants have stemmed 35+ treatments available to kids battling cancer today.
Help us raise money for this important cause! Donate through our fundraising page.
Another exciting thing is that Cookies for Kids’ Cancer is in a matching window with their friends at OXO, meaning OXO will be matching every dollar raised through the end of 2024, up to $100,000. Whatever money we raise will automatically double on our fundraising page!
©TakeTwoTapas.com. Content and photographs are copyright protected. Sharing of this recipe is both encouraged and appreciated. Copying and/or pasting full recipes to any social media is strictly prohibited.

Jennifer, you are absolutely on a roll this year because these Key Lime Pie Cookies are fantastic!!! The bright citrus glaze paired with that buttery shortbread base creates such a refreshing, pie inspired bite, and they feel like the perfect treat when you want key lime pie without all the work. Another beautiful contribution to The Sweetest Season!
Connor loves Key Lime Pie so I just had to make a cookie version too!