Honey Lemon Chicken
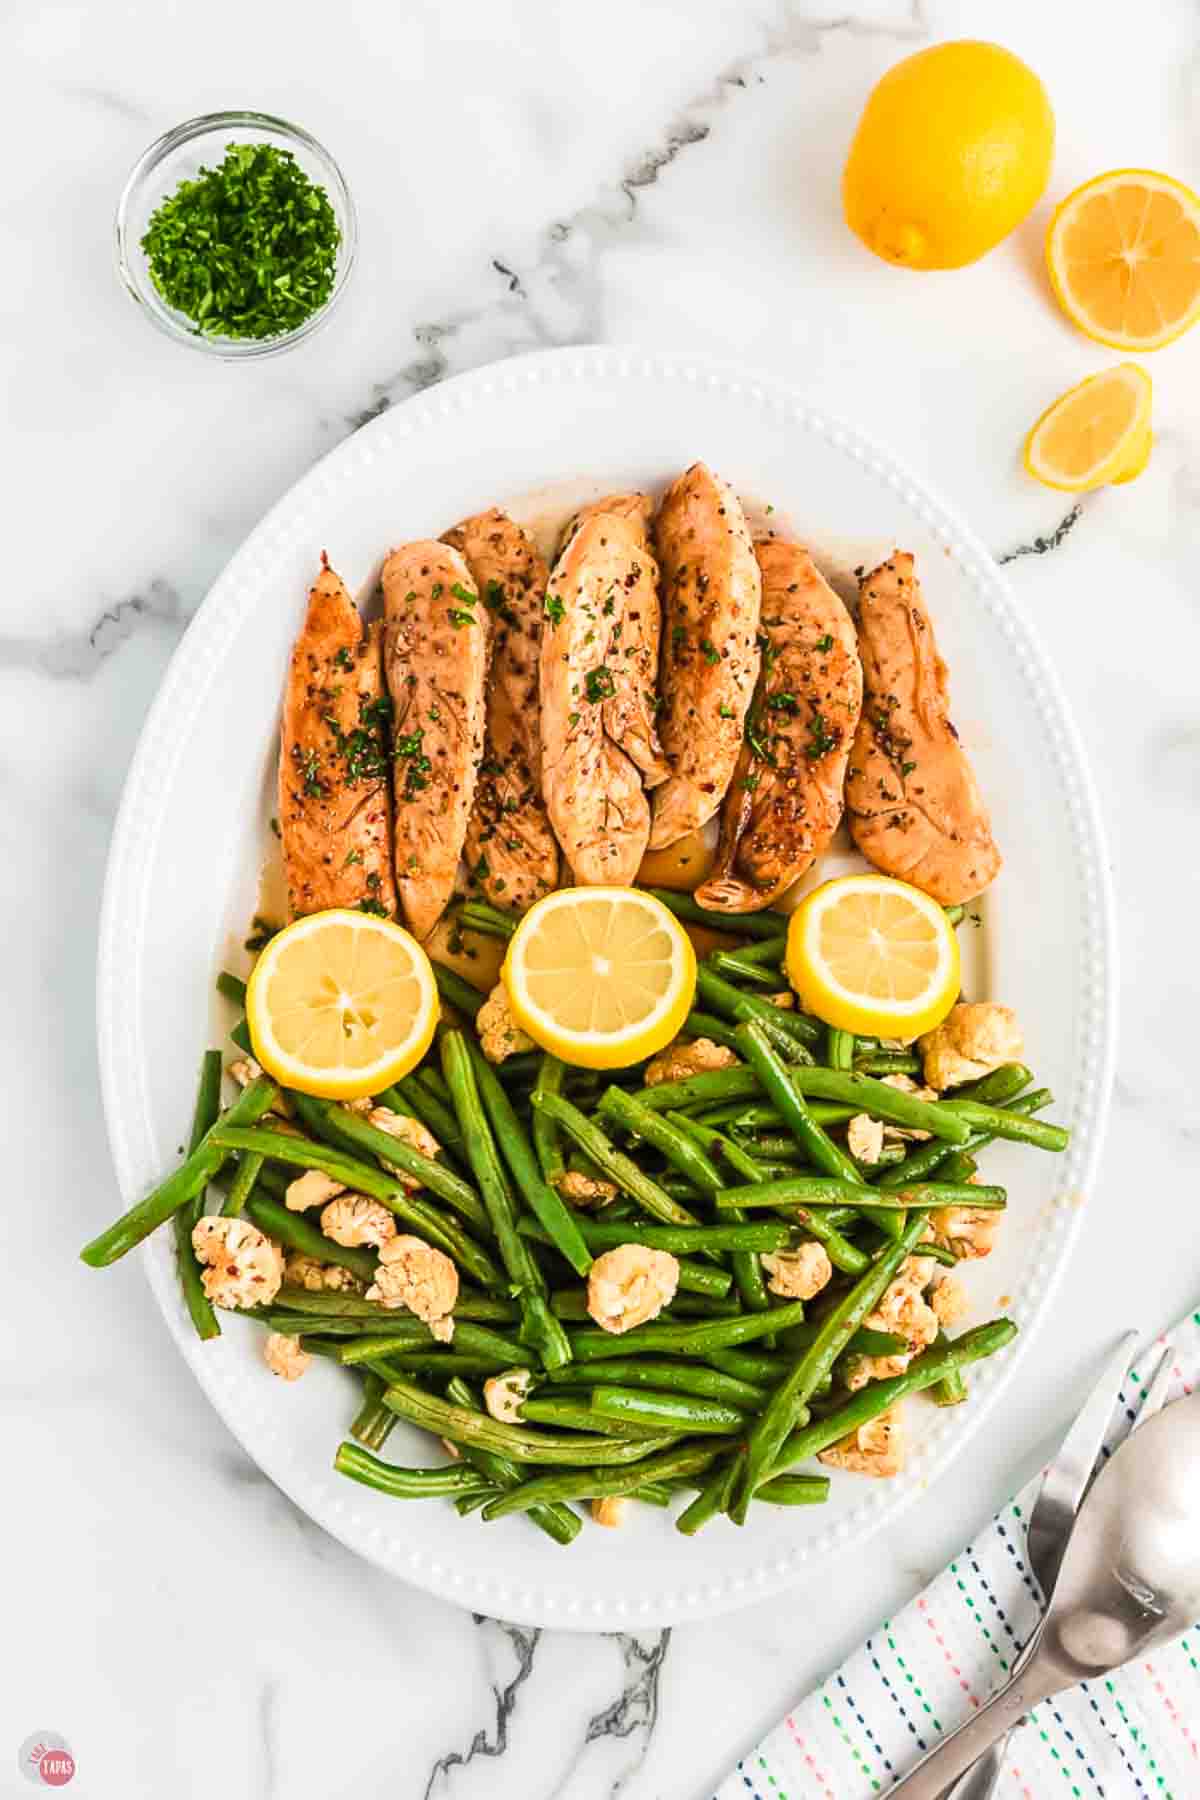
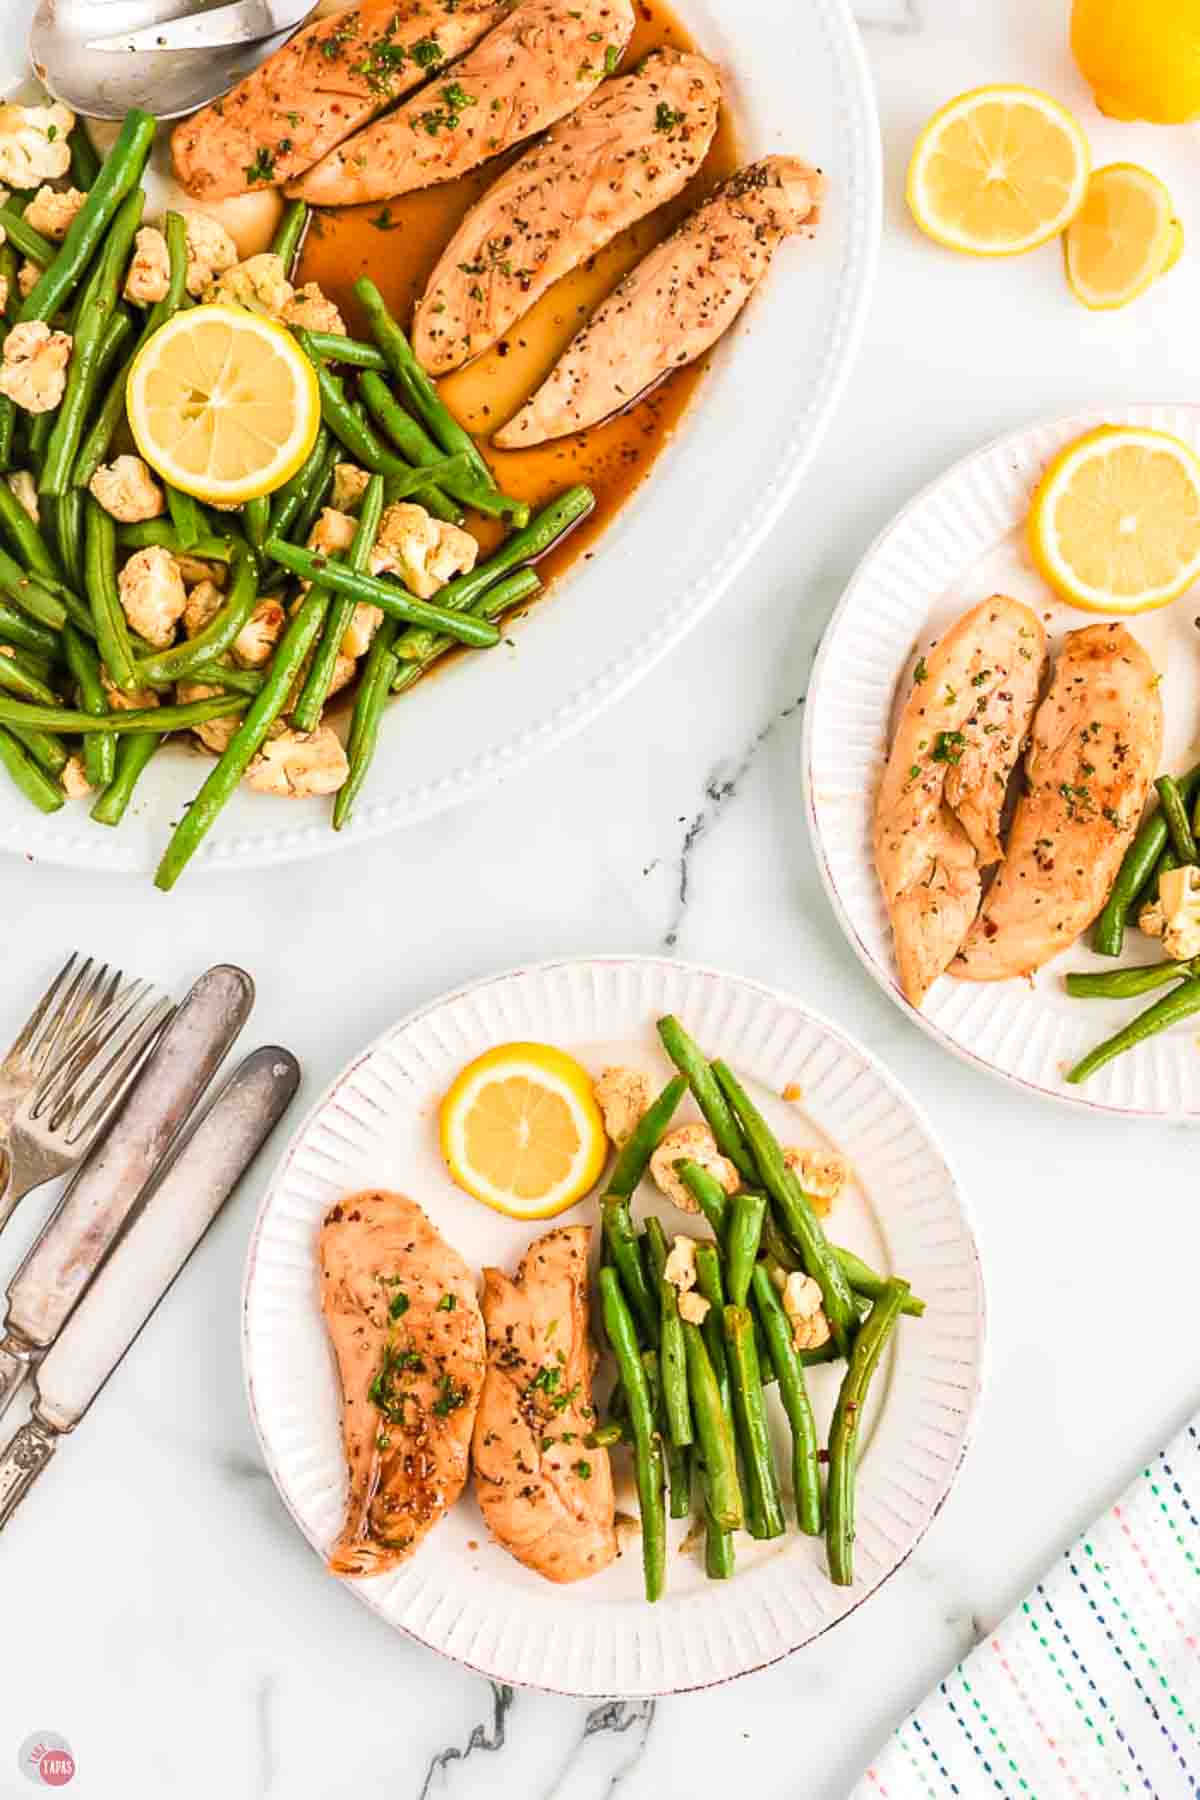
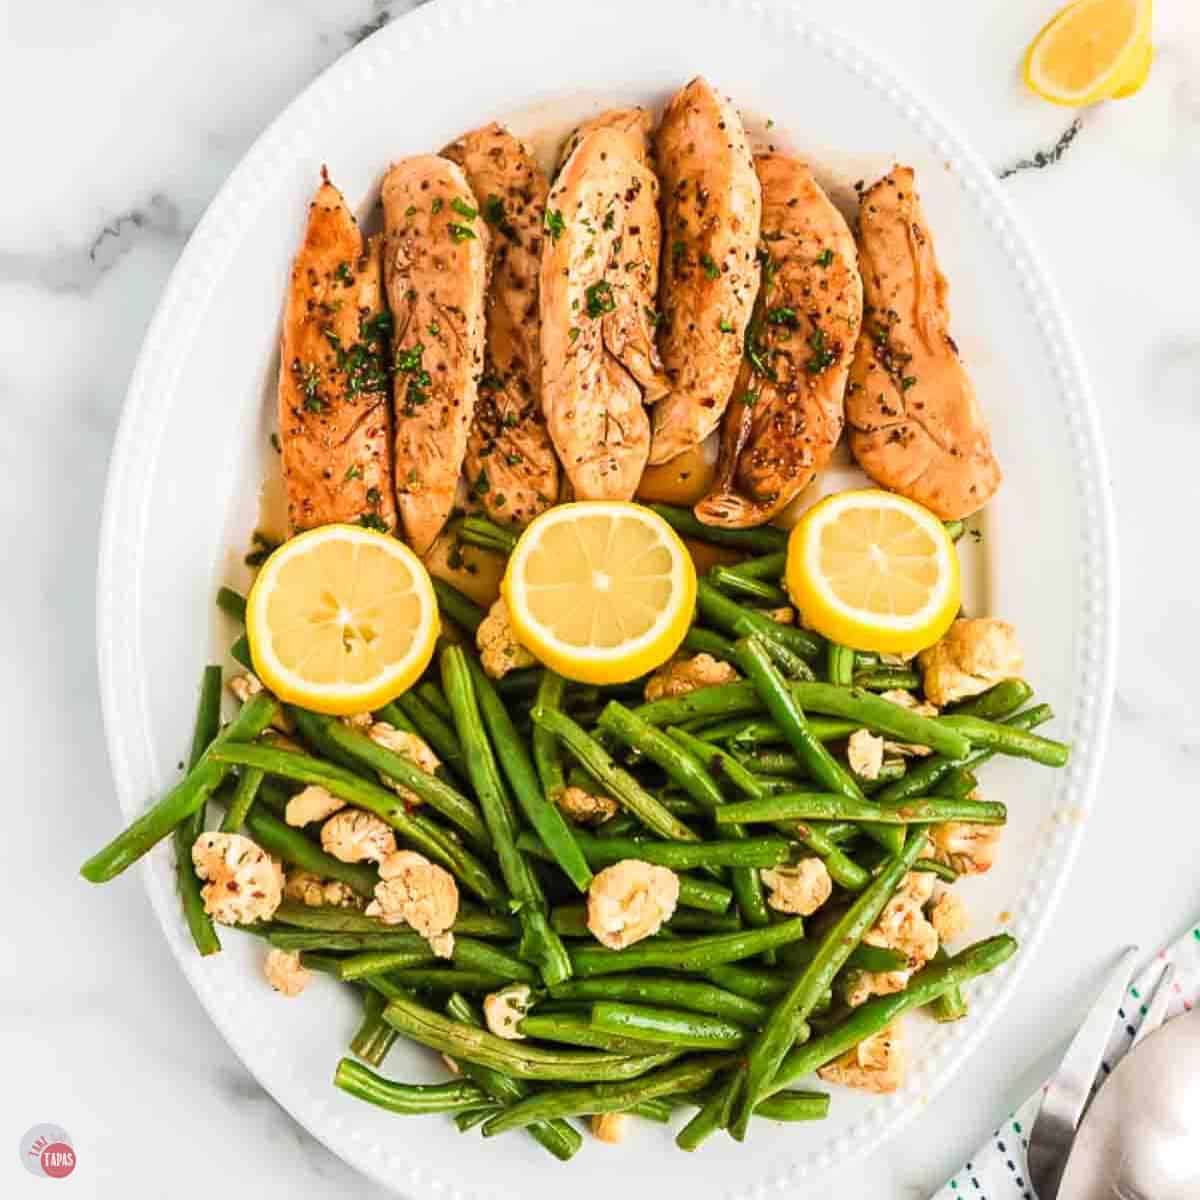
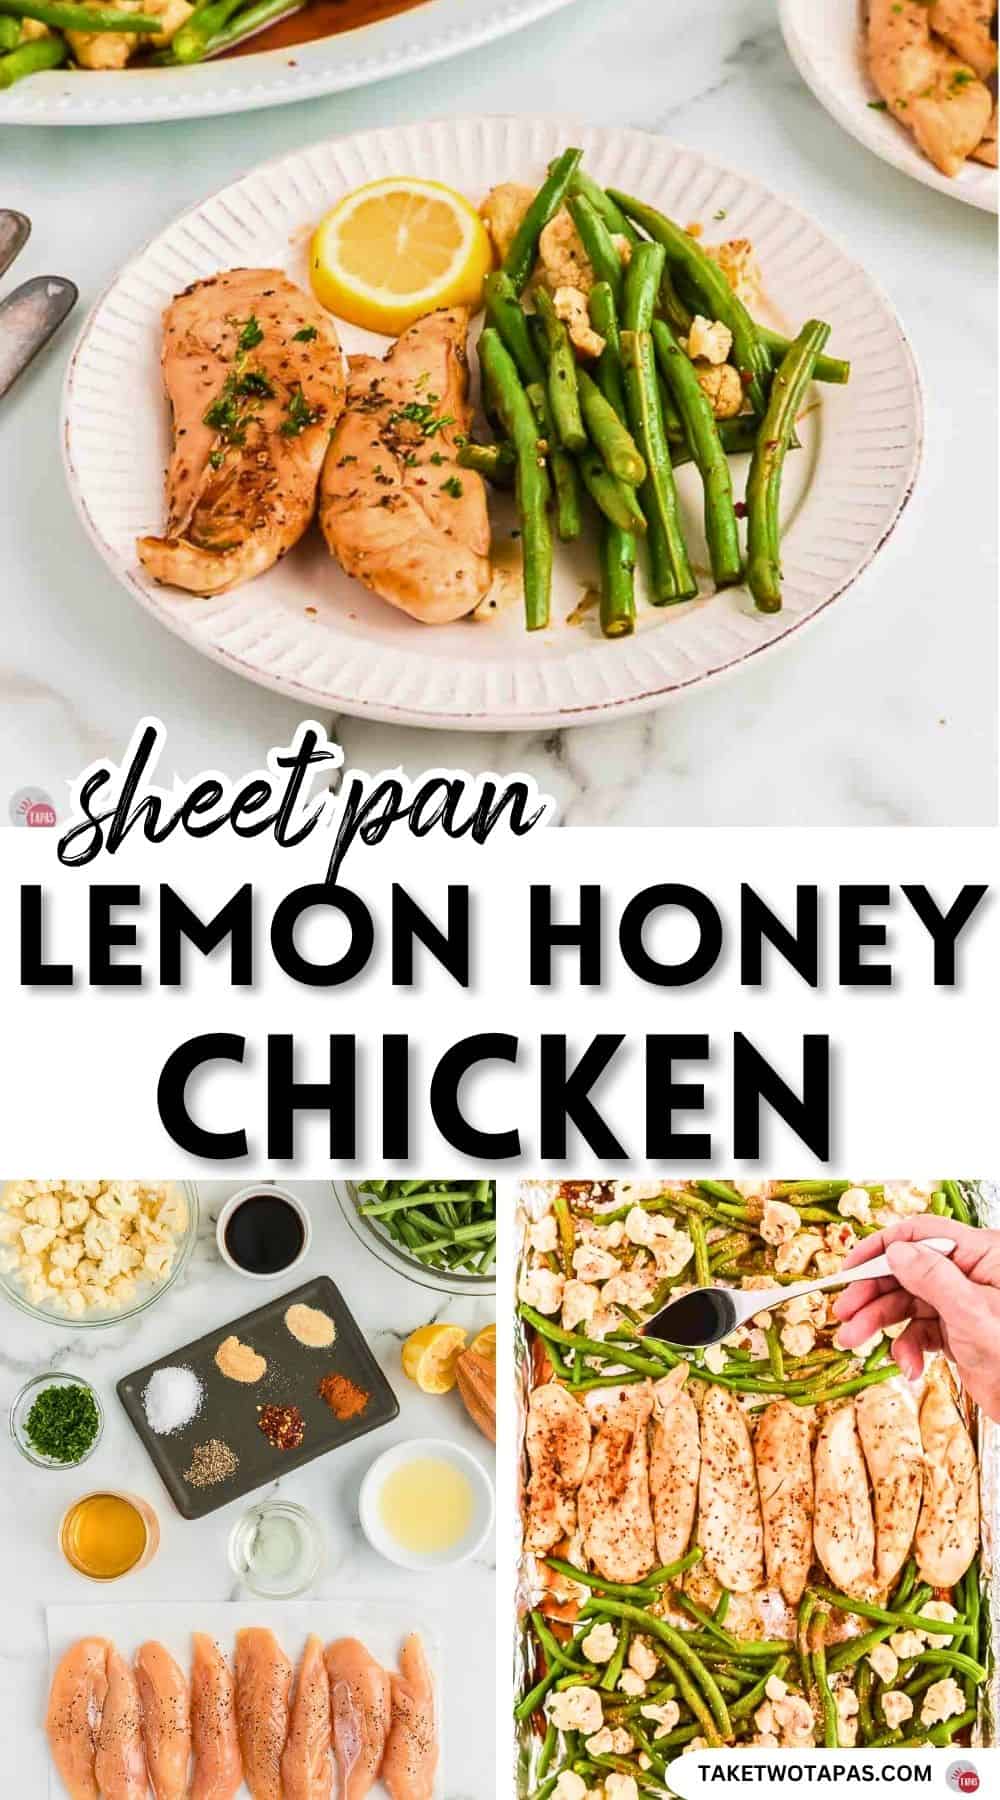
This sheet pan honey lemon chicken is a complete one-pan dinner with juicy seasoned chicken, roasted cauliflower, and green beans in a sweet and tangy honey lemon sauce. Ready in 30 minutes at 400°F, it feeds 4 people with minimal prep and only one pan to clean. The chicken bakes alongside the vegetables so everything finishes at the same time. Perfect for busy weeknights, meal prep, or when you want a healthy dinner without a sink full of dishes.
Sheet pan dinners are my best friend on weeknights when I am too tired to make anything fancy or complicated. With just a little prep, everything cooks together on one pan so there’s minimal cleanup and maximum flavor.
I have a sheet pan Greek chicken, a sheet pan sweet and sour chicken, and a sheet pan steak fajitas that I make on repeat!
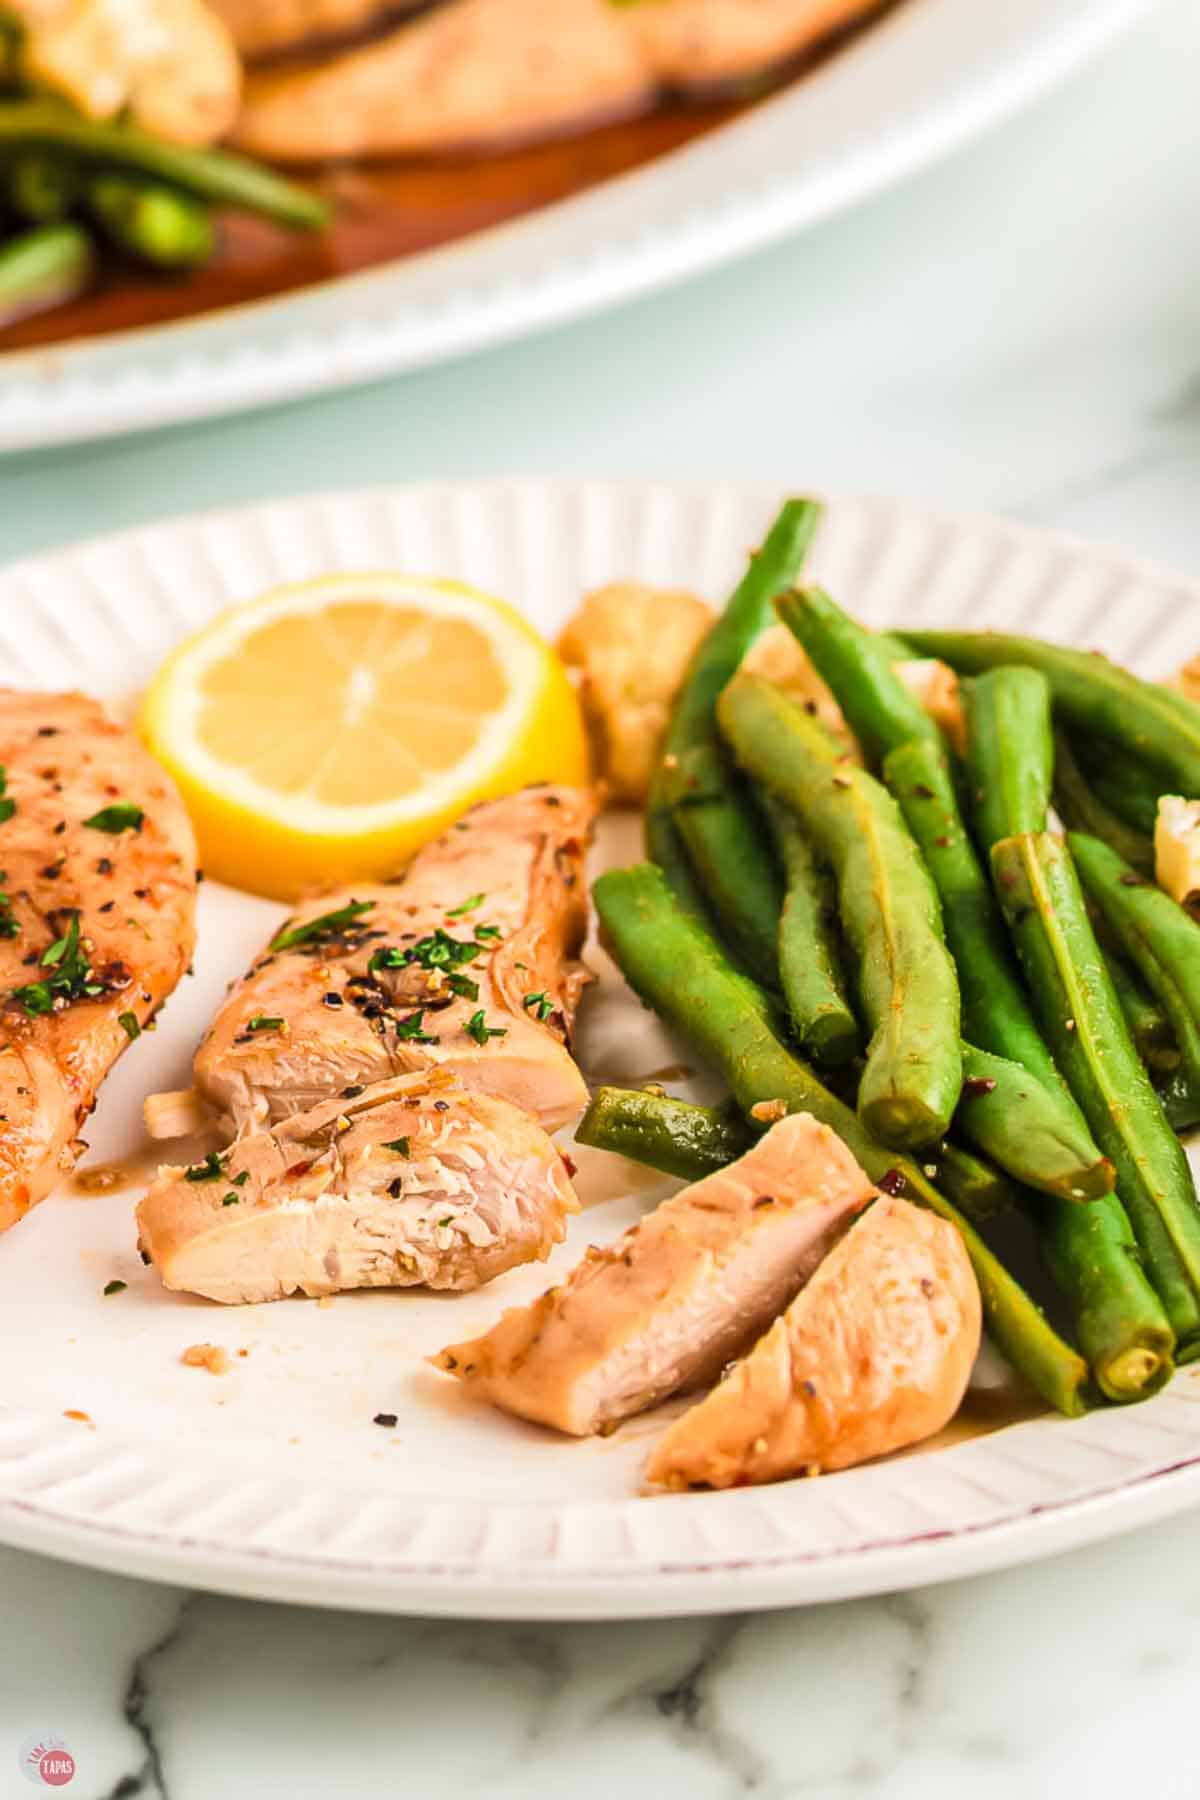
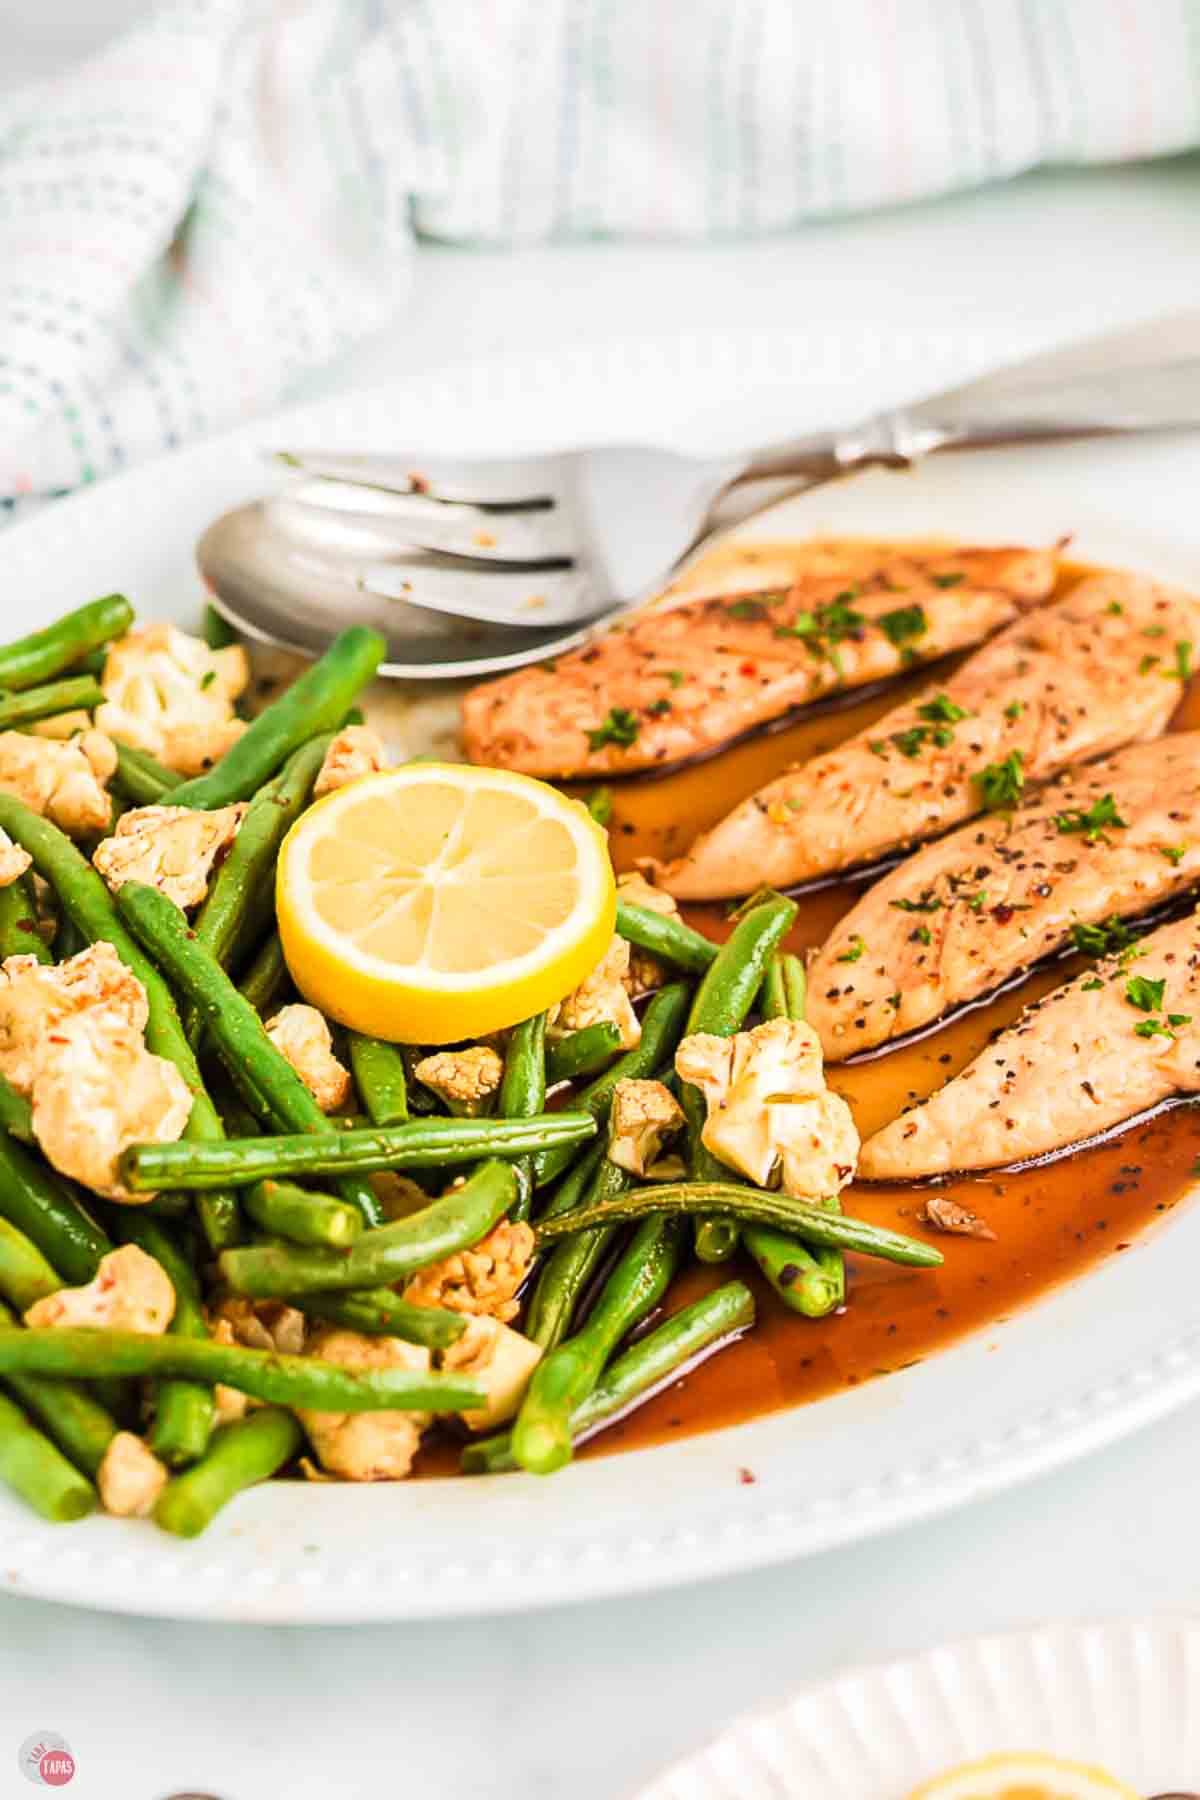
This honey lemon chicken combines juicy seasoned chicken tenders with roasted cauliflower and green beans, all drizzled with a sweet and tangy honey lemon sauce.
The vegetables get perfectly crisp-tender while the chicken stays juicy and the whole thing takes 30 minutes from start to finish! Same with this sweet and sour chicken, and this greek
If you are not a fan of vegetables I have here, swap them for your favorites! Sheet pan meals are algo great for meal prep. I double the recipe and then portion everything out into individual containers and I have lunches all week!
Serve everything over some white rice or mashed potatoes to soak up all that lemony sauce.
This post may contain affiliate links. As an Amazon Associate, I earn from qualifying purchases at no additional cost to you. Read my disclosure policy.

See recipe card for complete information on ingredients and their quantities.
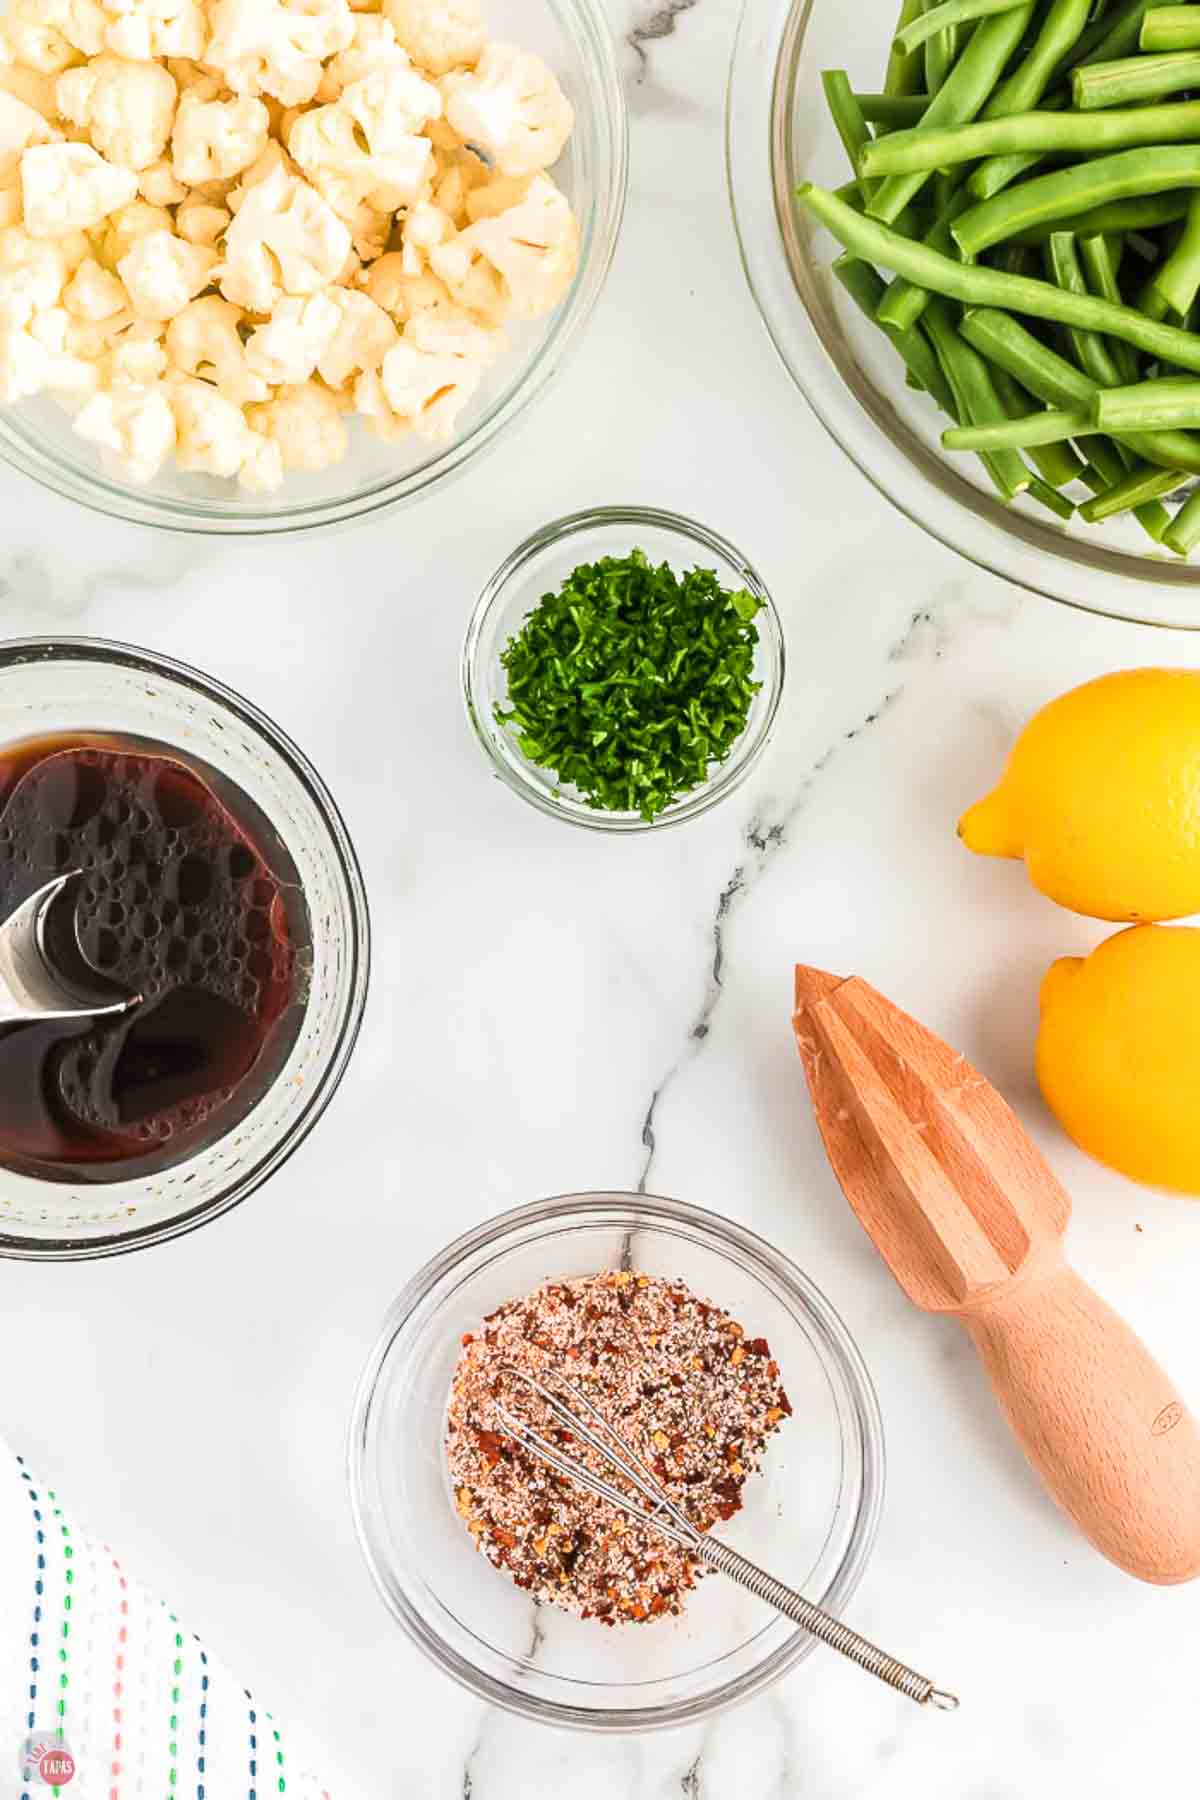
Ingredient Notes
- Chicken – To keep things easy, I use chicken tenders, but you can also use chicken breasts or chicken thighs. Just be sure to use boneless, skinless, and trim them into smaller pieces so they cook quick.
- Vegetables – For this recipe I use green beans and cauliflower florets. Substitute others like baby carrots, potatoes, or Brussels sprouts. Be sure to cut them into smaller pieces too.
- Sauce – A quick combination of fresh lemon juice, olive oil, soy sauce, and honey.
- Spices – Paprika, garlic powder, onion powder, crushed red pepper flakes. You can also use a chicken seasoning or a chicken marinade.
For more insider tips, tricks, and a behind the scenes look, follow me on Pinterest, Facebook, Instagram, & X.
How To Make Sheet Pan Honey Lemon Chicken
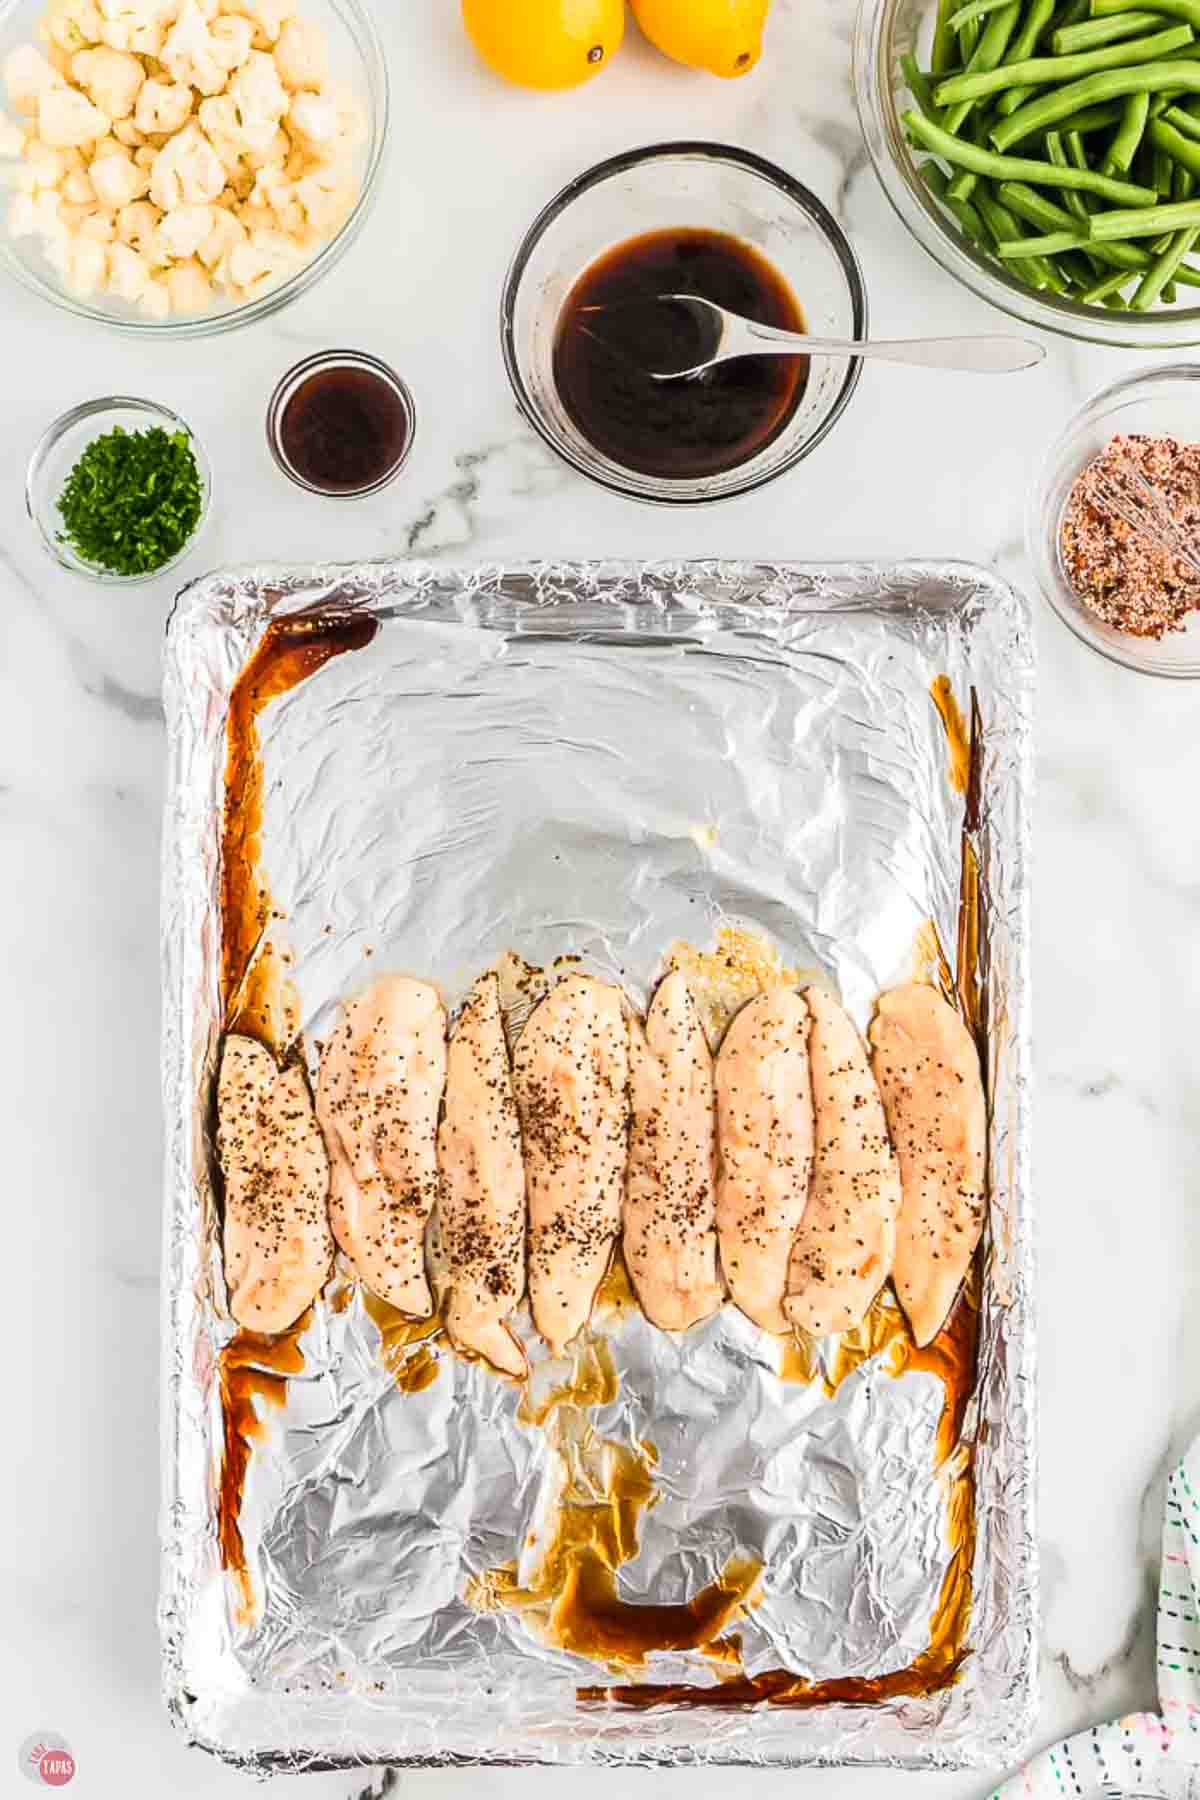
- Preheat the oven to 400F. Cover a baking sheet with foil or spray with non-stick spray. Add the chicken and sprinkle with salt and pepper. Mix the sauce and drizzle 1/3 of it over the chicken.
- Bake the chicken for 10 minutes. Remove and flip the chicken over.
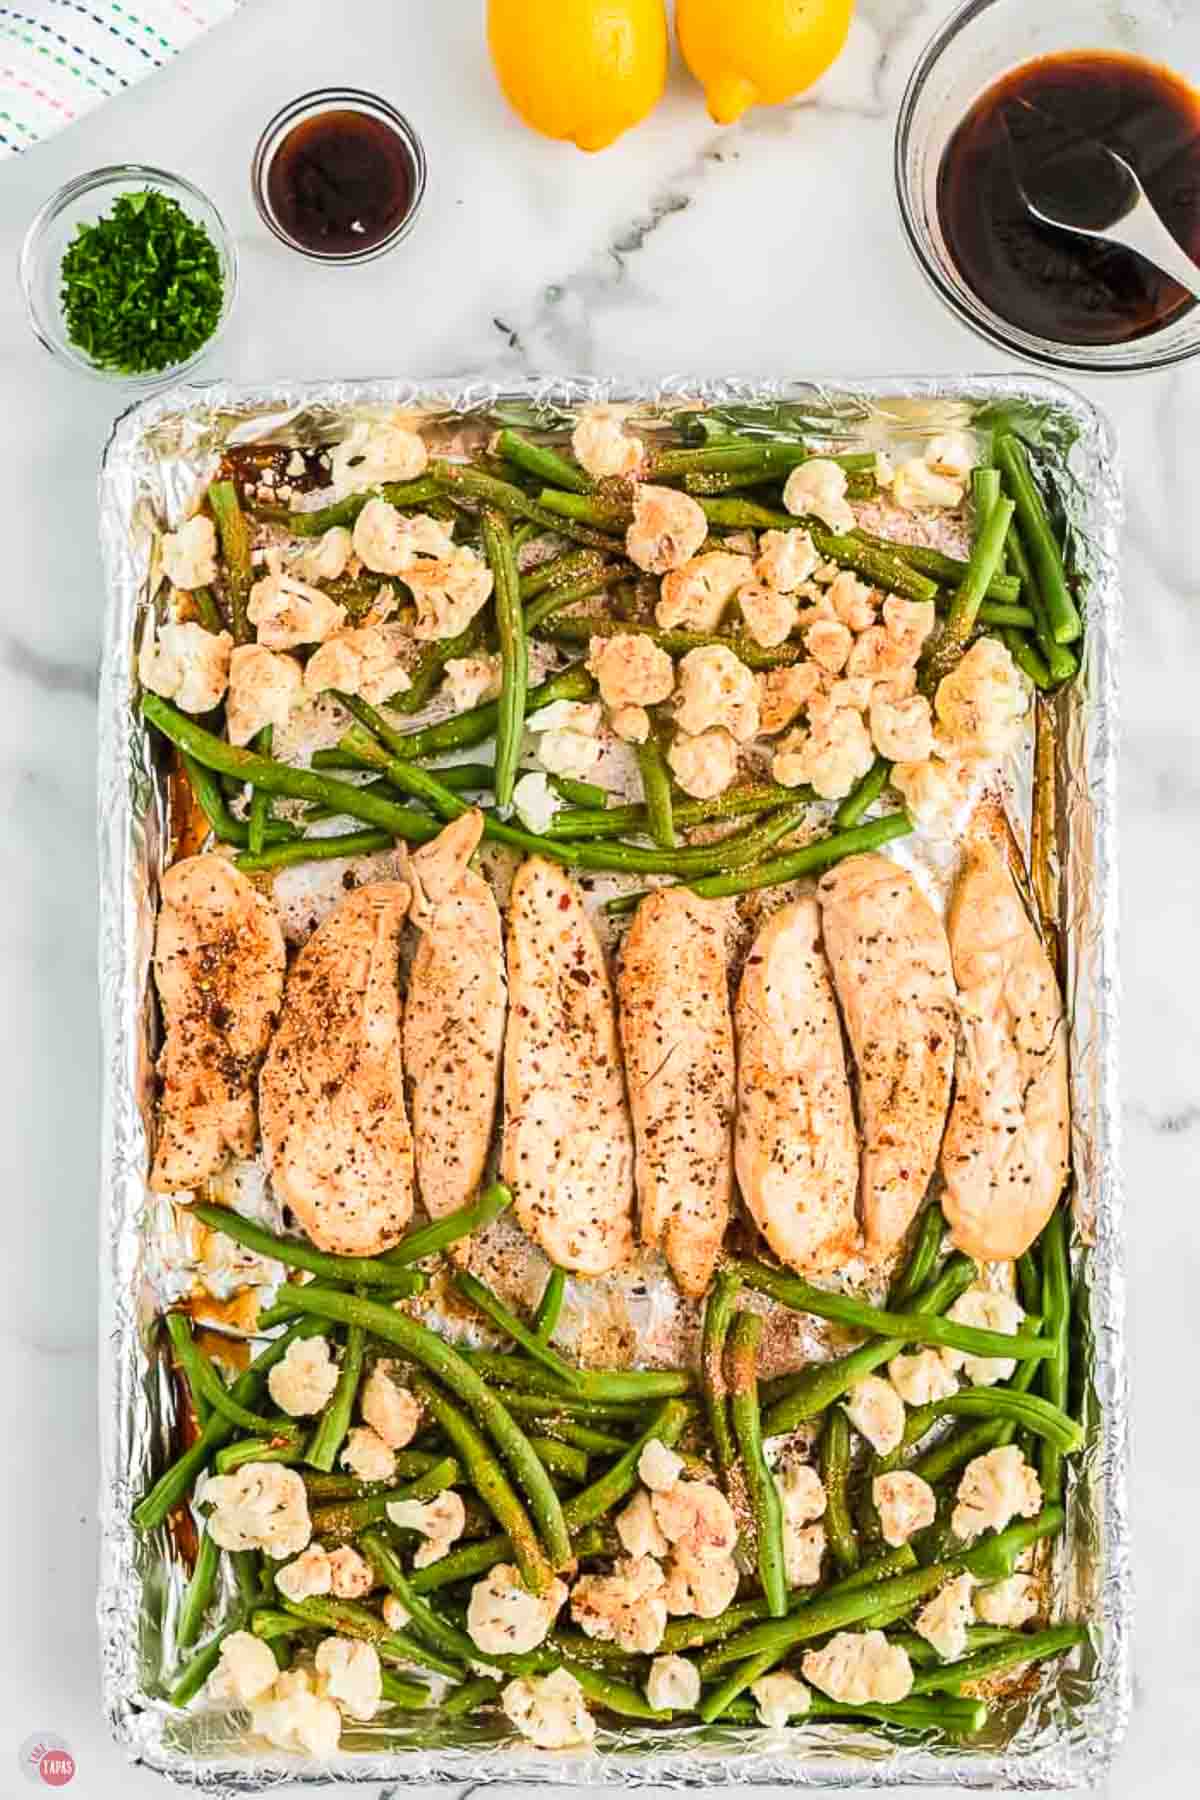
- Add the vegetables to the pan and season everything with spice mix. Drizzle with 1/3 of the sauce. Return the pan to the oven and bake for another 10 – 15 minutes or until the chicken has reached 165F. If the veggies are done but the chicken is not, you can transfer the veggies to a bowl and return the chicken back to the oven until finished cooking.
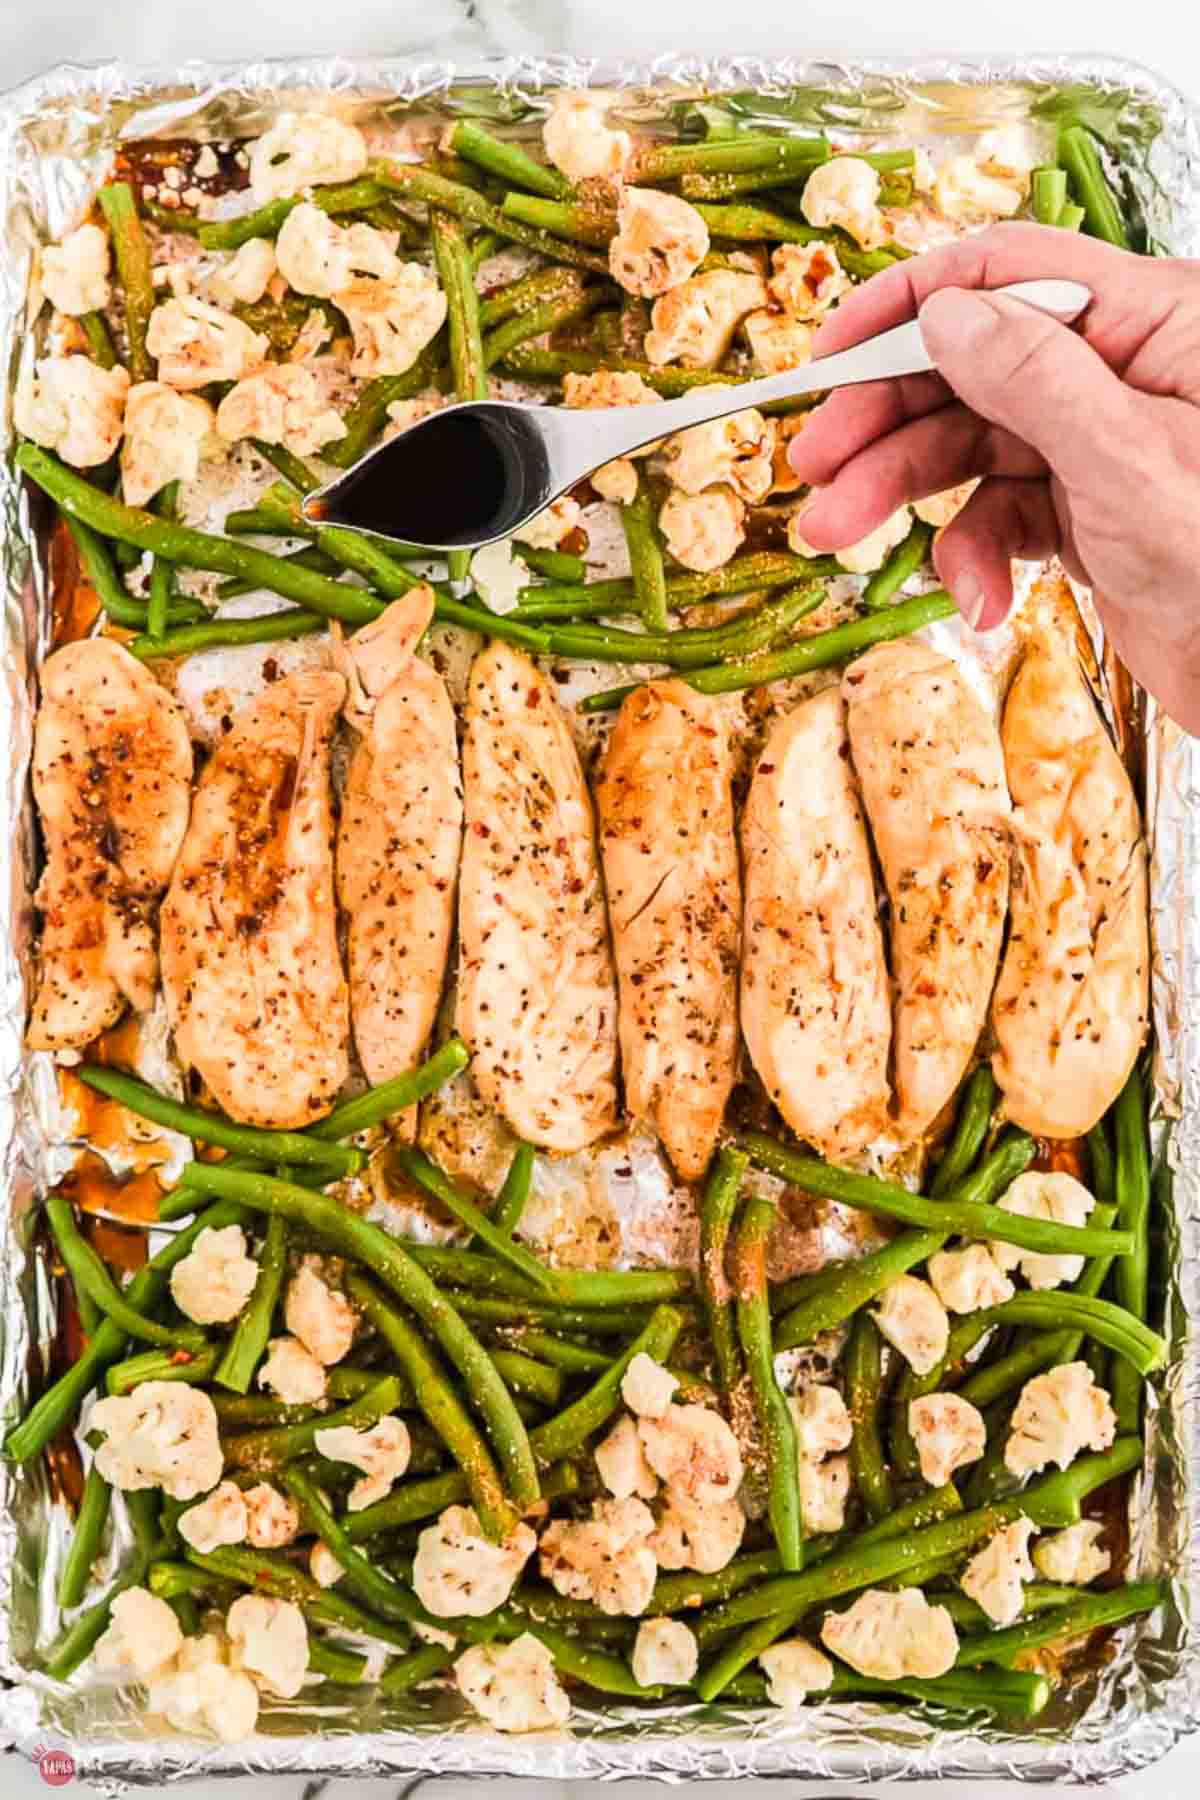
- Drizzle the chicken with remaining lemon sauce and turn the oven to broil. Broil for 2-3 minutes (watching carefully) until the chicken is a golden brown color. Remove the chicken from the oven and let rest for 5 minutes.
For the full recipe and detailed instructions, please refer to the recipe card at the bottom of the post.
Storage & Reheating
Refrigerator: Store any leftovers in airtight containers for up to 3 days.
Freezer: Freeze cooled chicken and vegetables in freezer-safe containers for up to 3 months. Thaw overnight in the refrigerator before reheating. The vegetables might get a little soft but they will still taste yummy!
Reheating: To keep the vegetables from getting too mushy, I like to heat mine in a 350°F oven for 10-15 minutes. You can also microwave individual portions for 1-2 minutes but the texture won’t be as good. Chop everything up and heat it in a skillet over medium high heat and you’ll get some crispy edges on the chicken!
Meal Prep: This recipe is perfect for making lunches and dinners ahead of time! Portion into individual containers and refrigerate for up to 3 days.
Make-Ahead: Season and marinate the chicken for up to 2 days in advance. Clean and chop the vegetables and store separately. When ready to cook, toss everything on the sheet pan and bake. I love to do this on a Sunday and then cook everything later in the week.
Variations
- Use chicken breasts, chicken cutlets, or boneless, skinless chicken thighs
- Swap out the green beans for broccoli or Brussels sprouts
- Change the cauliflower for cabbage wedges or baby potatoes
More Sheet Pan Dinners
- Honey Mustard Pork Chops – Tangy-sweet with roasted vegetables
- Sausage, Peppers, and Onions – Italian sausage, colorful peppers
- Steak Fajitas – Sizzling Tex-Mex with charred peppers
- Greek Chicken and Vegetables – Yummy Mediterranean flavors
Frequently Asked Questions
You sure can! Just adjust the cooking time. Whole breasts and thighs need a little bit longer. Check with a cooking thermometer.
You can season and marinate the chicken for up to 2 days in advance. Clean and chop the vegetables and store them separately in the refrigerator. When ready to cook, arrange everything on the sheet pan and bake like usual.
Any hearty vegetable that you normally roast will work. Try broccoli, Brussels sprouts, bell peppers, zucchini, yellow squash, asparagus, or cherry tomatoes. Cut everything into similar sizes so it all cooks evenly.
Use chicken thighs instead of breasts since they stay juicier at high temperatures. Don’t overcook the chicken. Pull it from the oven as soon as it reaches 165°F. Letting it rest for 5 minutes before serving also helps redistribute the juices.
Yes, but you’ll need two sheet pans. You need to keep everything in a single layer so it cooks evenly. Crowding the pan causes the vegetables to steam instead of roast which can make them soggy. Bake both pans at the same time, rotating halfway through.
No! Everything cooks in a single layer so you don’t have to flip anything. The high heat roasts everything evenly from all sides. Flipping just creates extra work and lets heat escape from the oven.
Use a large baking sheet (13×18 inches) with a rim on it. The rim keeps the juices from running off and falling on the bottom of the oven. If you don’t have one that large, you can split it between two smaller pans.
Recipe Tips & Tricks
- Line your sheet pan with foil for easy cleanup. Once dinner is done, just let it cool, ball up the foil, and toss it. No scrubbing required!
- Arrange everything in a single layer without overlapping. Crowded pans steam instead of roast which makes soggy vegetables and rubbery chicken.
- Cut vegetables into similar sizes so everything finishes cooking at the same time.
- Pat the chicken dry before adding the seasoning. Moisture prevents proper browning and crispy edges.
- Don’t skip the second drizzle of honey lemon sauce after baking. This adds more flavor and adds a glossy, shine to everything!
- Start checking the chicken at 20 minutes if using smaller thighs or thin chicken breasts. They cook faster than thick pieces.
- Add a few lemon slices to the pan for more lemon flavor!
This baked honey lemon chicken recipe is great for meal prep or making an easy dinner during the week. Better than your usual boring baked chicken!
If you love this recipe as much as I do, please leave us a ⭐️⭐️⭐️⭐️⭐️ five-star review in the comment section below. Thanks!
Honey Lemon Chicken Recipe
Ingredients
- 8-10 chicken tenders or 4 chicken breasts sliced horizontally
- 1 cup cauliflower florets
- 1 pound green beans ends trimmed
- Parsley for garnish
Honey Lemon Sauce
- 2 tablespoons soy sauce
- juice of 1 lemon
- ⅓ cup honey
- 2 teaspoons olive oil
Spice Mix
- 1 ½ teaspoons salt
- ½ teaspoon garlic powder
- ½ teaspoon onion powder
- ½ teaspoon black pepper
- ½ teaspoon crushed red pepper flakes
- ½ teaspoon paprika
Instructions
- Preheat the oven to 400ºF. Spray a large sturdy baking sheet with cooking spray or line with parchment paper or aluminum foil.
- Place the chicken on a prepared baking sheet. Season with salt and black pepper to taste.
- In a small bowl, combine soy sauce, lemon juice, honey, and olive oil. Whisk to combine. Drizzle 1/3 of the lemon sauce over the chicken.
- Place chicken in the oven and bake for 10 minutes. Meanwhile, combine the seasonings in a small bowl and set aside.
- After 10 minutes, remove the baking pan from the oven, flip the chicken and place the green beans and cauliflower around the sides of the chicken.
- Sprinkle the chicken and vegetables with seasonings and drizzle 1/3 of the lemon sauce over the vegetables and some more on the chicken.
- Return the oven back to the pan and bake for another 10-15 minutes, or once the chicken is cooked through and has reached an internal temperature of 165ºF. If the veggies are done but the chicken is not, you can remove the veggies to a bowl and return the chicken back to the oven until finished cooking.
- Drizzle the chicken with remaining lemon sauce and turn the oven to broil. Broil for 2-3 minutes (watching carefully) until the chicken is a golden brown color.
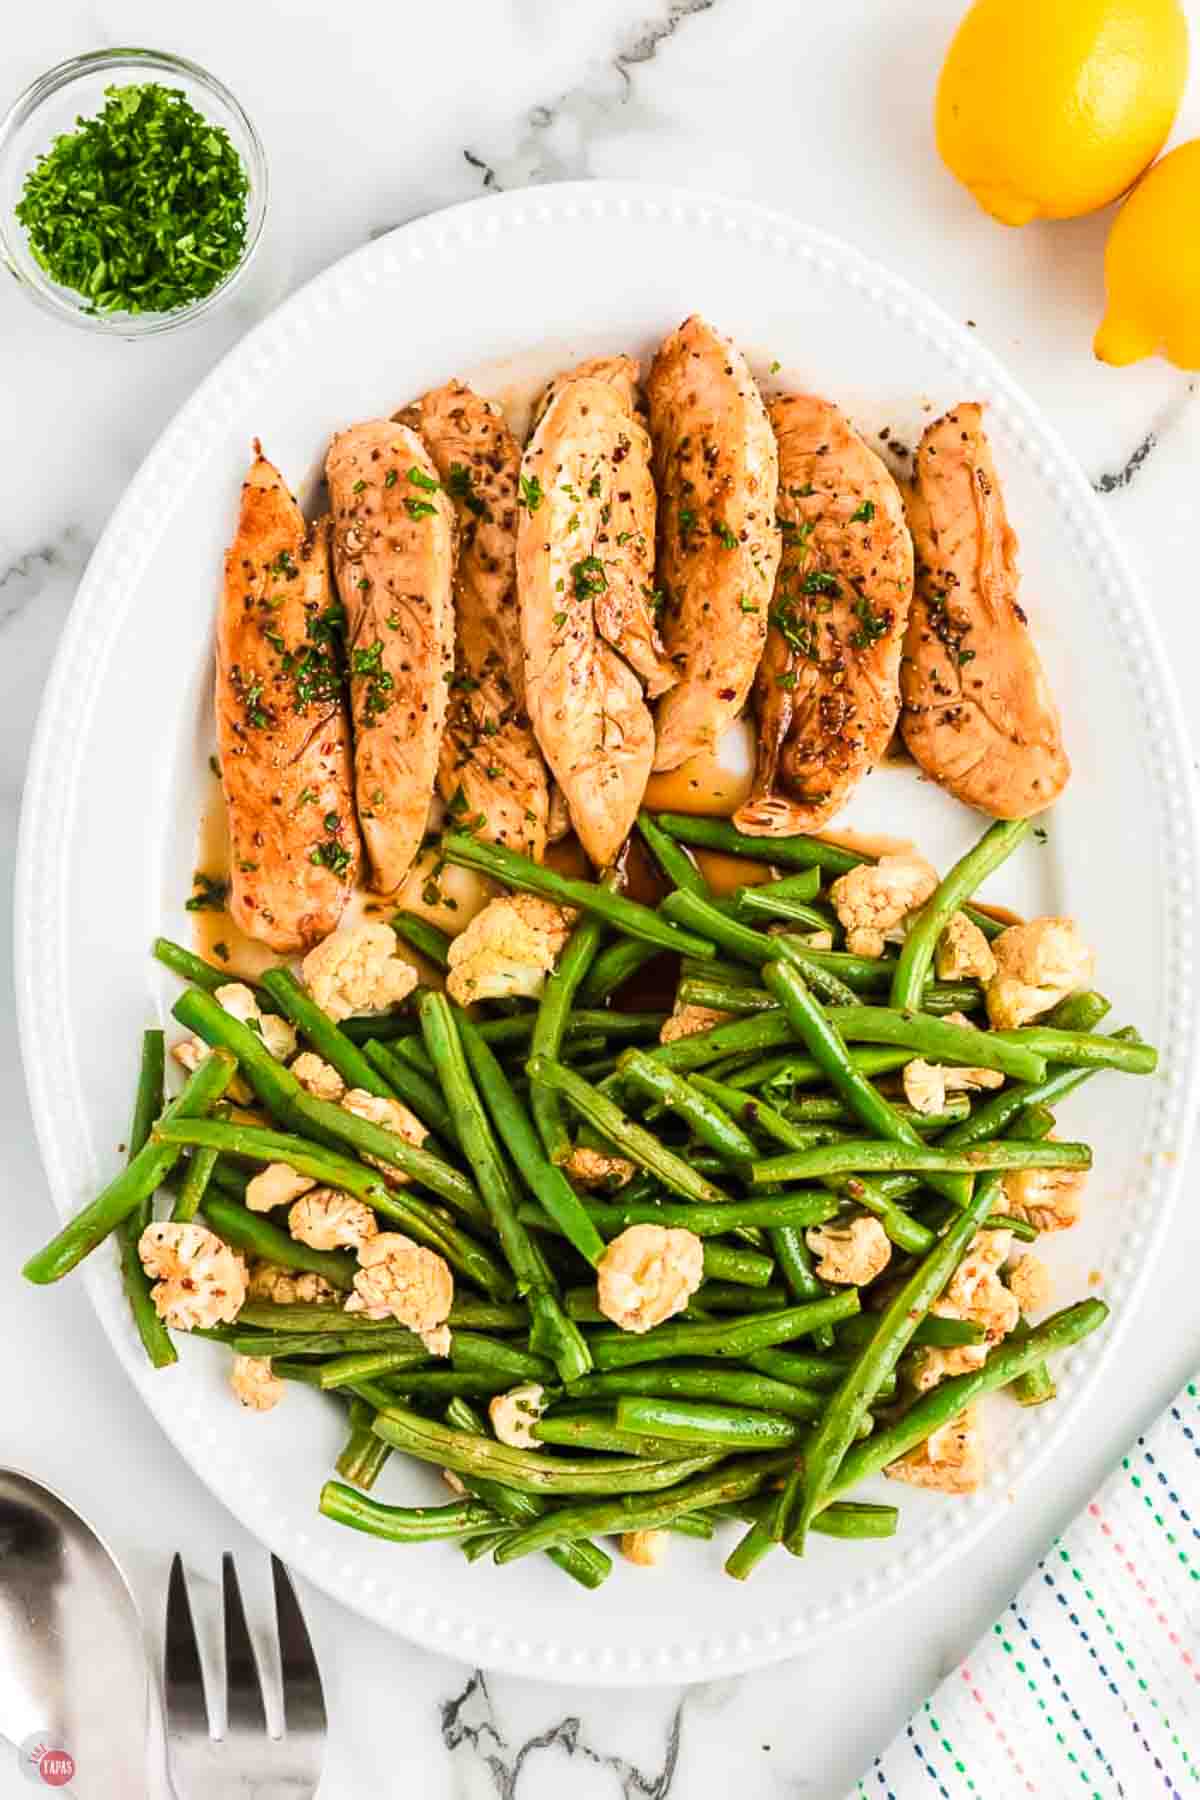
- Remove the chicken from the oven and let rest for 5 minutes.
- Sprinkle with chopped parsley if desired and serve warm. Enjoy!
Notes
- Line your sheet pan with foil for easy cleanup. Once dinner is done, just let it cool, ball up the foil, and toss it. No scrubbing required!
- Arrange everything in a single layer without overlapping. Crowded pans steam instead of roast which makes soggy vegetables and rubbery chicken.
- Cut vegetables into similar sizes so everything finishes cooking at the same time.
- Pat the chicken dry before adding the seasoning. Moisture prevents proper browning and crispy edges.
- Don’t skip the second drizzle of honey lemon sauce after baking. This adds more flavor and adds a glossy, shine to everything!
- Start checking the chicken at 20 minutes if using smaller thighs or thin chicken breasts. They cook faster than thick pieces.
- Add a few lemon slices to the pan for more lemon flavor!
Nutrition
©TakeTwoTapas.com. Content and photographs are copyright protected. Sharing of this recipe is both encouraged and appreciated. Copying and/or pasting full recipes to any social media is strictly prohibited.