The Complete Guide to Perfect Deviled Eggs
Do you love deviled eggs? Do you have trouble getting the eggs cooked perfectly? Are your hard-boiled eggs hard to peel? Are you against mayonnaise in your deviled egg mixture?
Here is a complete guide to making the easiest, best tasting, and perfect deviled eggs for your gathering!
Tips & Tricks for Perfect Hard Boiled Eggs
If you are still searching for the perfect way to boil or cook your eggs to get the perfect hard boiled eggs for topping a salad, a healthy snacking option, a portable breakfast, and most importantly, perfect deviled eggs!
Before we start talking about how to cook the eggs and for how long, let’s first talk about the eggs themselves.
Does it matter if the eggs are brown, white, medium, large, extra large, cold, room temperature, freshly laid, or weeks old? Read on to see the answers!
How to Pick the Perfect Eggs
The Age of the Eggs
What eggs are the best eggs to use for making deviled eggs? The age of the eggs only matters if you are using eggs that were just laid or you are plucking the eggs from the coop within a few days.
Most likely you are not harvesting your own eggs from your farm but buying them from the store. If you are like me and grabbing your neatly packaged dozen while grocery shopping, the eggs are most likely at least two weeks old so no extra aging is necessary. Older eggs are ok, fresh eggs are not the best for hard boiling!
Cold or Room Temperature Eggs
The starting temperature of the egg doesn’t really mater. You don’t need to bring your eggs to room temperature before boiling them so I wouldn’t stress about it. If you are doing a “cold start” boil, the eggs will warm up as the water heats up.
If you are doing a “hot start” and placing your eggs directly in boiling water, they will also heat up so feel free to add them straight from your fridge to the water without waiting.
Brown or White Eggs
In case you are wondering if brown eggs boil differently than white eggs, there is no difference. The color only affects the color of the shell and not the color or chemical makeup of the inside of the egg.
Personally I prefer organic, free range eggs because I think they taste better and the yolks tend to be a deeper yellow color, but this doesn’t affect the cooking. Now that we have chosen our eggs, let’s get them cooked already!
Ways to Hard Cook Eggs
Despite being called hard boiled eggs, you can cook eggs without actually boiling them. Here is a list of ways to hard cook your eggs!
- steam in an instant pot
- steam on the stove top
- boil on the stove top
- bake in the oven in a muffin pan or on a damp towel
- cook them in the microwave in an egg cooker
- cook them in a microwave in a bowl of water
- hard boil in a countertop electric egg cooker
Of all these methods, the instant pot and the old school stovetop boiling produce the best, most reliable, most consistent results.
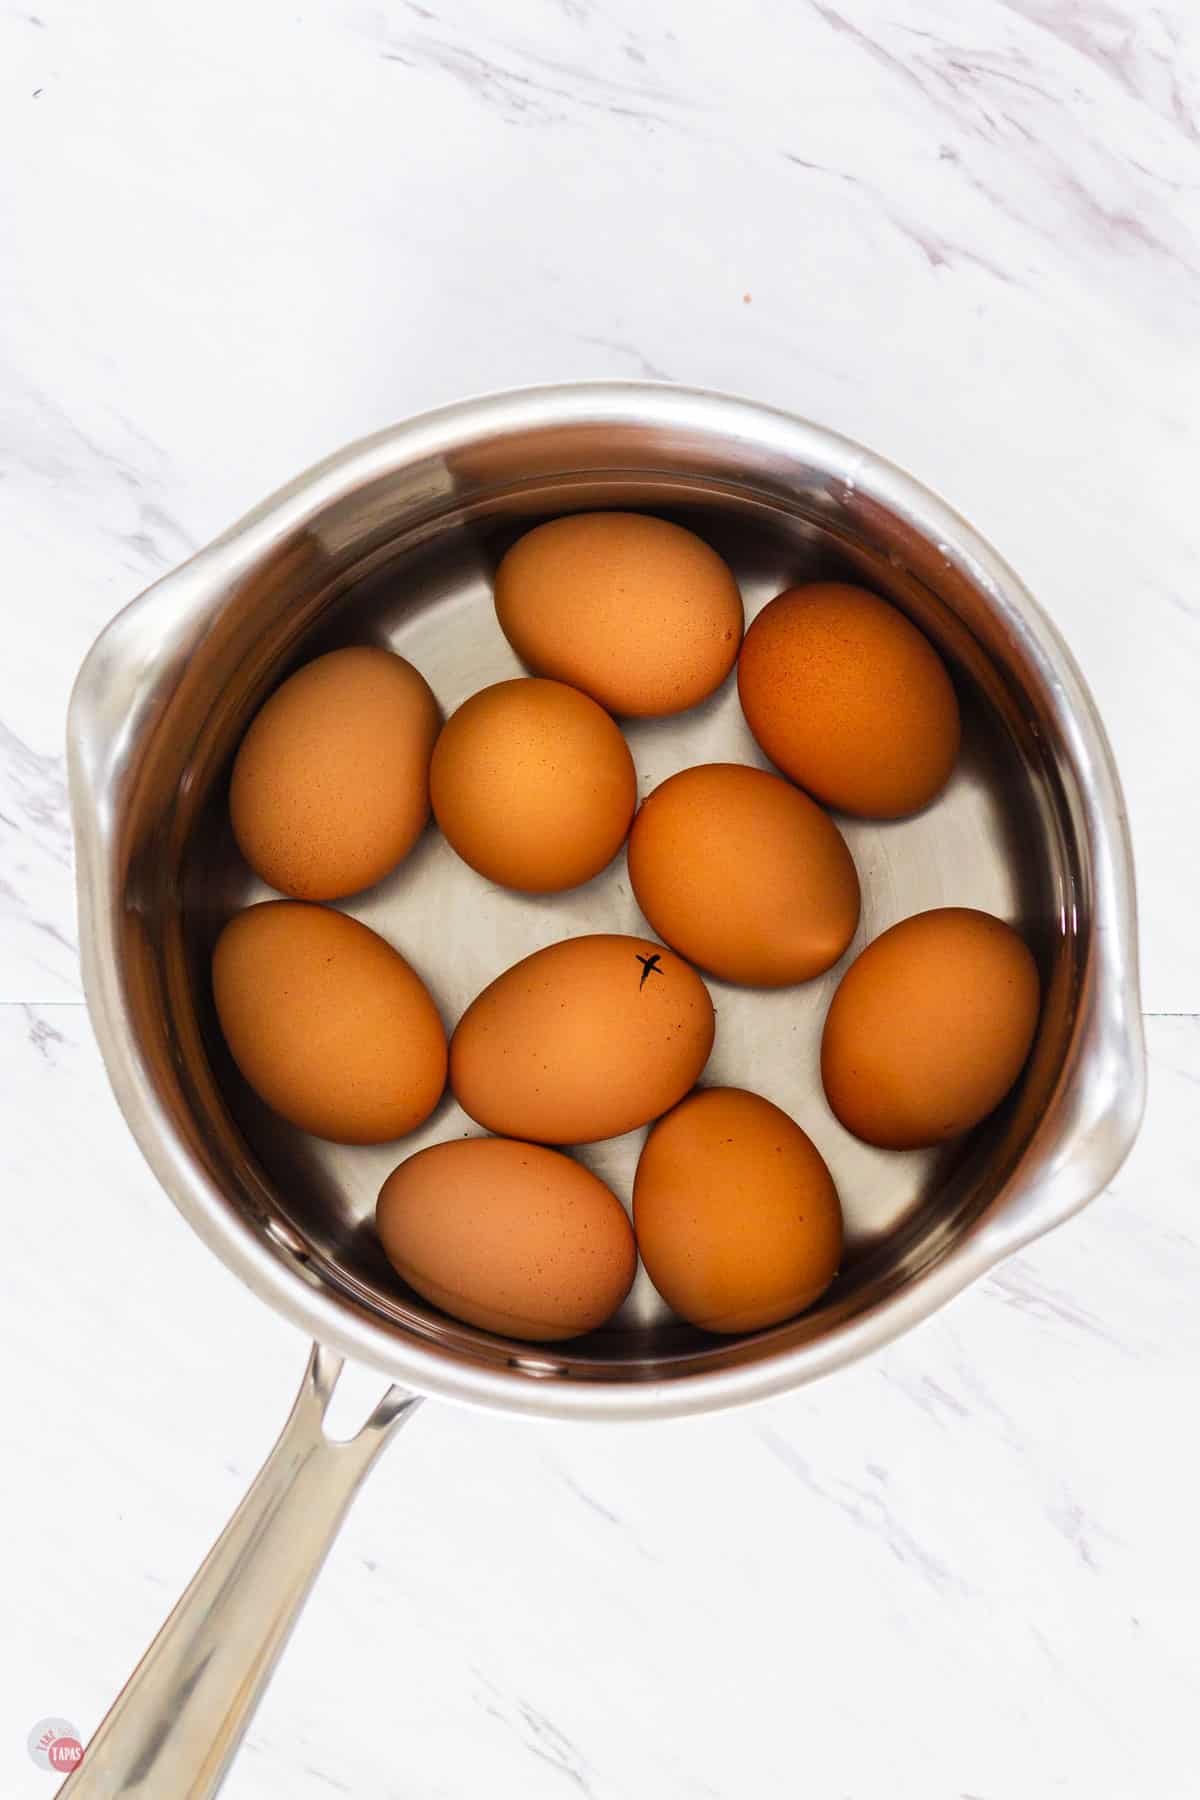
Stove Top Hard Boiling
Cold Start
- start with eggs covered by 1 inch of cold water
- bring to a boil
- boil for 30 seconds, cover, remove from heat
- let sit in water for 12 minutes
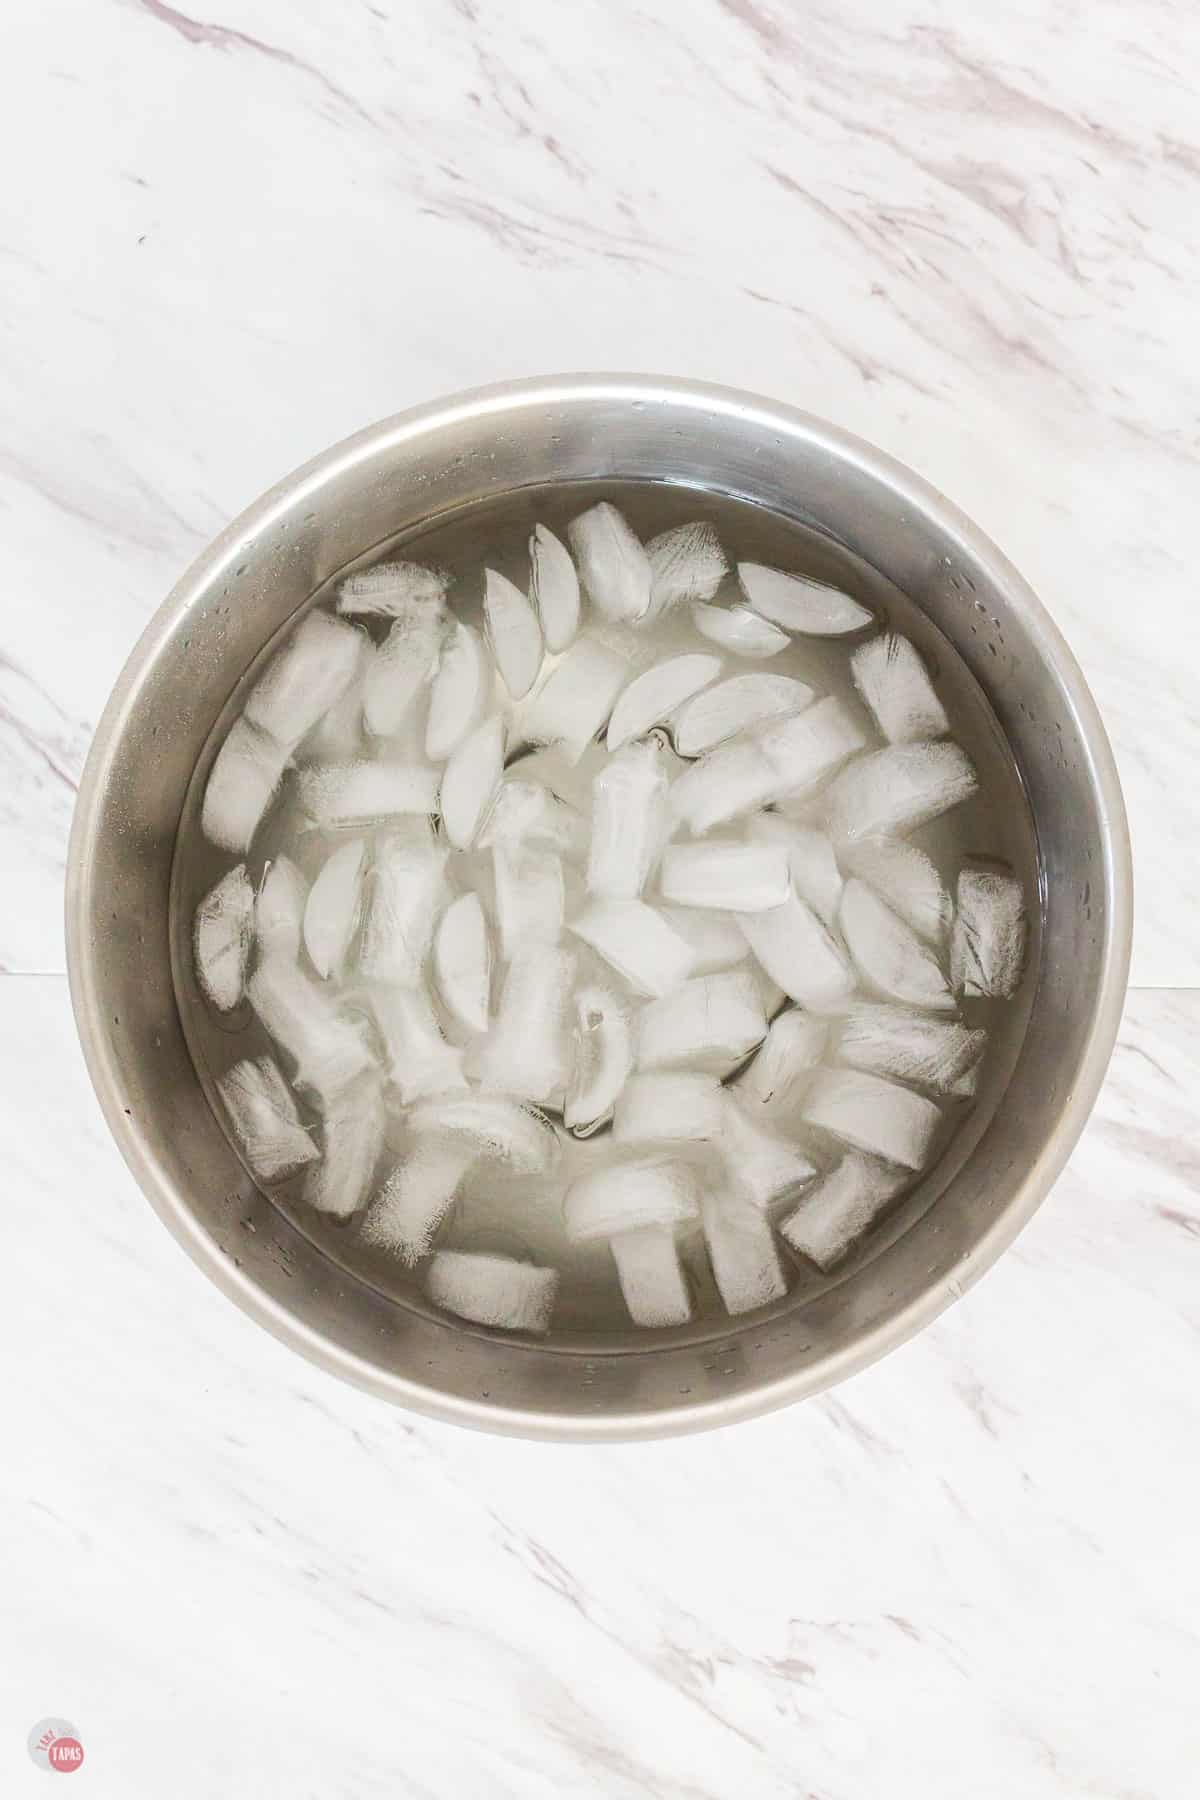
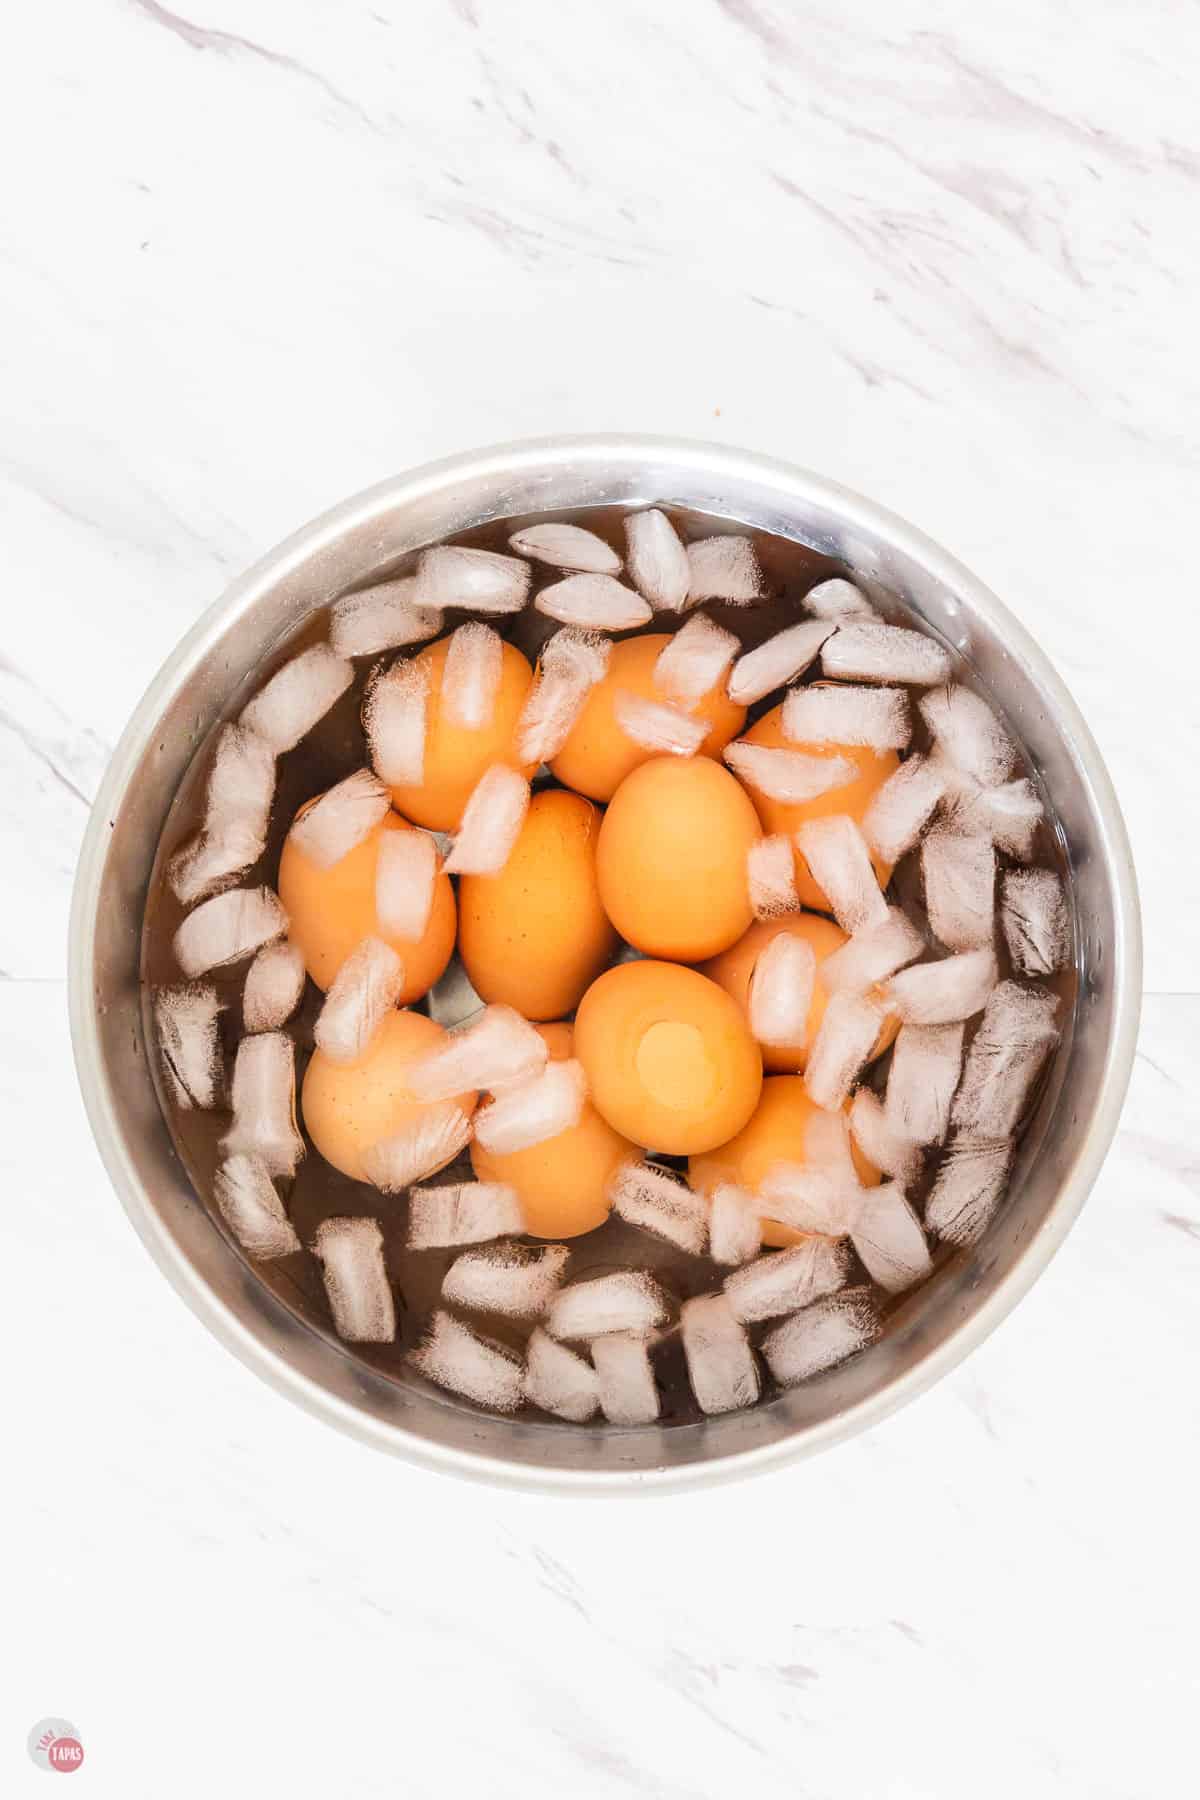
- remove with a slotted spoon to an ice bath
- chill for 15 minutes
- peel or store
This method seems to be the overall favorite of all the methods listed above.
There is some debate between a cold start, which is mentioned above, and a hot start.
Hot Start
- bring the water to a rolling boil
- add the eggs gently
- boil for 30 seconds, lower the heat to a simmer, and then cook for 14 minutes
- shock in an ice bath for 10 minutes
- store or peel
After reading trying out both methods, I had consistently better results with the hot start. Scientifically speaking, a hot start sets the outside of the white faster and keeps it from fusing to the membrane and shell like a cold start does.
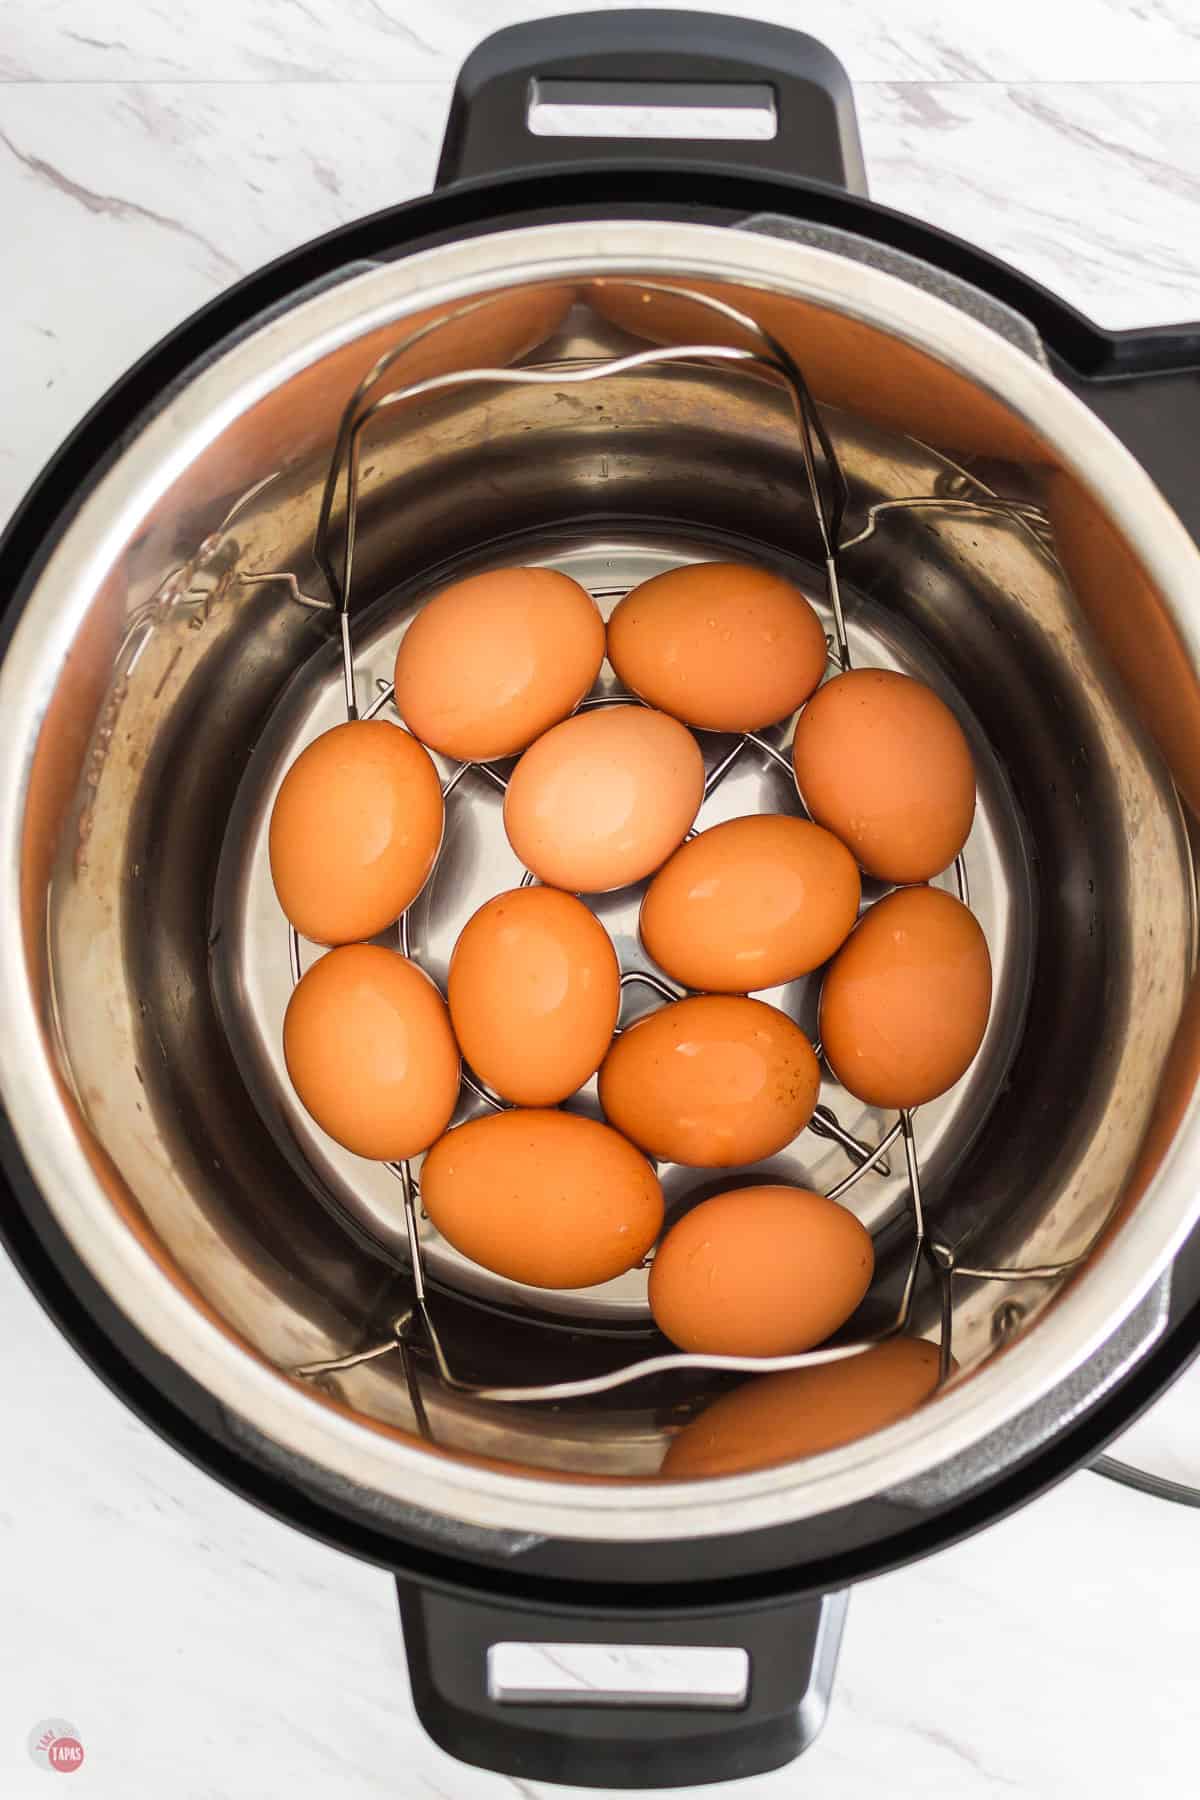
Instant Pot Hard Boiled Eggs
The instant pot (or pressure cooker) is all the rage and I have hard cooked eggs in mine. I followed a recipe, did a trial run with 3 eggs, and found it to be a good one.
But when I tried to repeat it with a full dozen eggs, they came out undercooked. I followed everything exactly so I can not say for sure that more eggs meant that I should have increased the cooking time.
- add 1 cup water to the Instant Pot
- use trivet or steamer basket
- place eggs in a single layer
- cook on high pressure 8-10 minutes
- vent
- shock in an ice bath for 10 minutes
- peel or store
I also found that it didn’t save me ANY time because it took some time for the IP to come up to pressure, then to actually cook the 8-10 minutes, waiting for the pressure to come down after venting, and then cooling time.
If I am trying not to heat up my house, or if I don’t have an empty burner on the stove top, I will use the IP method and do a dozen or two at once.
Microwaving Eggs
I think this goes without saying, but unless you have a microwave egg cooker, do not cook your eggs by just putting them in the microwave and pressing start. You will end up with extremely hot, extremely volatile, and extremely dangerous eggs.
- placing eggs in a microwave safe bowl and cover with water
- add 1/2 tablespoon salt for each egg
- cook on high for 6-8 minutes
- carefully remove eggs
- shock in ice bath
- peel or store
Oven Baked Eggs
If you have never heard of baking your eggs in the oven, you can do it. I have done it a time or two and it works for specific recipes like egg salad.
- place each egg in a muffin tin cavity or lay on a damp towel on the oven rack
- bake at 350F for 30 minutes
- shock in a bowl of ice water
- peel or store
This does cook the egg but has been known to cause brown “burn-like” spots on the egg whites which doesn’t make for pretty deviled eggs. You can try to reduce the appearance or occurrence of the brown spots by moving and turning the eggs every 10 minutes.
Now that you have picked your eggs, hard boiled them, and chilled them down, it is now time to peel them. This immediately causes me anxiety.
Are the eggs going to peel easily? Am I going have to fight with the shell thus leaving egg whites covered in divots and cuts? Are the yolks going to be green or the center under cooked?
If you have cooked your eggs with one of the tried and true methods above you should have nothing to worry about. I will admit that there are times when I do everything exactly right and the eggs don’t turn out like they should.
It happens. I just chuck it up to the moon’s cycle, karma doling out punishment for one of my past sins, or two bad things have happened already and this is an easy third to finish out the set.
Ready to peel?

Easy Ways to Peel Hard Boiled Eggs
Do I really need to tell you how to peel an egg? No, but I am going to share some tips and tricks to make it easier to perfectly peel them. If you have a way to peel cooked eggs that always works for you, or it’s the way your mom told you how to do it, do it that way!
If you need a new method of getting the shell off the whites in the least damaging way, try one of these methods.
- shake the eggs in a jar with a tiny bit of water
- peel under cold running water
- crack and roll under your hand
- use vinegar in the water while you are cooking them
- add 1/2 teaspoon of baking soda cooking water
- add 1/2 a lemon to the cooking water
- shake the eggs in the pot directly after cooking to crack the shells before chilling the eggs in an ice bath
Shake the Eggs
Find your trusty mason jar, or any jar with an air-tight lid, add a tablespoon or two of water, toss in a few eggs, close the jar, and give it a few shakes.
Don’t put too many eggs in the jar because you need to have room in the jar for the eggs to move, bang against the side of the jar and each other, for this to be effective.
A less messy way easier to peel eggs with surprising stress relief side effects. The down side being you can only do a few eggs at a time and the force needed to shake the shells off the egg is not that far away from the force needed to demolish the egg altogether.
Rolling between hands and a hard surface
Peeling Eggs under Running Water
This is my favorite method! I love having the mess of peeling eggs contained in my sink and not all over my countertop.
Start by tapping the egg all over to crack the shell as much as possible. Pop off a small piece and place under the running water. The water will run into the hole and if you have pierced the membrane between the egg and the shell, the water will basically lift the shell off the egg.
Some say to start with the bigger end of the egg because there is an air pocket there and if you get the water under the membrane in that area the shell comes off easier. You can be the judge of that.
Shaking the hot eggs in the pan
For this method, boil your eggs, and instead of plunging the eggs in an ice bath, drain the hot water out of the pan, shake the cooked eggs in the pan to crack the shells all over, then fill the pan up with ice water. Let the eggs chill for the usual time and then peel.
I have tried this method once and only once because I burned myself and didn’t seem worth the trouble. I find it easier to remove my eggs with a strainer/spoon/tongs and place them in an ice bath.
Being the klutz that I am, pouring hot water out of a pot while simultaneously trying to keep the hot eggs in, is a disaster waiting to happen, as evidenced by my burn scar. Feel free to try this method at your own risk and tell me if you find that it makes peeling the eggs easier.
Adding something to the cooking water
There are plenty of instructions for hard cooking eggs that include adding a little something extra to the cooking water to ease the peeling process.
Some say a splash of vinegar, some say 1/2 teaspoon of baking soda per 3 cups of water, or even adding 1/2 a fresh lemon.
Whether you believe these things or not, or have tried this and notice that they don’t make a difference, they don’t really harm the eggs themselves.
I will warn you that adding baking soda can make the boiling eggs smell bad while cooking, but they don’t change the flavor or smell of the finished eggs.
If all else fails, buy them already hard-boiled:) I admit that I have done this plenty of times when I needed them last minute and din’t have time to cook and cool them. No judging from this side!
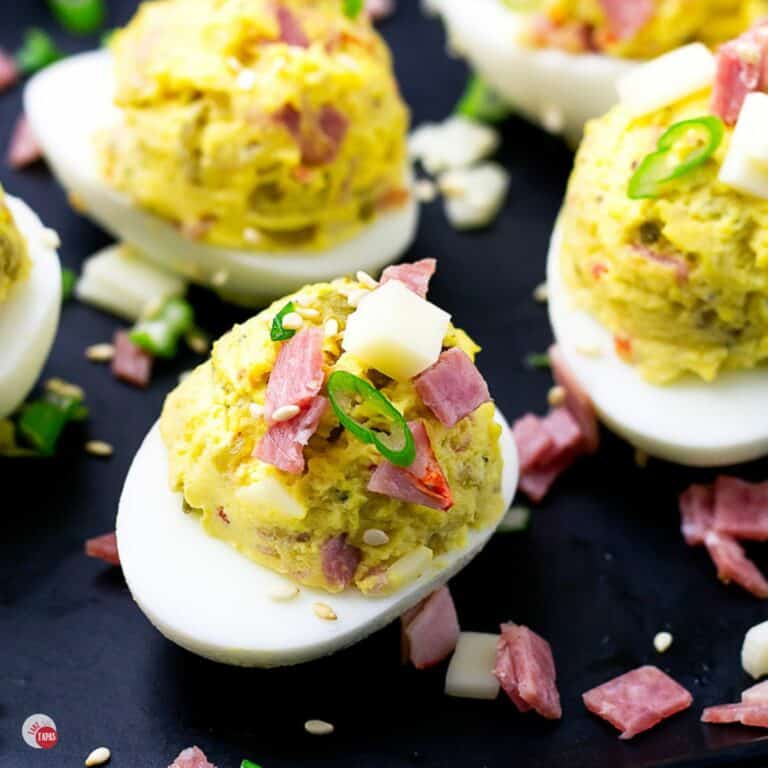
How to make the Best Deviled Eggs Filling
Now that we have our hard boiled eggs cooked and peeled, let’s discuss how to make the filling. Not all fillings are the same so read on to get tips and tricks to making the best deviled egg filling to put in those perfect egg white halves!
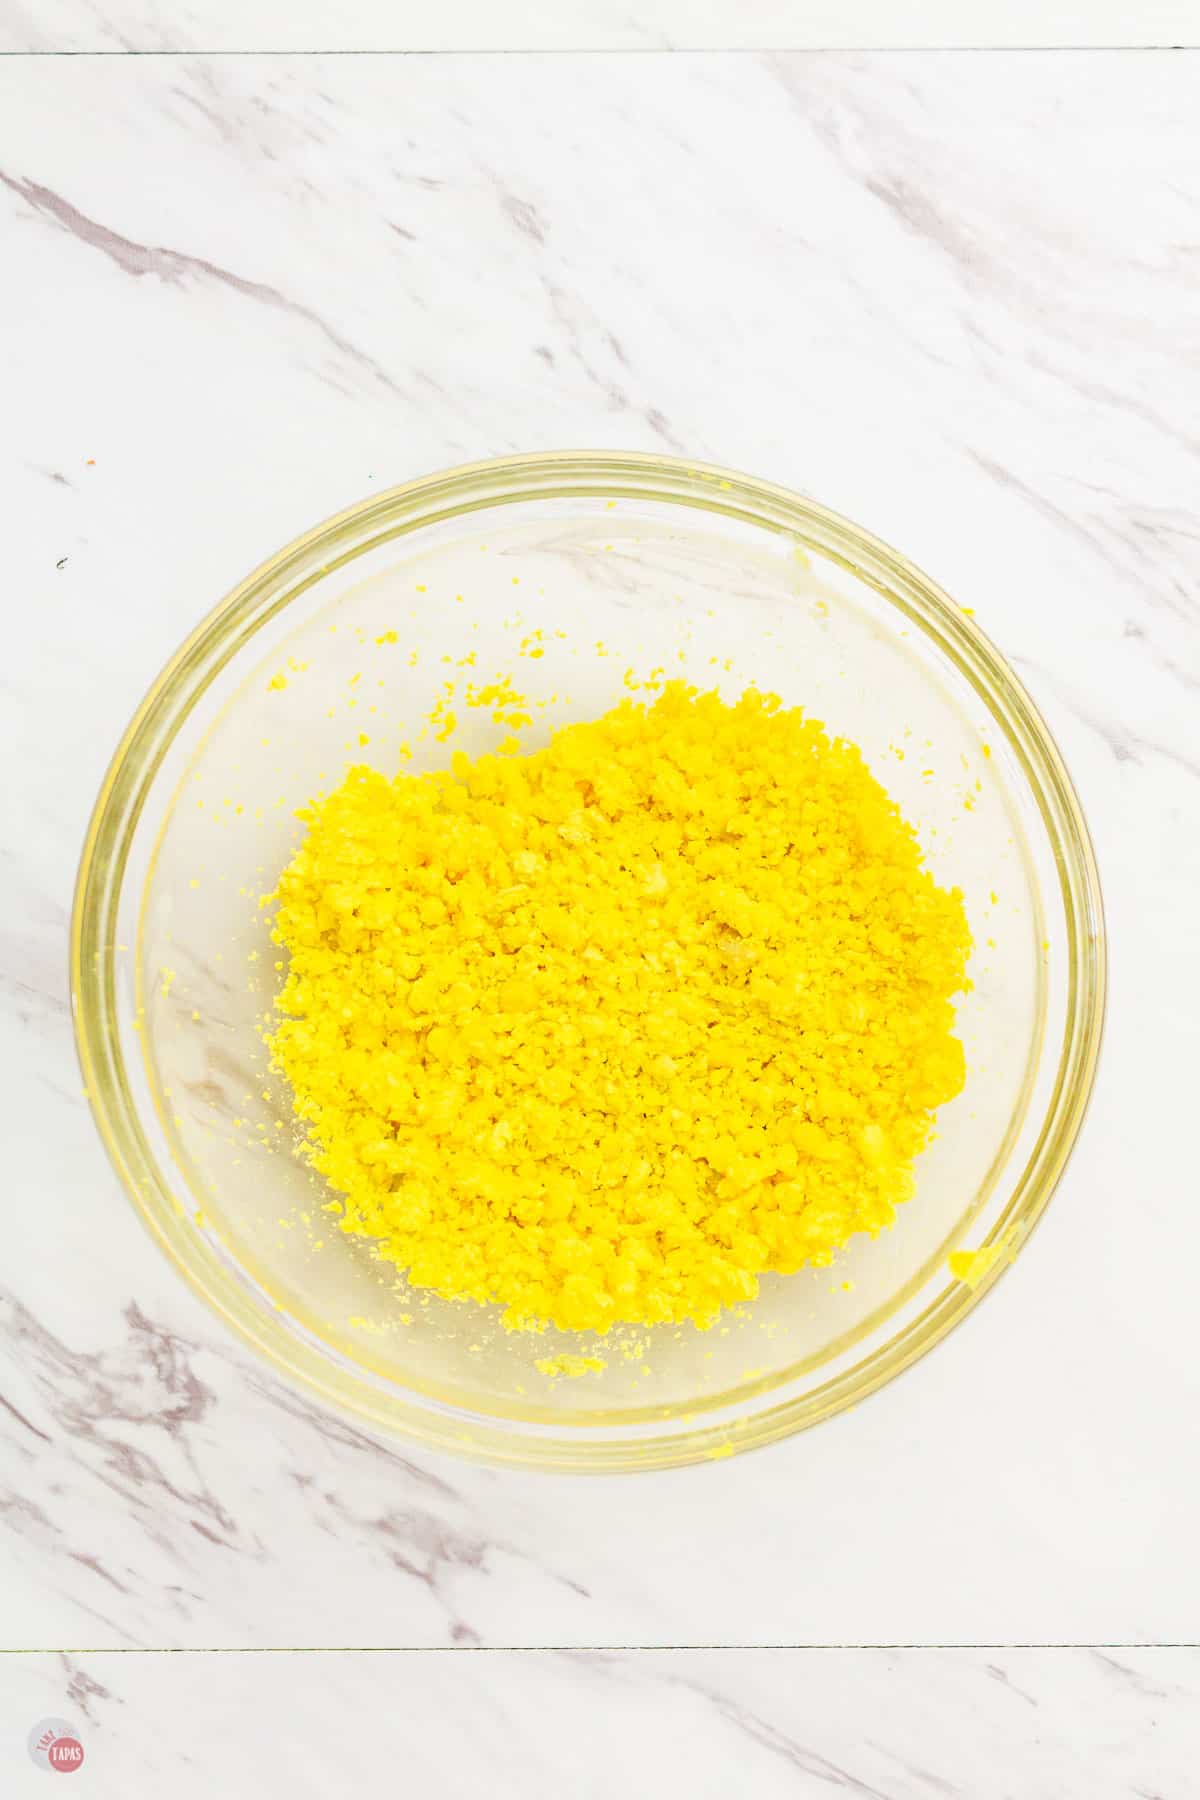
Filling the egg white halves with a delicious, creamy, and mouth-watering filling starts with the cooked yolks. If you have followed all the tips and tricks listed above for cooking the best hard-boiled eggs, you have bright yellow yolks all ready to go.
The first tip to making a great filling is to crumble the yolks up in a bowl. Crumbling or smashing the yolks ahead of time, avoids chunks of unmixed yolks that keeps the filling from having a consistent flavor throughout and can cause problems with piping later.
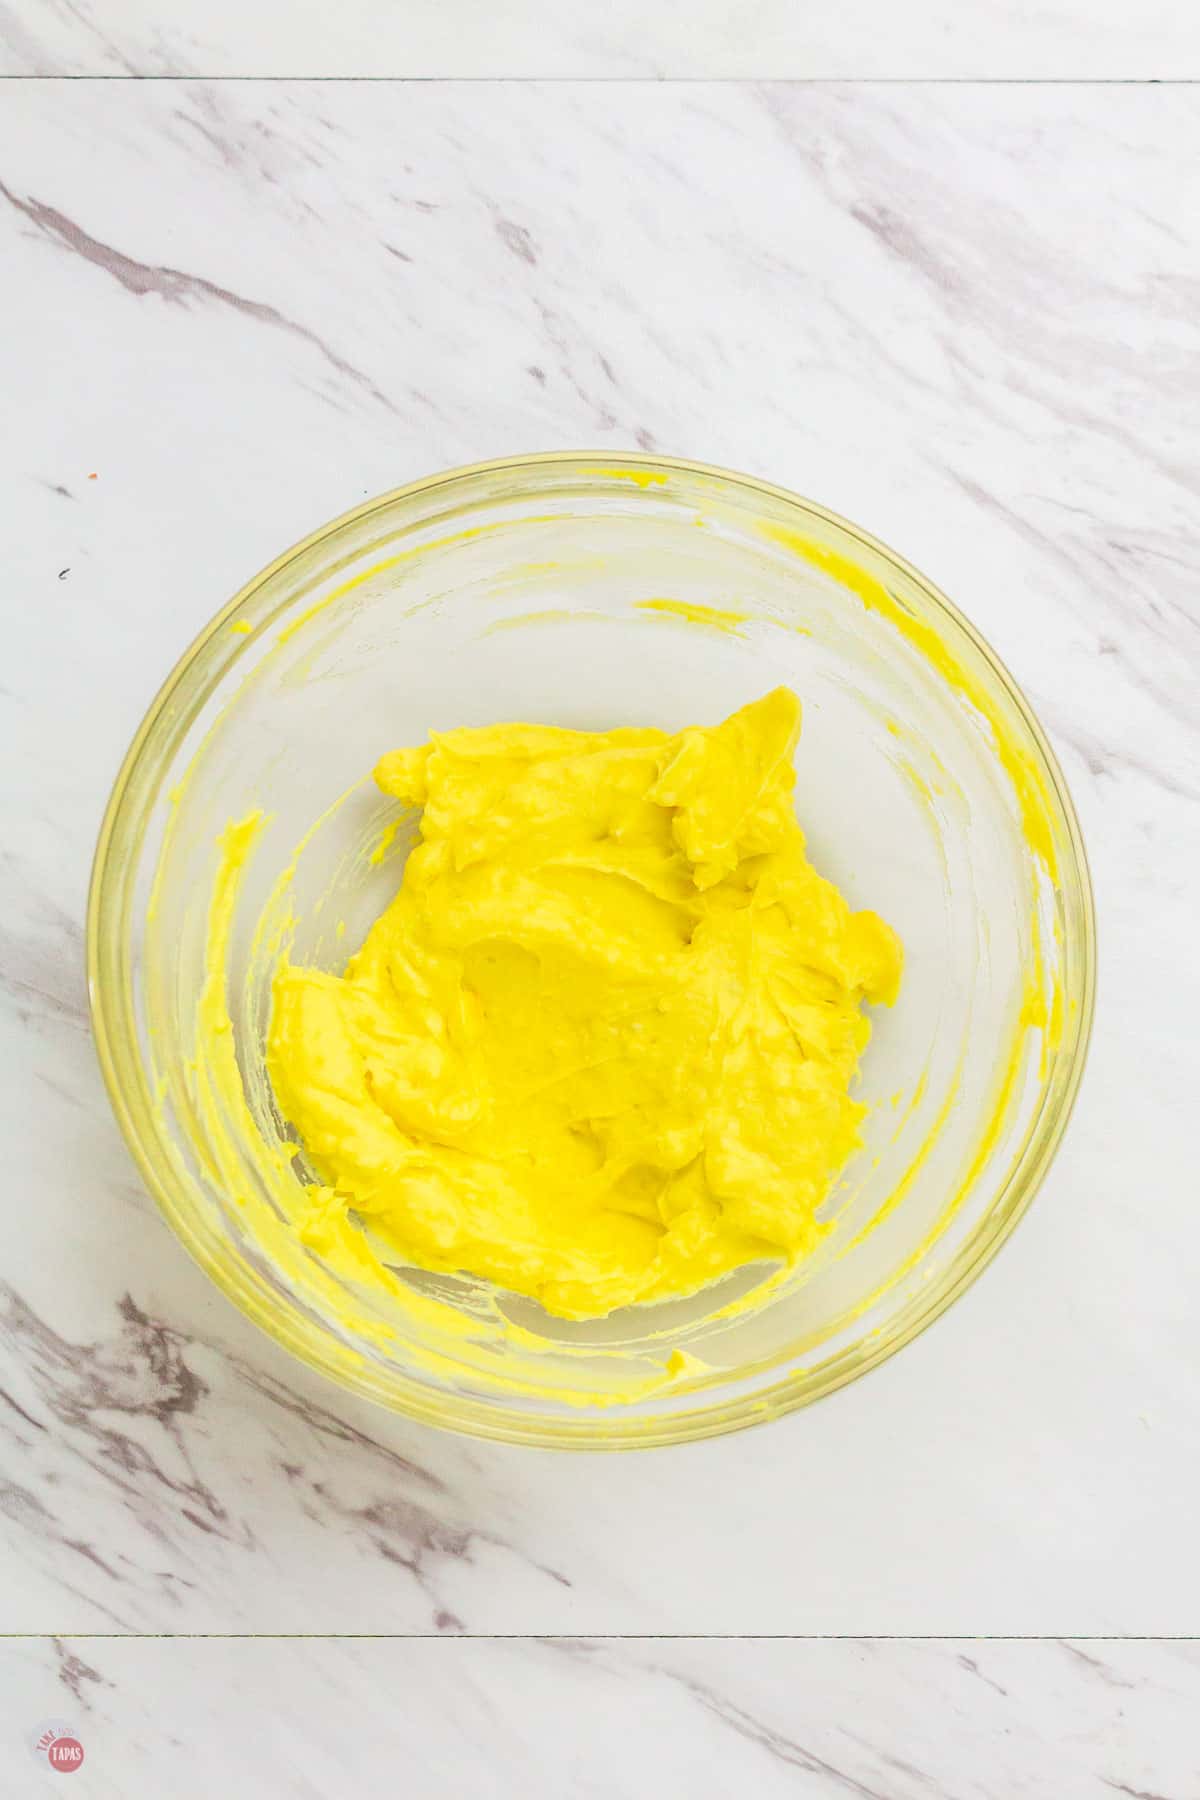
After the yolks are crumbled, it is time to start mixing in the other ingredients. Typically, the egg yolk mixture would be mixed with mayo to make them creamy.
For best results I start with a ratio of 12 yolks to 1/2 cup mayo. If you are using an avocado, I use 1 whole large avocado per 12 yolks.
If you are using something other than mayo, such as mustard or sour cream, just use the same volume (1/2 cup per dozen yolks) and combine your favorites.
Options to mix in the Deviled Eggs filling
- mayonnaise
- yellow mustard
- dijon mustard
- sour cream
- smoked paprika
- avocado
- tartar sauce
- ketchup
- horseradish
- salsa
- wasabi
Additional ingredients to add
- bacon
- pickle relish
- hot sauce
- chopped dill pickle
- garlic
- olives
- pimentos
- caviar
- jalapeño
Once you have your filling made, you can fill your egg white halves right away or you can store it for up to 3 days. If you have ingredients with high moisture content such as tomatoes and cucumbers, leave those out until ready to serve or your filling will become runny and that doesn’t make for delicious deviled eggs.
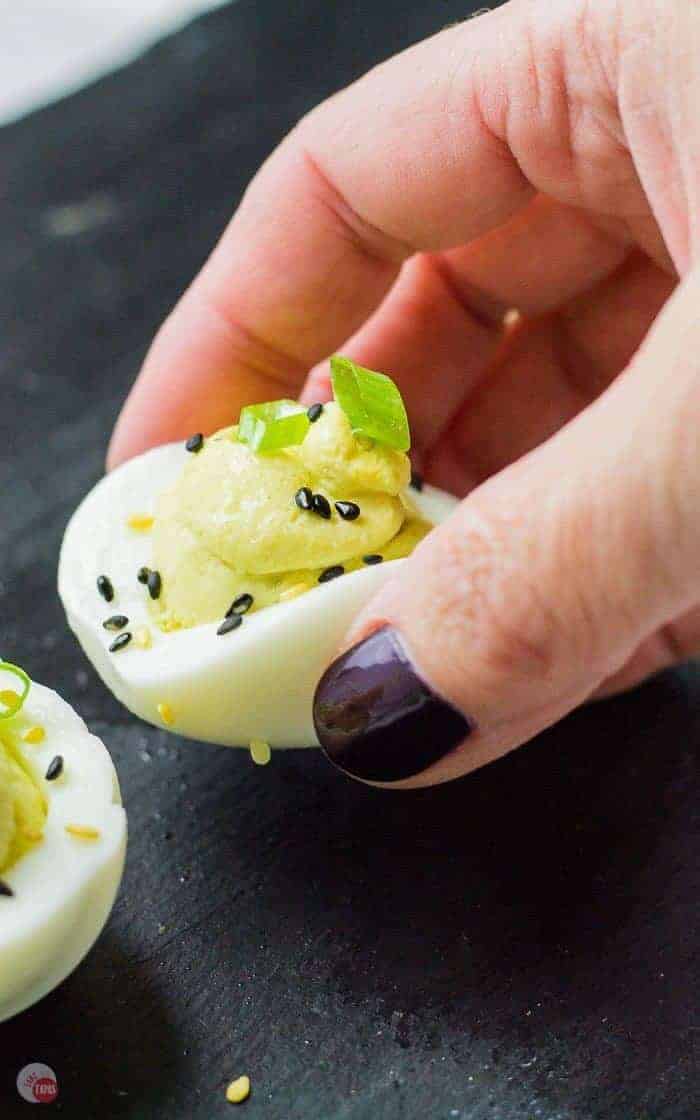
How to fill Deviled Eggs
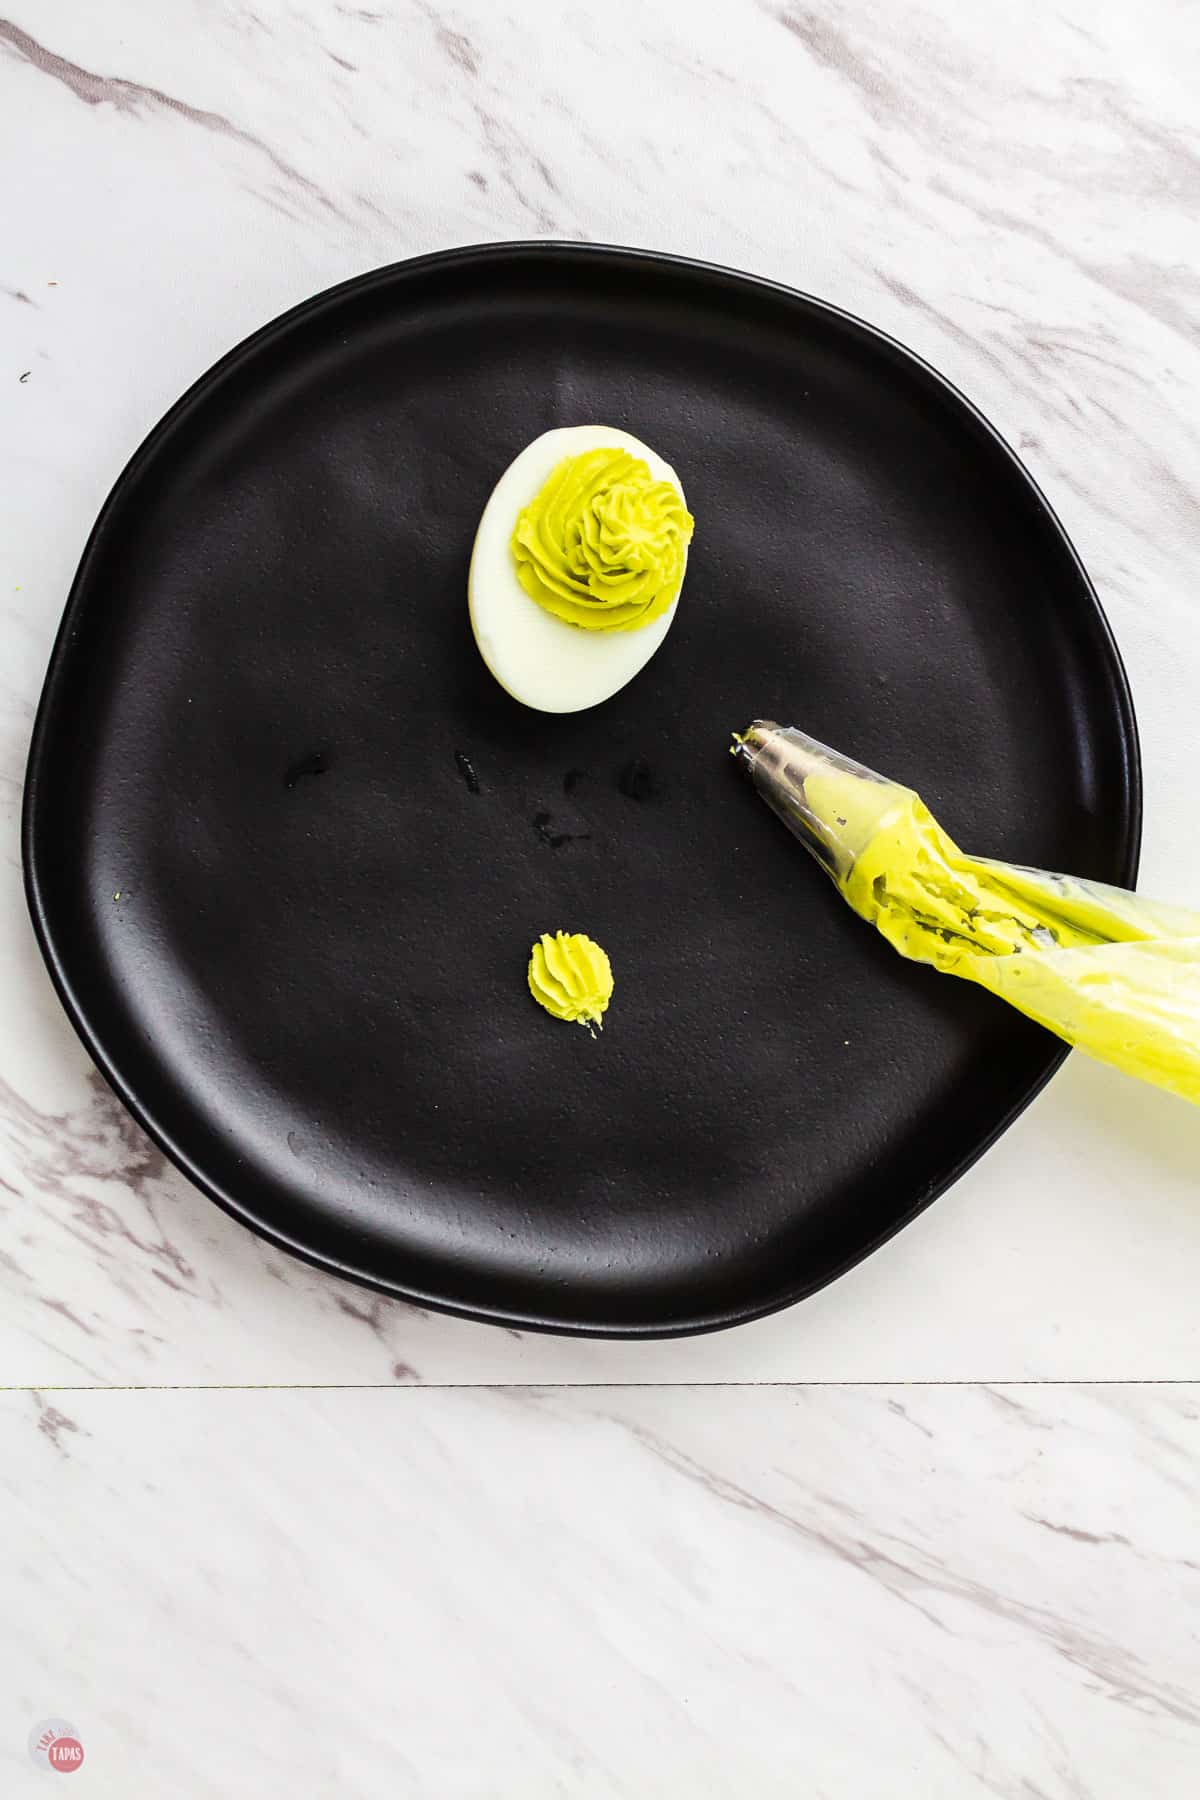
- When you are ready to serve your deviled eggs, put your filling in a piping bag or zip top bag. If you use a piping bag and a frosting tip for fun ridges and a beautiful display.
- First tip is to wash or rinse the egg white halves as not to have any stray flecks of unmixed yolks. Next, sprinkle the egg white halves with a little salt before adding the filling so the egg white half is seasoned all the way through.
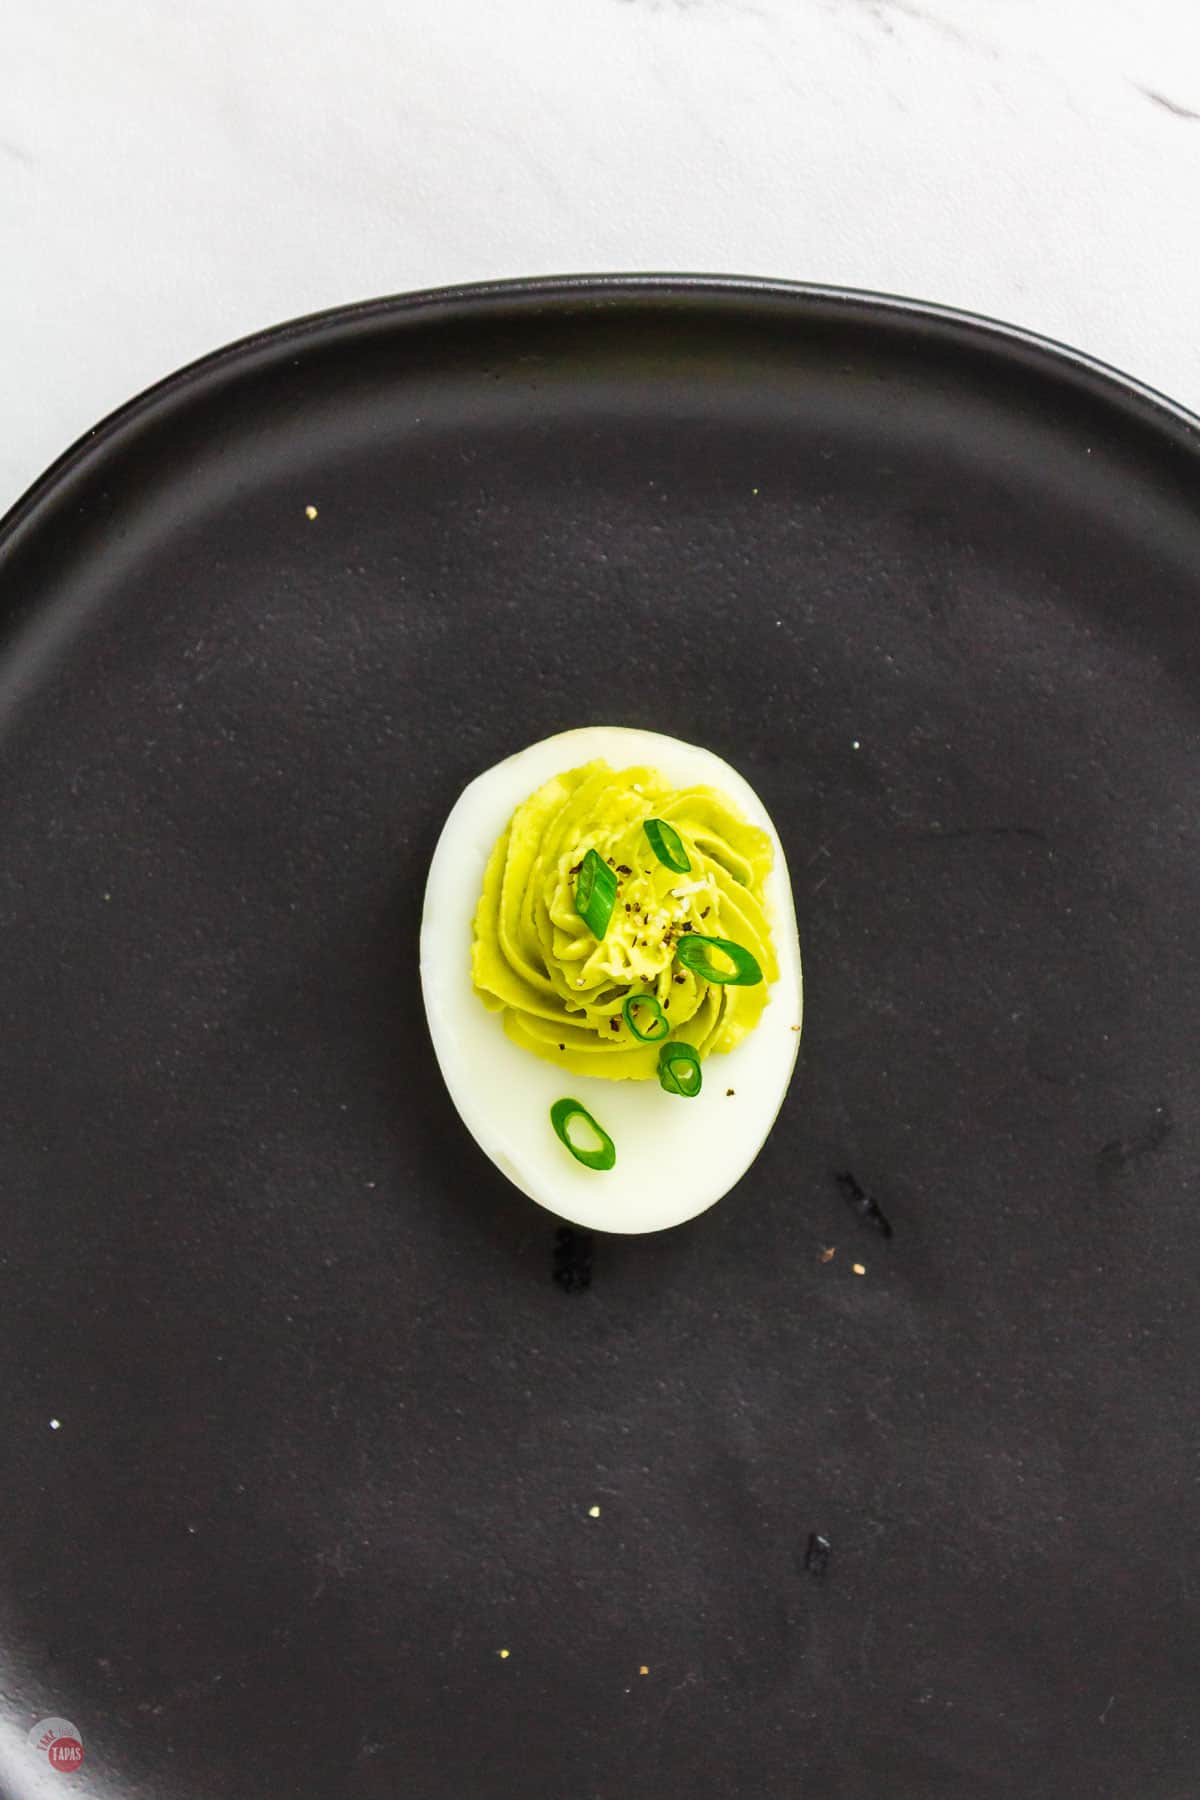
- Start adding the filling to your egg white halves. A swirl motion is perfect for making sure that there aren’t any holes left. Using different piping tips add nice flourishes to creamy filling.
- To finish them off, feel free to keep some of the filling ingredients out to sprinkle on top, like poppy seeds, sesame seeds, sliced onions, and crumbled bacon.
Displaying Deviled Eggs
For me, there is nothing more appetizing than a tray of deviled eggs on a food table at a party. Some are on trays, in bowls, or whimsical options like egg cartons. Think outside the box to add some fun to the occasion!
How many deviled eggs per person?
The best way to plan for a party is to make sure you have enough food and variety of dishes per person. Deviled eggs are versatile in that they are light finger foods or can be considered a heavy hors d’oeuvres.
The appropriate serving per person is 2-3 egg halves every 2 hours.
Tips for serving
- Fill your eggs and store them on the serving platter so you don’t have to handle the eggs too much reducing the chance to smush the eggs and filling.
- To keep the eggs from sliding around due to their round surface, you can trim a little of the white off to make it flat.
- You can also pipe a small amount of filling on the serving tray (don’t worry you will have a little extra due to adding ingredients) and set the egg white on that dot.
- You can fill the bottom of the tray with items like rock salt, crushed ice, sesame seeds, etc. and set the eggs on it. You can also transport them or display them on these too!
Tools for making Deviled Eggs
- Reusable Pastry Bag with Tips
- This Set of Tips
- Collapsable Egg Storage Container
- This Storage Container also acts as serving trays
- This Ceramic Serving Platter is beautiful for all occasions
- This Serving Tray is insulated and keeps the eggs cold too
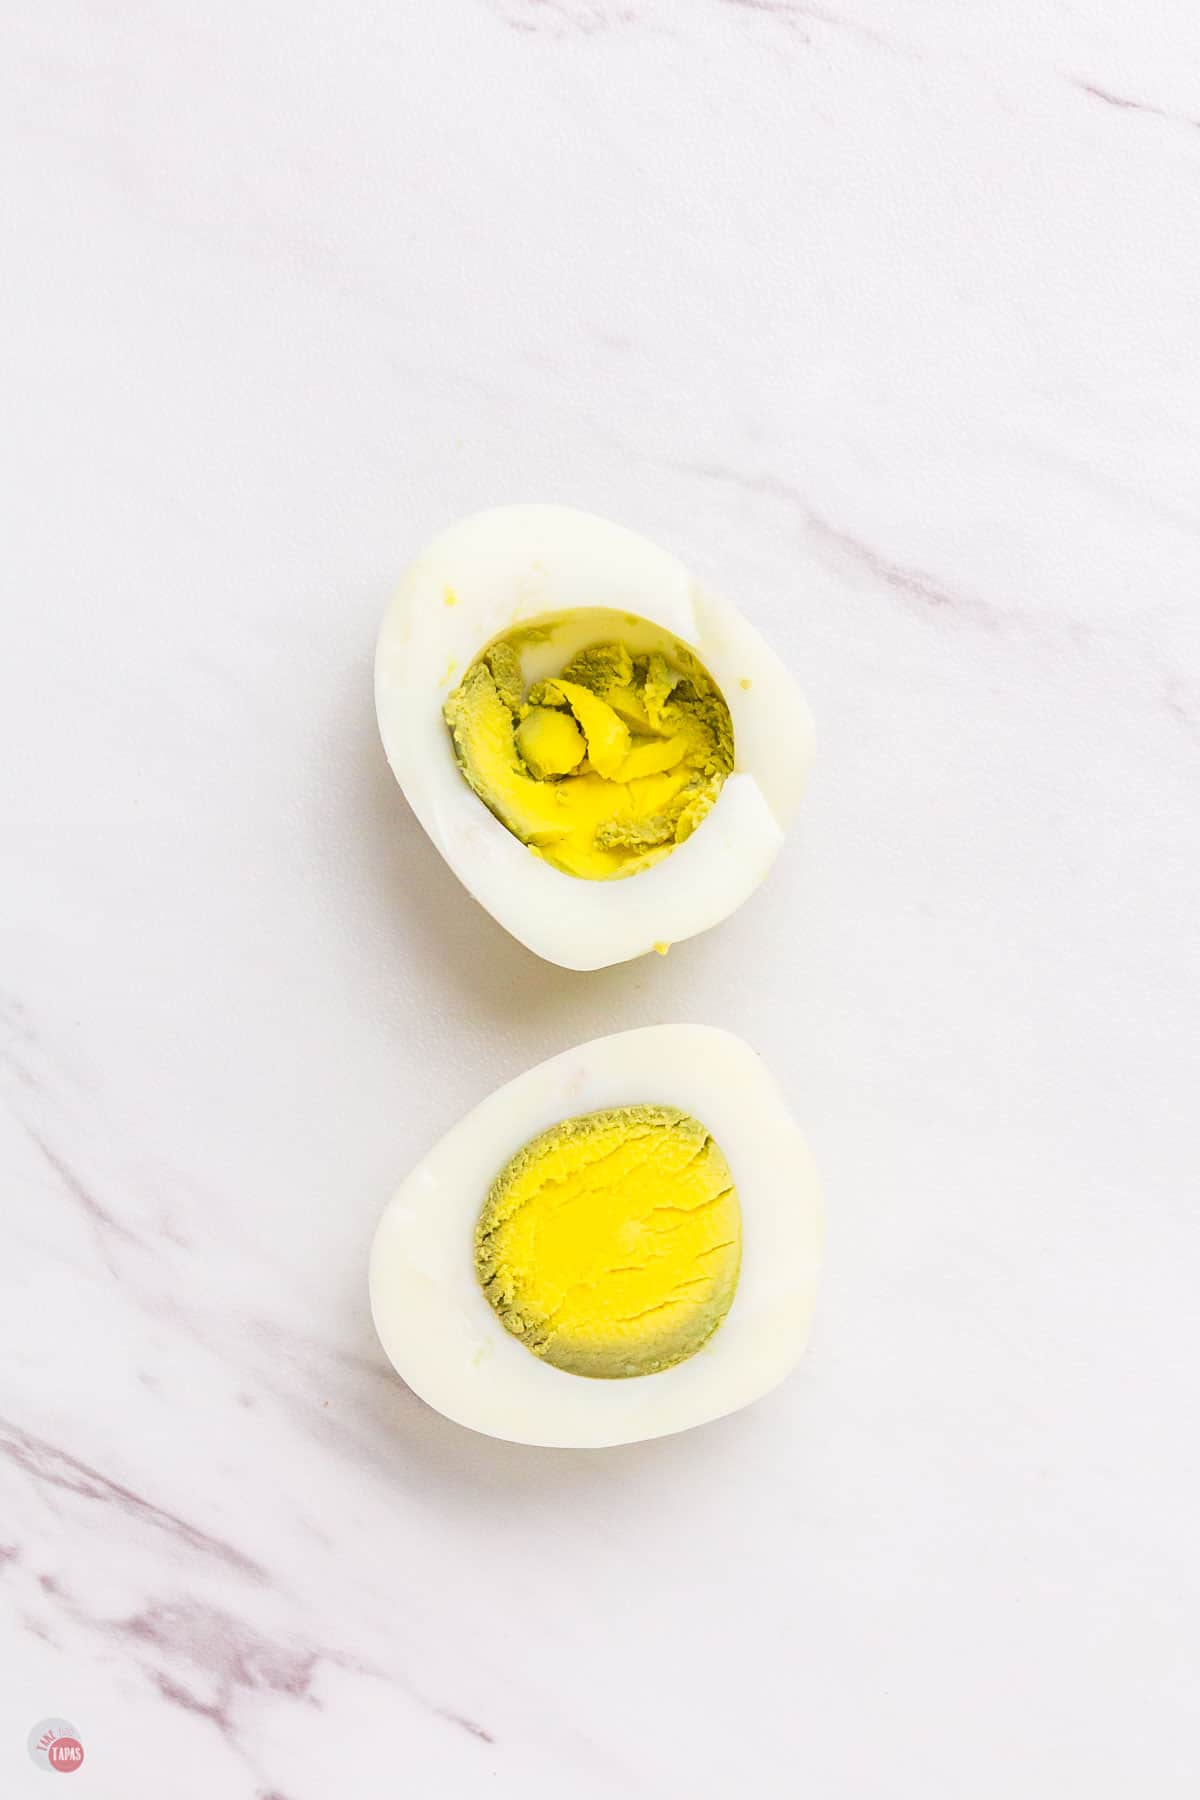
Why do the yolks turn grey on the outside while cooking?
Do you have a green ring around the yolk when they are cooked? The iron in the yolks react with the hydrogen sulfide in the egg white which can occur when the eggs are overcooked.
It is harmless in regards to eating the eggs, but does look unappetizing.
How do I keep my egg whites from getting rubbery?
Only hard boil the eggs for 30 seconds to 1 minute and then boil at a lower temperature to keep the proteins in the whites from seizing.
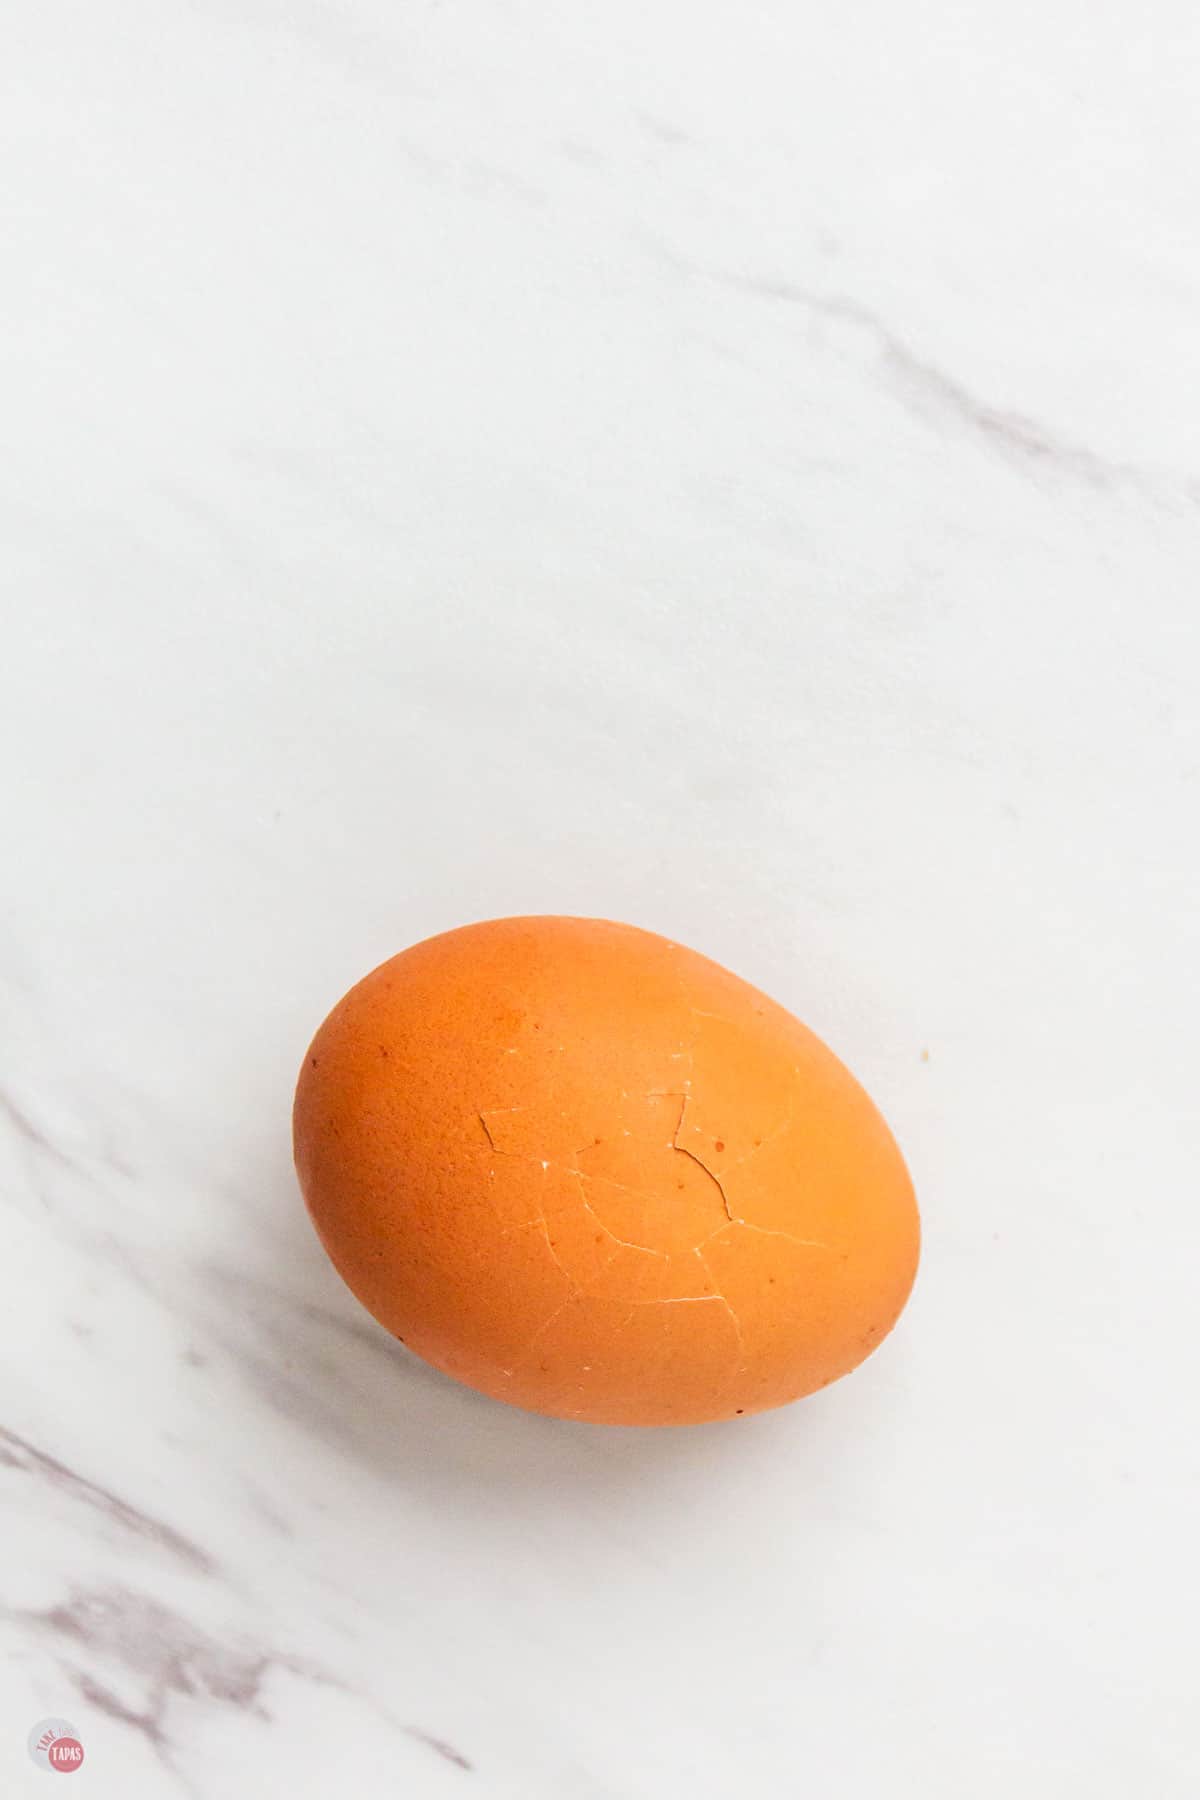
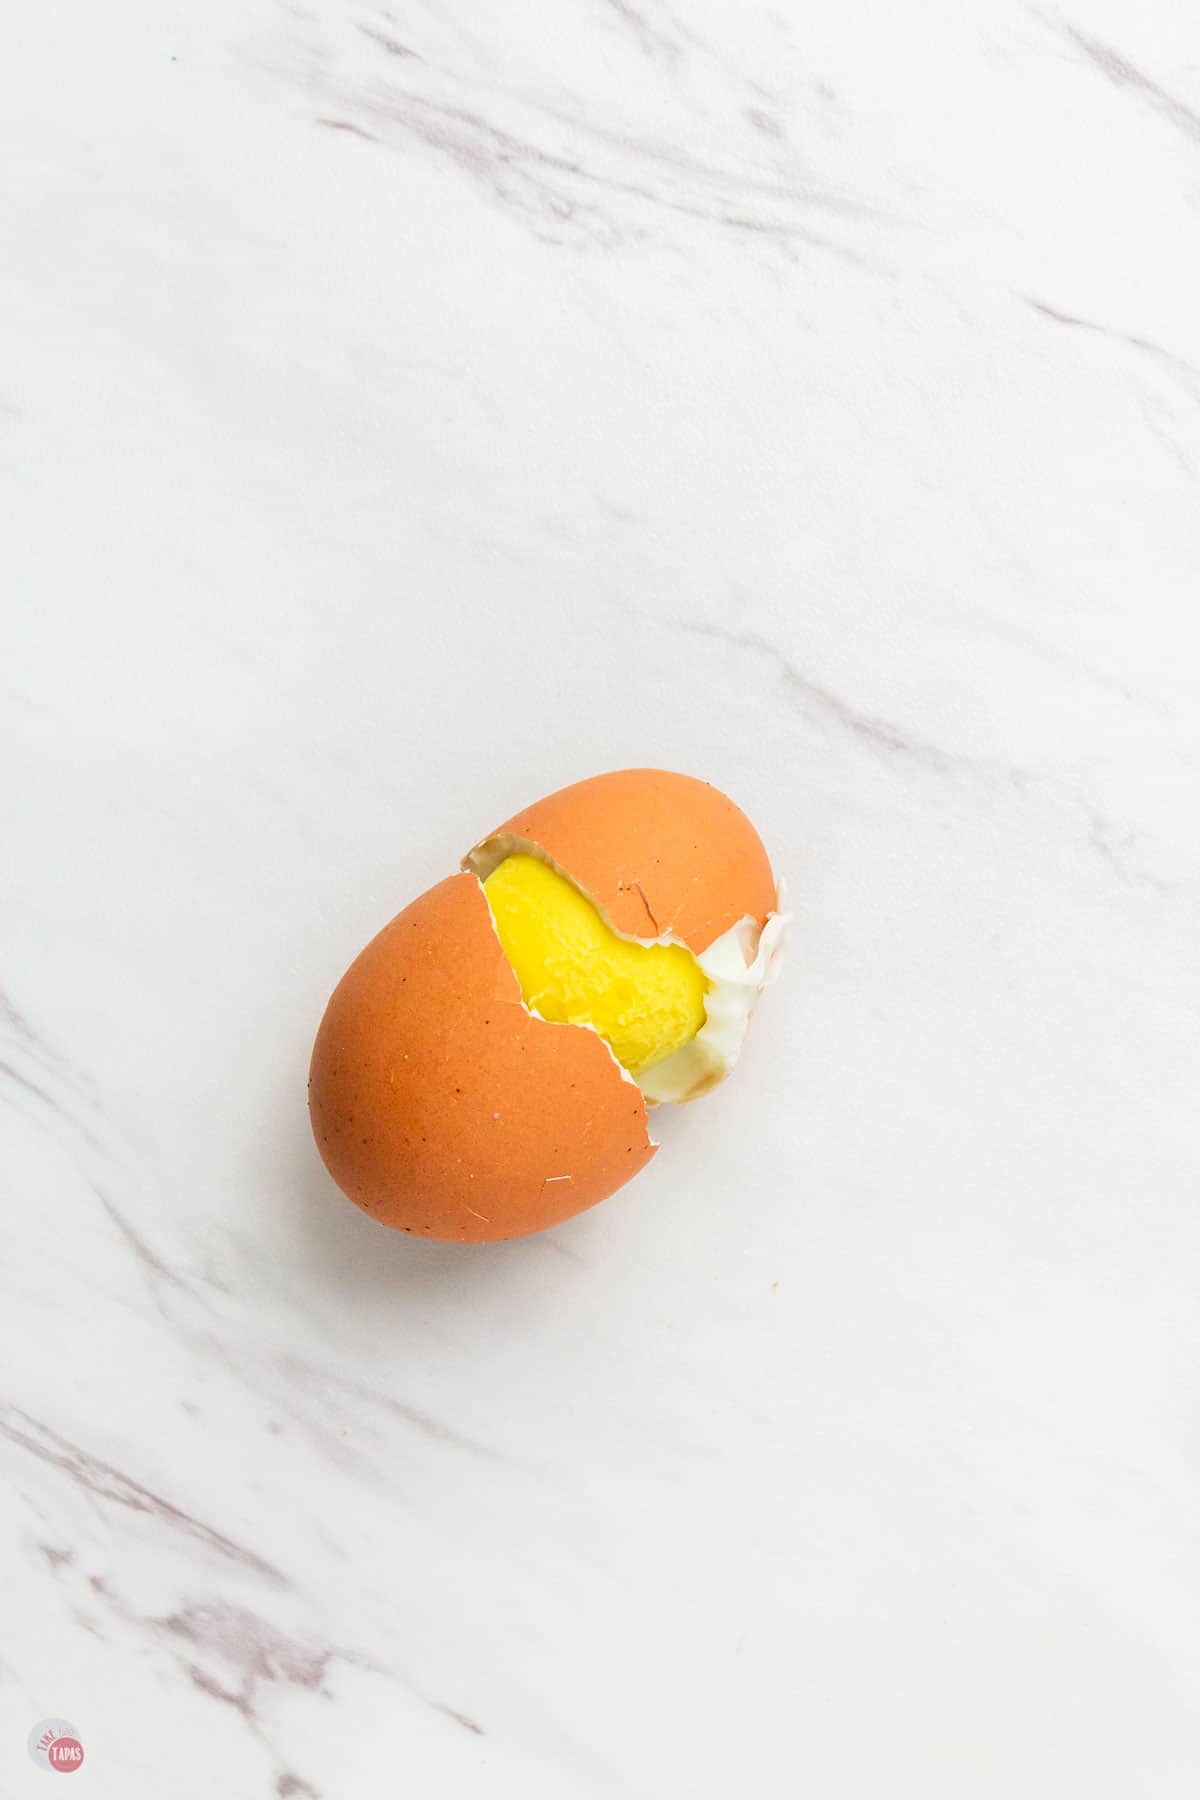
If the egg shells crack during cooking can I still serve them?
Yes, you can! This just means you get a jump start on peeling them.
How do I get my yolks more centered in the white instead of at the bottom?
The night before you intend to cook them, turn them upside down in the carton so the larger end is pointing up. This will allow the yolk to center itself in the egg whites.
For other Delicious Deviled Egg Recipes to try check out my Deviled Egg Pinterest Board!!
How can I get rid of the flat end of the egg white?
Prick the larger end with a pin or thumbtack to allow air to escape as egg cooks and expands. I recommend this if steaming but if boiling, water can get into the egg shell causing bubbles.
Also shocking the eggs can reduce the volume of air in the pocket allowing for the egg to expand and fill the space more.
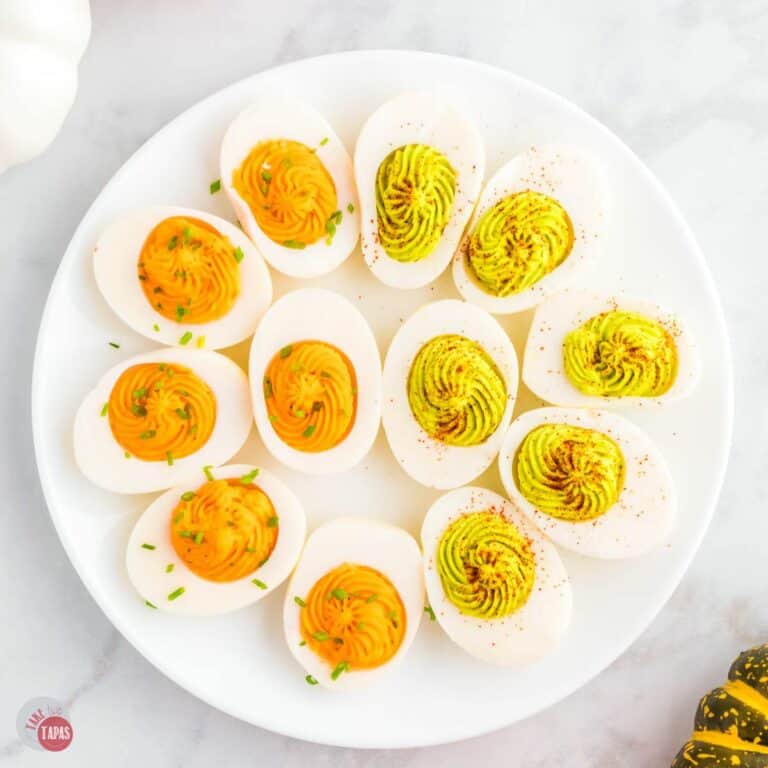
How can I color or dye my eggs for special occasions?
Peel the eggs and then soak them in your dyeing solution until it is colored to your liking. Dry and then slice to remove yolks. Beet juice is a popular way to dye whites.
You can also just color the filling like I do in these Halloween deviled eggs.
Can I make deviled eggs ahead of time?
They are perfect for making a few days ahead of time. Keep the filling separate until ready to serve for best results.
Deviled eggs last a few days in the fridge. So some leftovers are ok:)
Can you freeze them?
This gets tricky. Check out this article on freezing deviled eggs for best results.
What can I do with ugly eggs?
If you find that your egg whites are mangled after a failed peeling attempts, or break a white with an over-exaggerated rolling technique, here are some great ideas to use the cooked eggs as not to waste them.
- Egg salad
- Eat them with salt and pepper before anyone sees them
- Slice and add to a Cobb or Chef’s Salad
- Save for a portable breakfast
- Tuna salad
More Deviled Eggs Recipes
If you love this recipe as much as I do, please leave us a ⭐️⭐️⭐️⭐️⭐️ five-star review in the comment section below. Thanks!

©TakeTwoTapas.com. Content and photographs are copyright protected. Sharing of this recipe is both encouraged and appreciated. Copying and/or pasting full recipes to any social media is strictly prohibited.


Let’s get real on this… I am from NC and have made so many deviled eggs in my lifetime, its unreal. Cook a couple of extra eggs to to in the ” filling” and add a dash of vinegar when boiling the eggs. This keeps the eggs from spilling all over the pot when boiling.. In addition, after the 10 minute boil, immediately empty the hot water out, and run cold water over them. Let them stand in cold water a few minutes, then , prepare the filling and spoon it in the egg halves. I think yall are making this way to difficult.
Lindee, thank you for your response. I too use the stovetop method as I don’t mind being in the kitchen. With that said, there are a lot of people out there who don’t make them on a regular basis, prefer to use other methods like the instant pot, oven, etc. The purpose of this guide is to give my readers as many options as possible and they can find what works best for them. If you make eggs quite often then this guide isn’t for you, but feel free to check out my other deviled egg recipes. You might find one that you like:)
I a, horrible at cooking eggs. This year when I make deviled eggs for Easter I know right where I am coming!! This is a wealth of information!!
I love deviled eggs, but using these tips I was able to make THE BEST ones I’ve ever tasted!! Thanks!
Confession: I’ve never made deviled eggs! But now I think I have to give them a try!
What an egg-celent read!! all the egg facts right here with some new tips and tricks!! Thank you!!
We keep boiled eggs in the refrigerator all the time and lately we’ve been making them in the Instant Pot, but I actually prefer the stove top method best. The avocado deviled eggs are on my list to make!
This is a great compilation of explaining something that’s supposed to be simple but never is! Too many times I ruin my eggs so my deviled eggs look horrible! I’ll definitely be taking some of these ideas.
One day, I swear, I will try making my own deviled eggs. Your tutorial will help me. I know it will.
Thank you for such an informative post. I now know I had misconceptions about some things like the age of the eggs for example. I also want to try cooking my eggs in my instant pot, seems like they turn out perfectly that way. I am ready for some deviled eggs now!
wow! Ive always used the stove top method but now I have an answer for everyone who tells me I should make them in an IP! and why I wont be doing it that way!!. I especially love the tip about pricking the end to not get the weird line on the egg white…