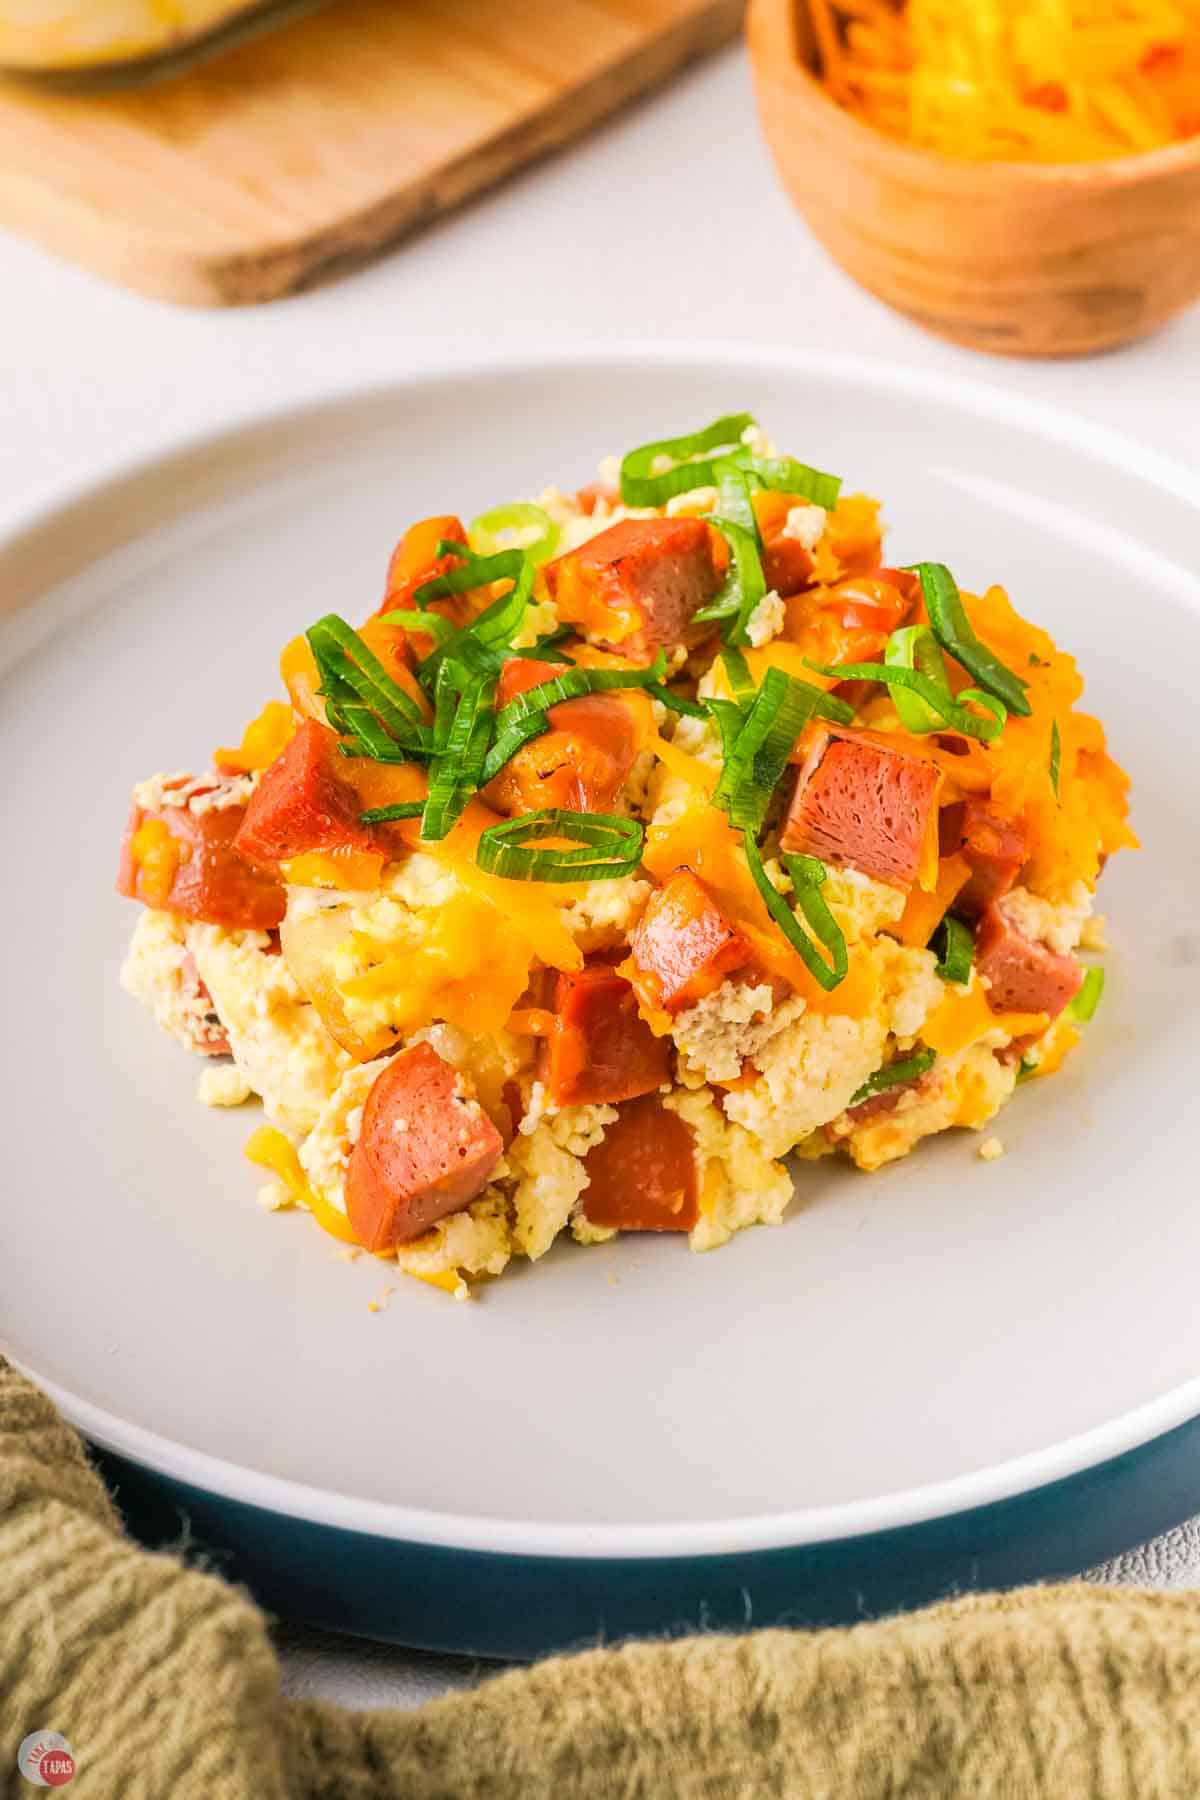
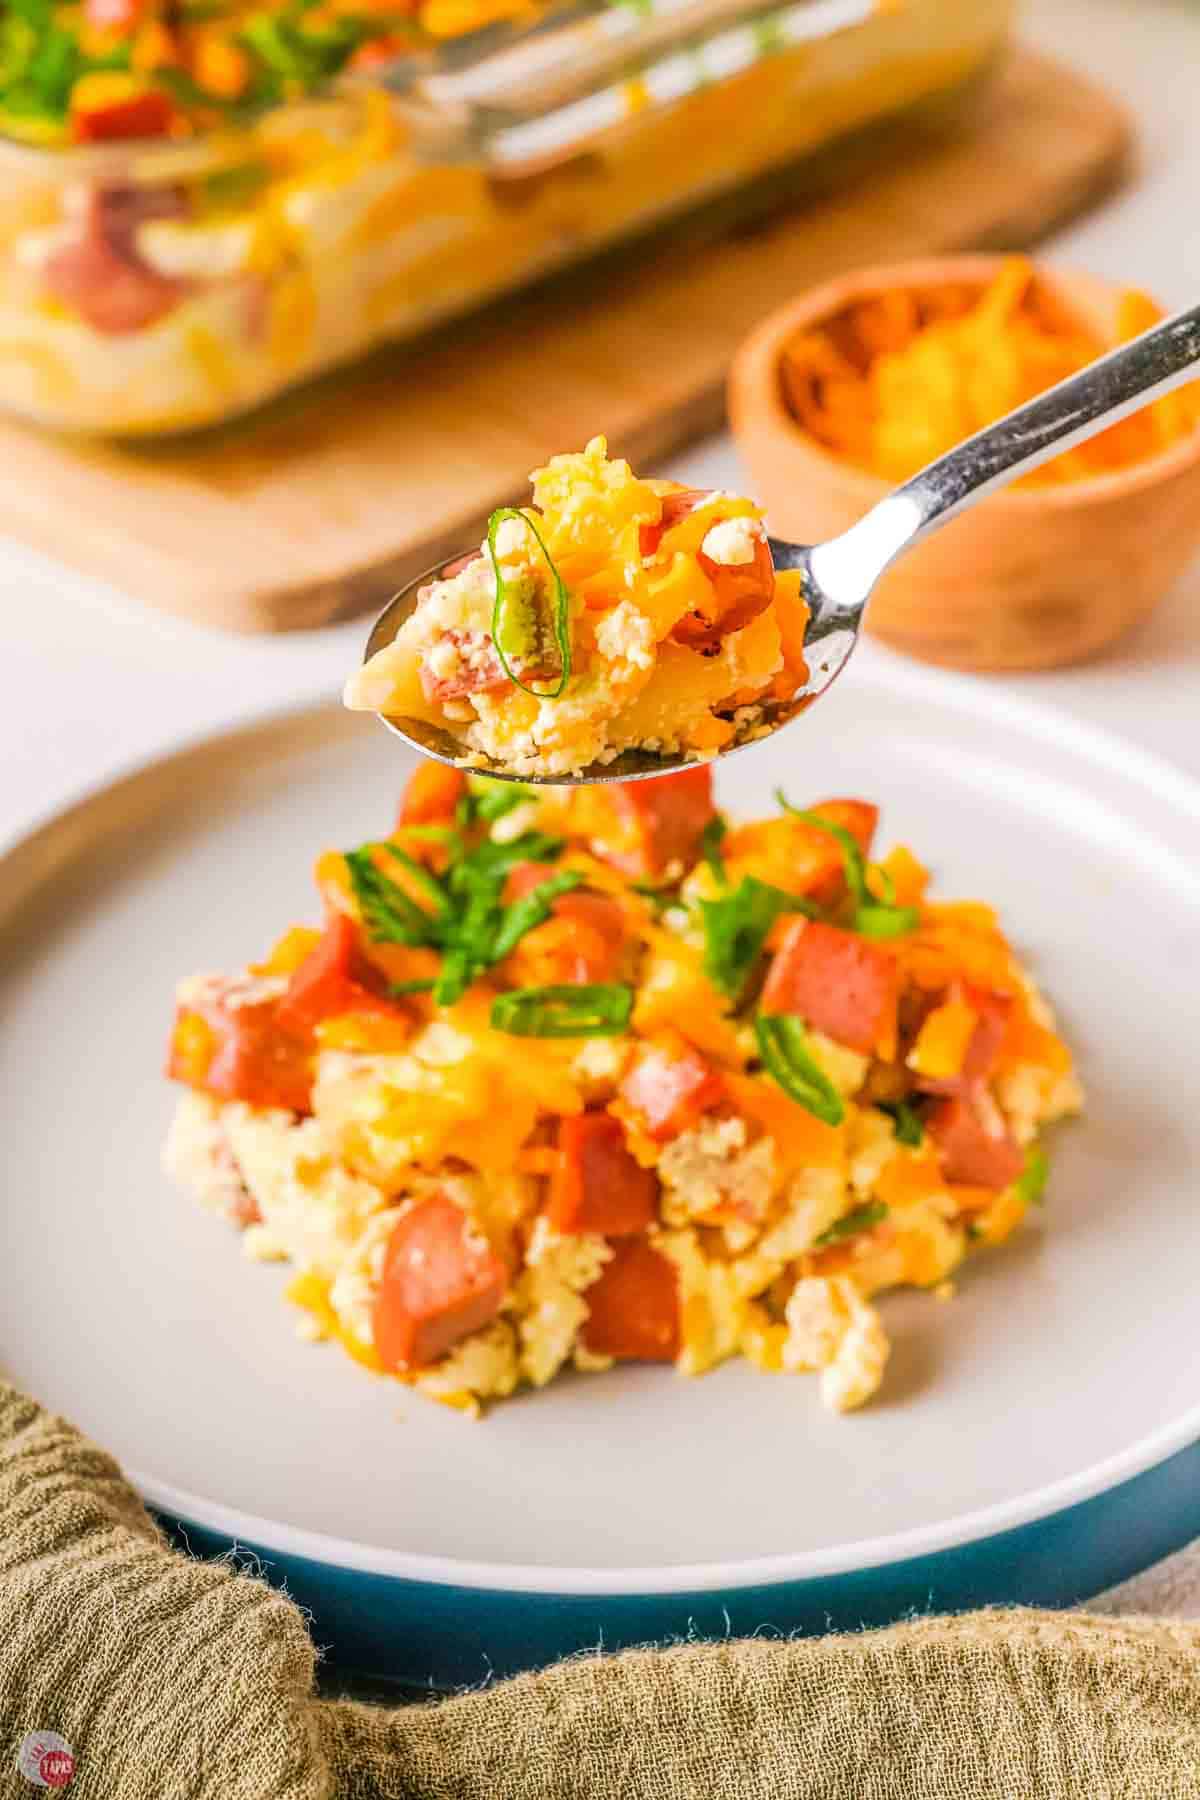
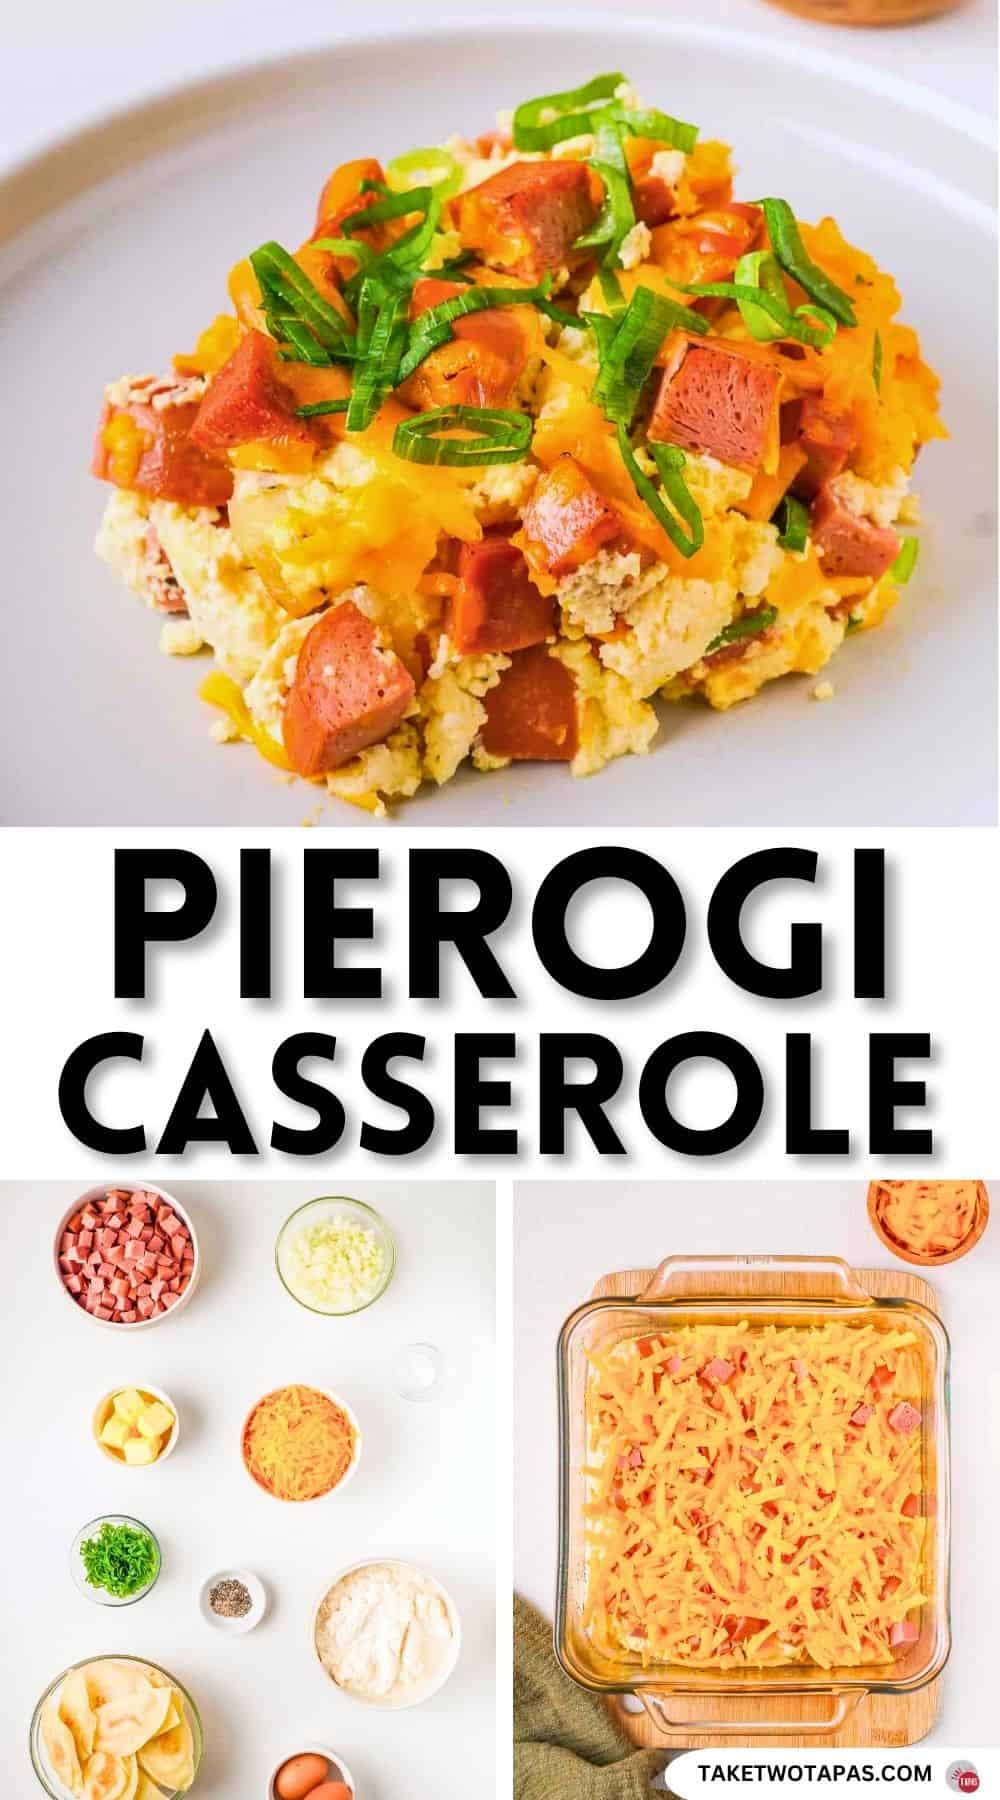
Pierogi Casserole
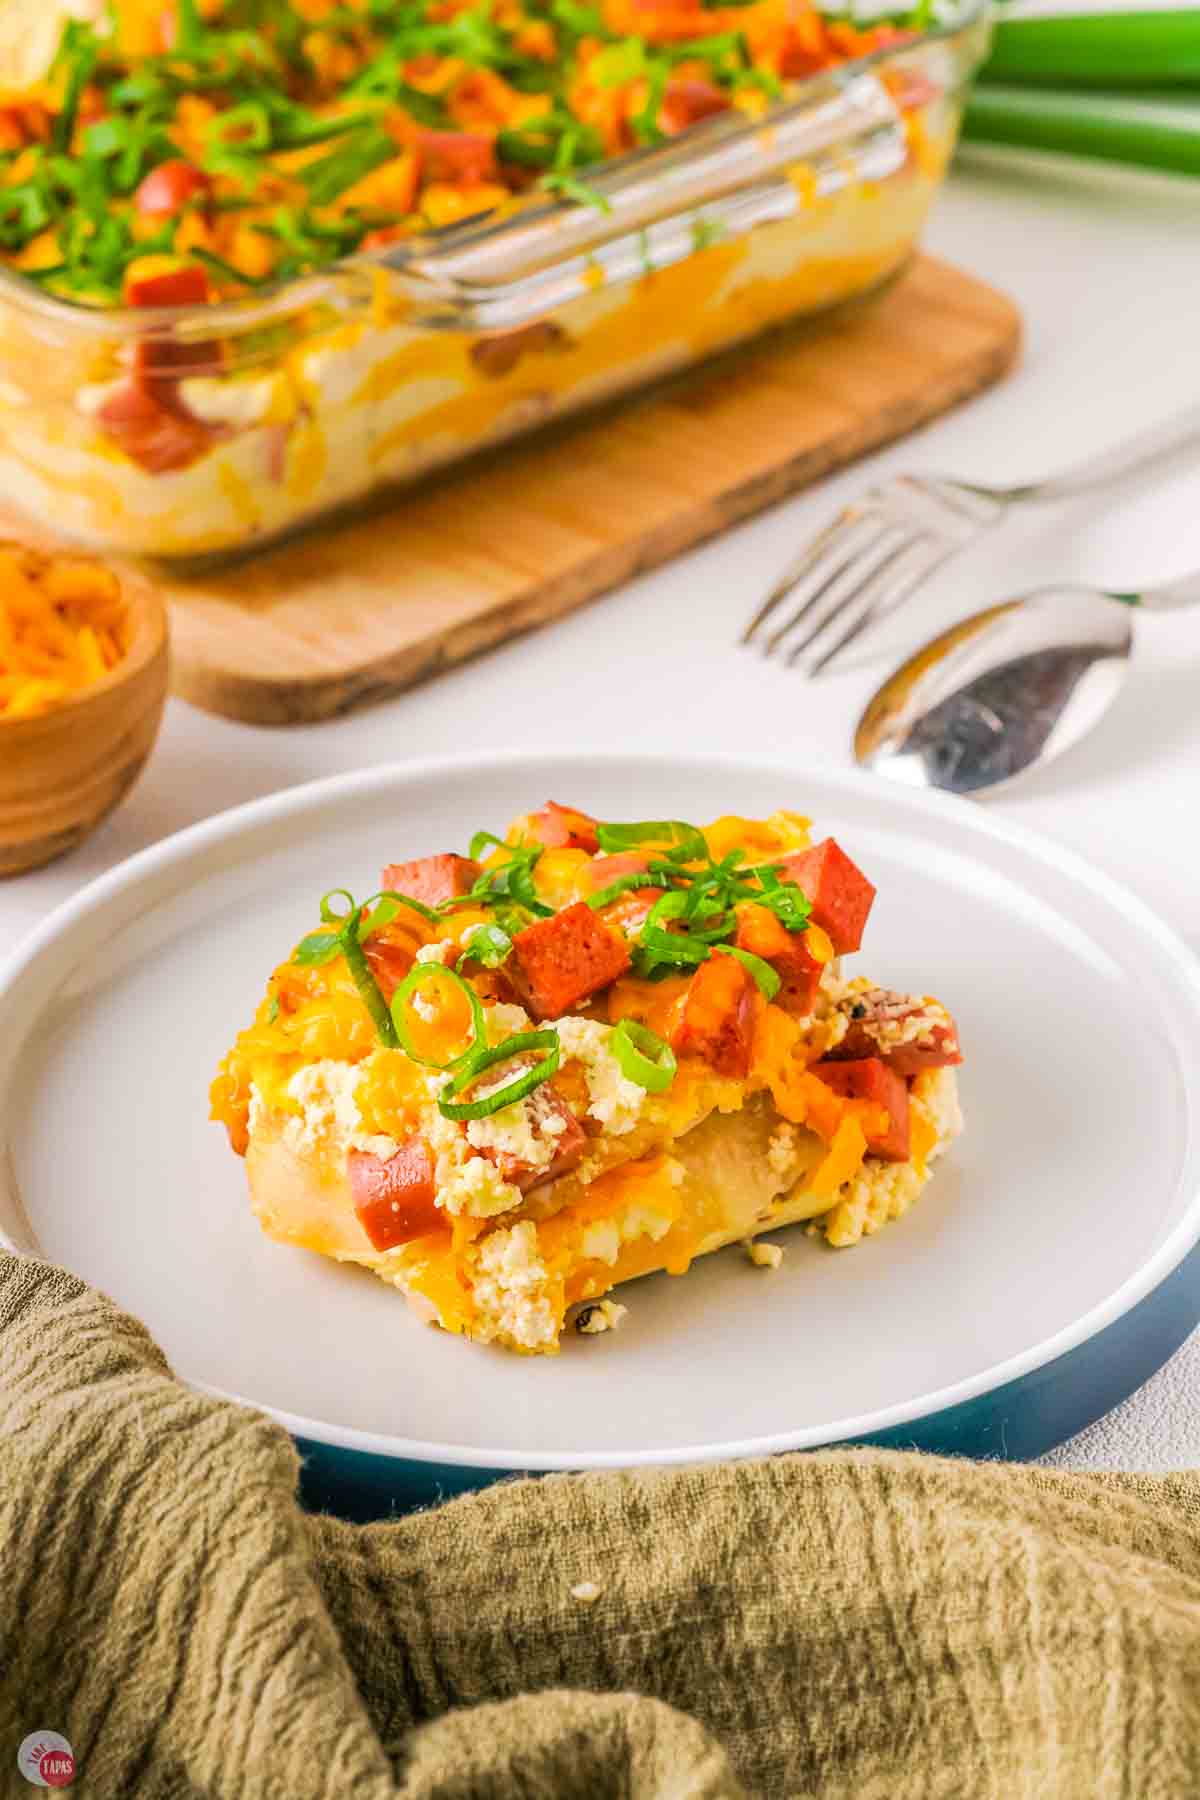
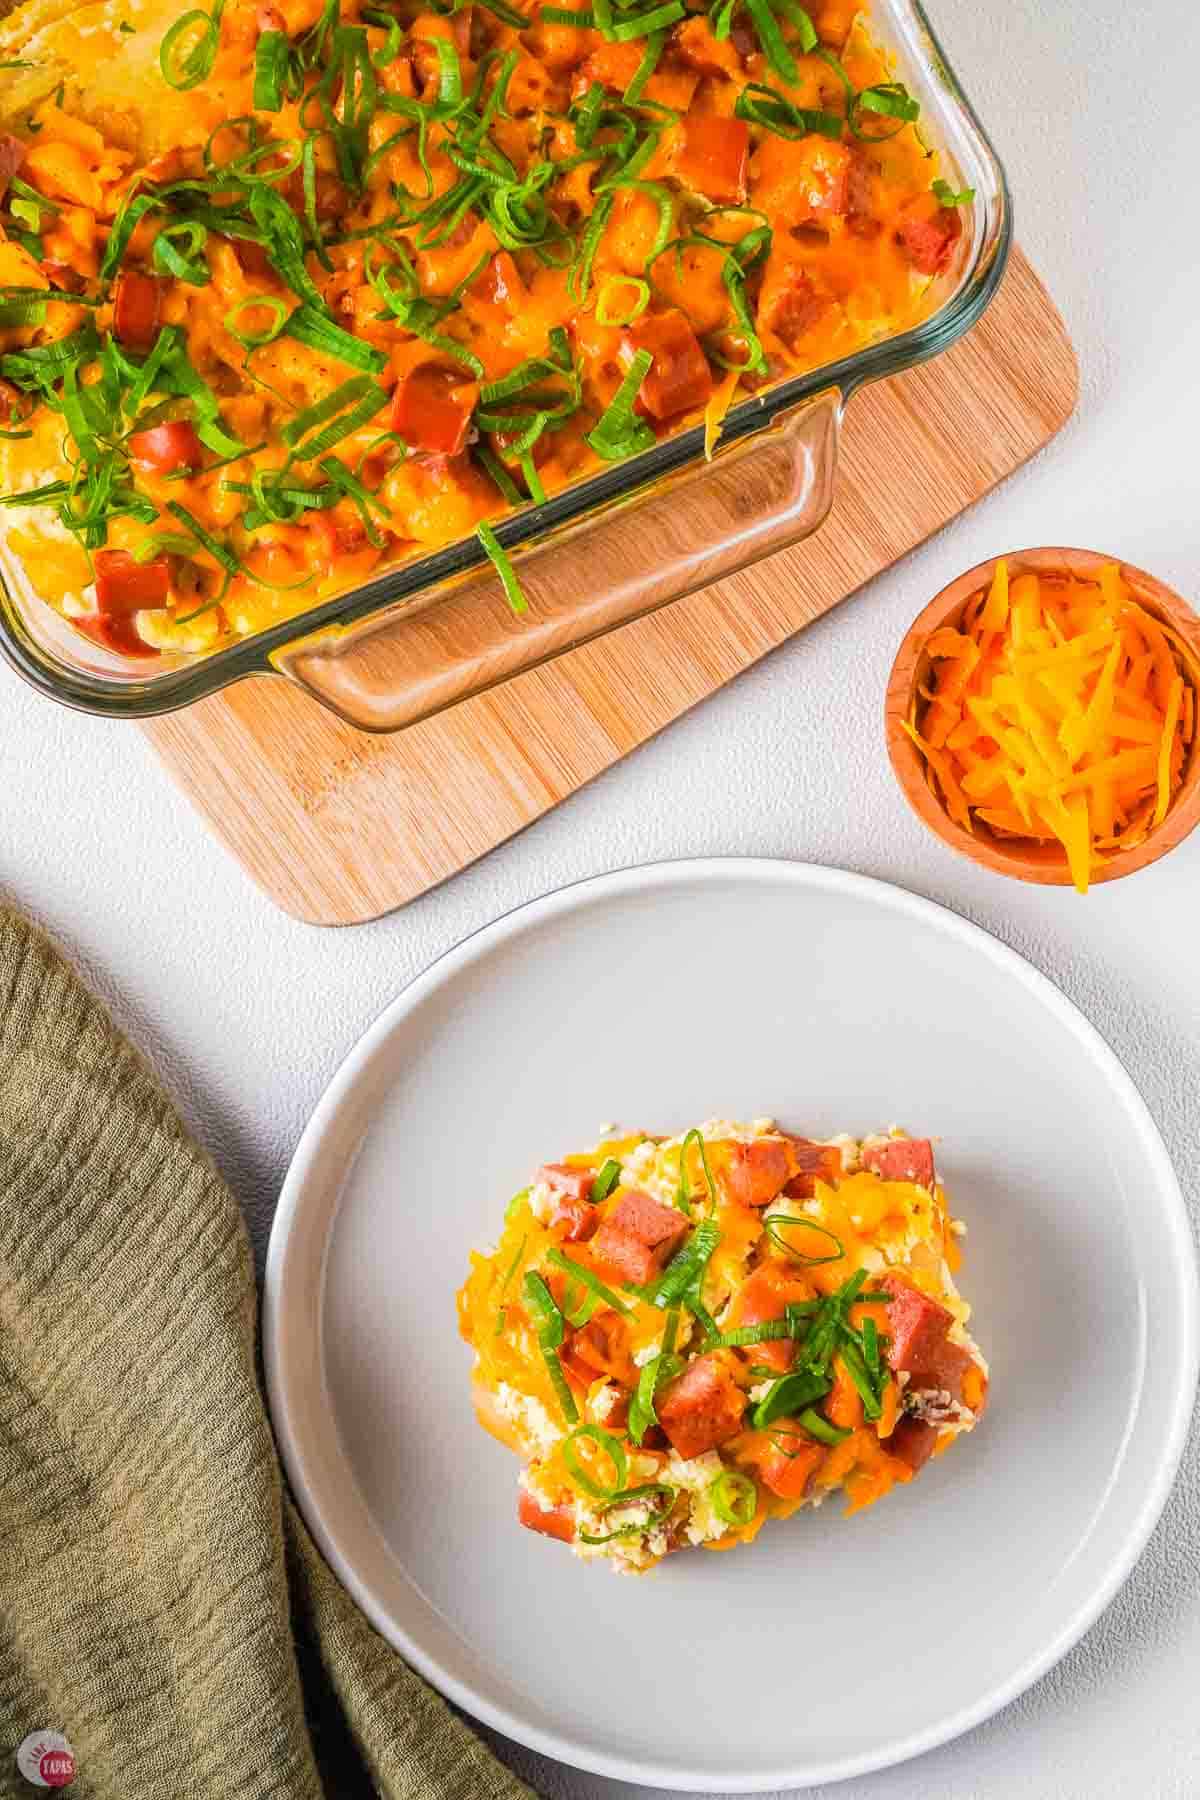
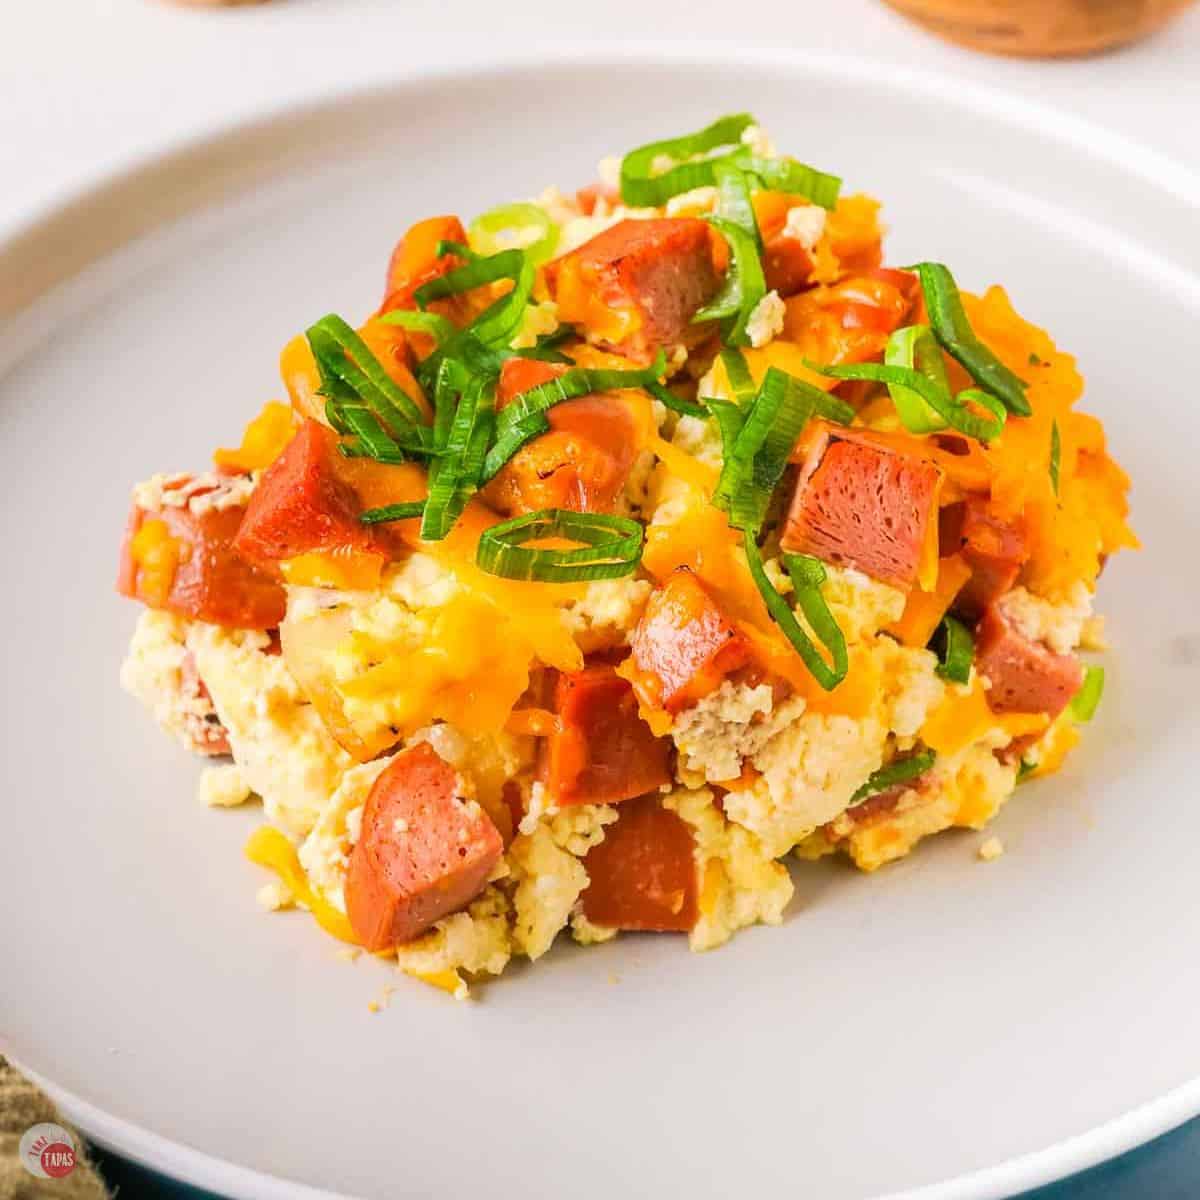
Pierogi casserole has layers of browned cheese pierogis with ricotta cheese, kielbasa, and cheddar in a 9×9 baking dish. Ready in 60 minutes at 350°F, it feeds 6 people and uses frozen pierogis you don’t have to boil first. The ricotta mixture holds everything together while the cheddar gets golden and bubbly on top. Perfect for busy weeknights, make-ahead dinners, or when you want comfort food that freezes beautifully for up to 3 months.
Have you ever had pierogis? I have a few times and let me tell you, they are delicious! They are like cheese tortellini but instead of pasta they have a light, fluffy outside, while the cheese is tucked inside. That’s why I HAD to try them in a casserole!
Instead of using cheese tortellini to skip all the steps of stuffing shells, layering pasta, making ravioli, etc, these pierogis make everything easier. And more delicious.
Just quickly brown them right out of the freezer, layer them with cheese and smoky kielbasa, and bake until warm and bubbly! No boiling pierogis, no complicated steps, just layering and baking.
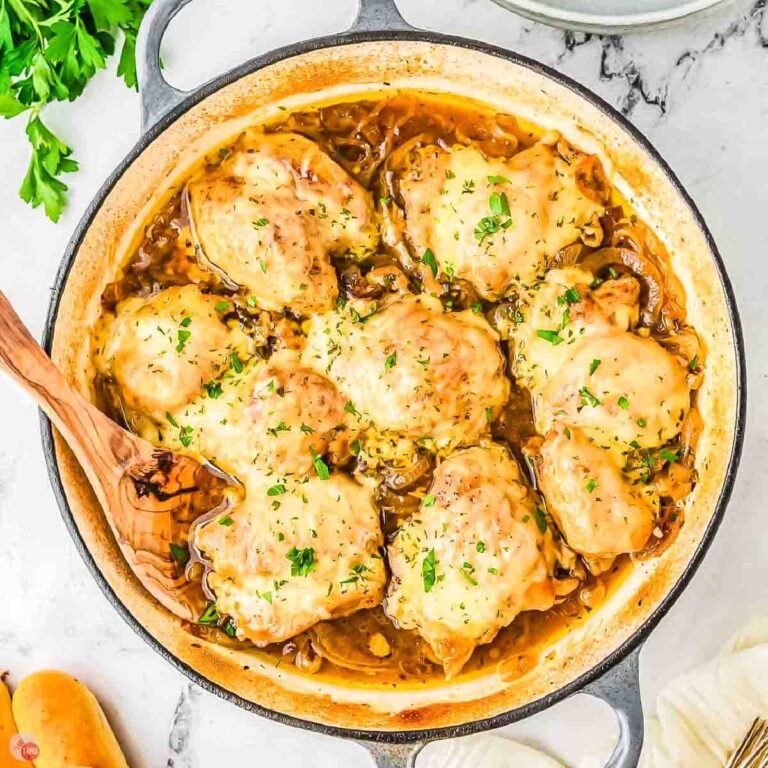
Serve it with my smothered green beans, glazed carrots, or an easy salad. Check out my crockpot version or make my swamp soup if you’re looking for something delicious and a little outside the norm.
This post may contain affiliate links. As an Amazon Associate, I earn from qualifying purchases at no additional cost to you. Read my disclosure policy.
See recipe card for complete information on ingredients and their quantities.
Ingredient Notes
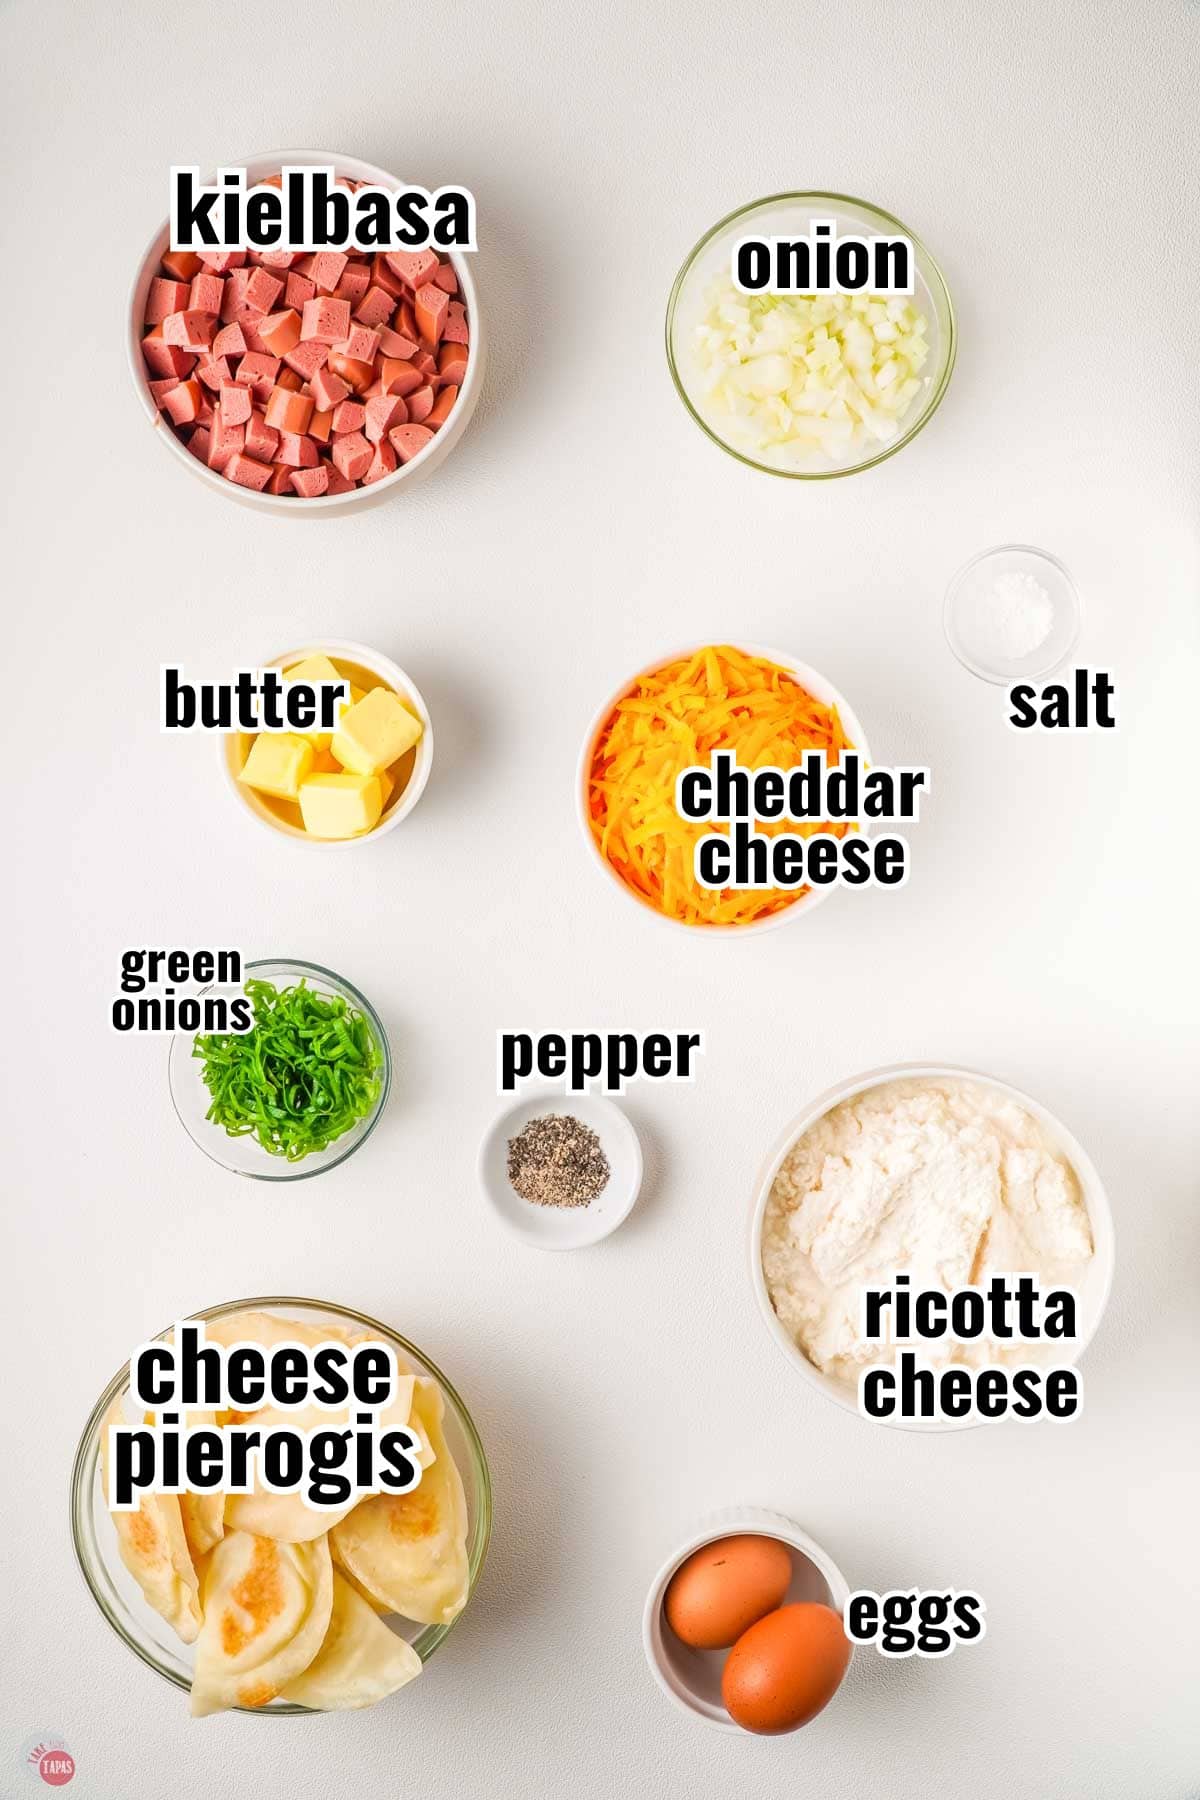
- Cheese Pierogis – I use frozen pierogi because they are the easiest to find and use. The onion or plain cheese flavors are my favorite. If you have a recipe for homemade pierogis, feel free to use that too.
- Onion – One of my favorite shortcuts is buying chopped onions in the produce or frozen section of my grocery store. Saves me time and tears!
- Ricotta cheese – Cottage cheese is a great substitute. I recommend using 4% fat and blending it for a bit in your food processor so your cottage cheese mixture will be creamy.
- Cheddar cheese – I like to grate my own off the block so it melts better. And it’s cheaper.
- Kielbasa – I prefer this sausage, but you can try it with talian sausage or ground pork sausage. It would also be a perfect way to use up leftover ham or shredded chicken.
For more insider tips, tricks, and a behind the scenes look, follow me on Pinterest, Facebook, Instagram, & X.
How To Make Pierogi Casserole
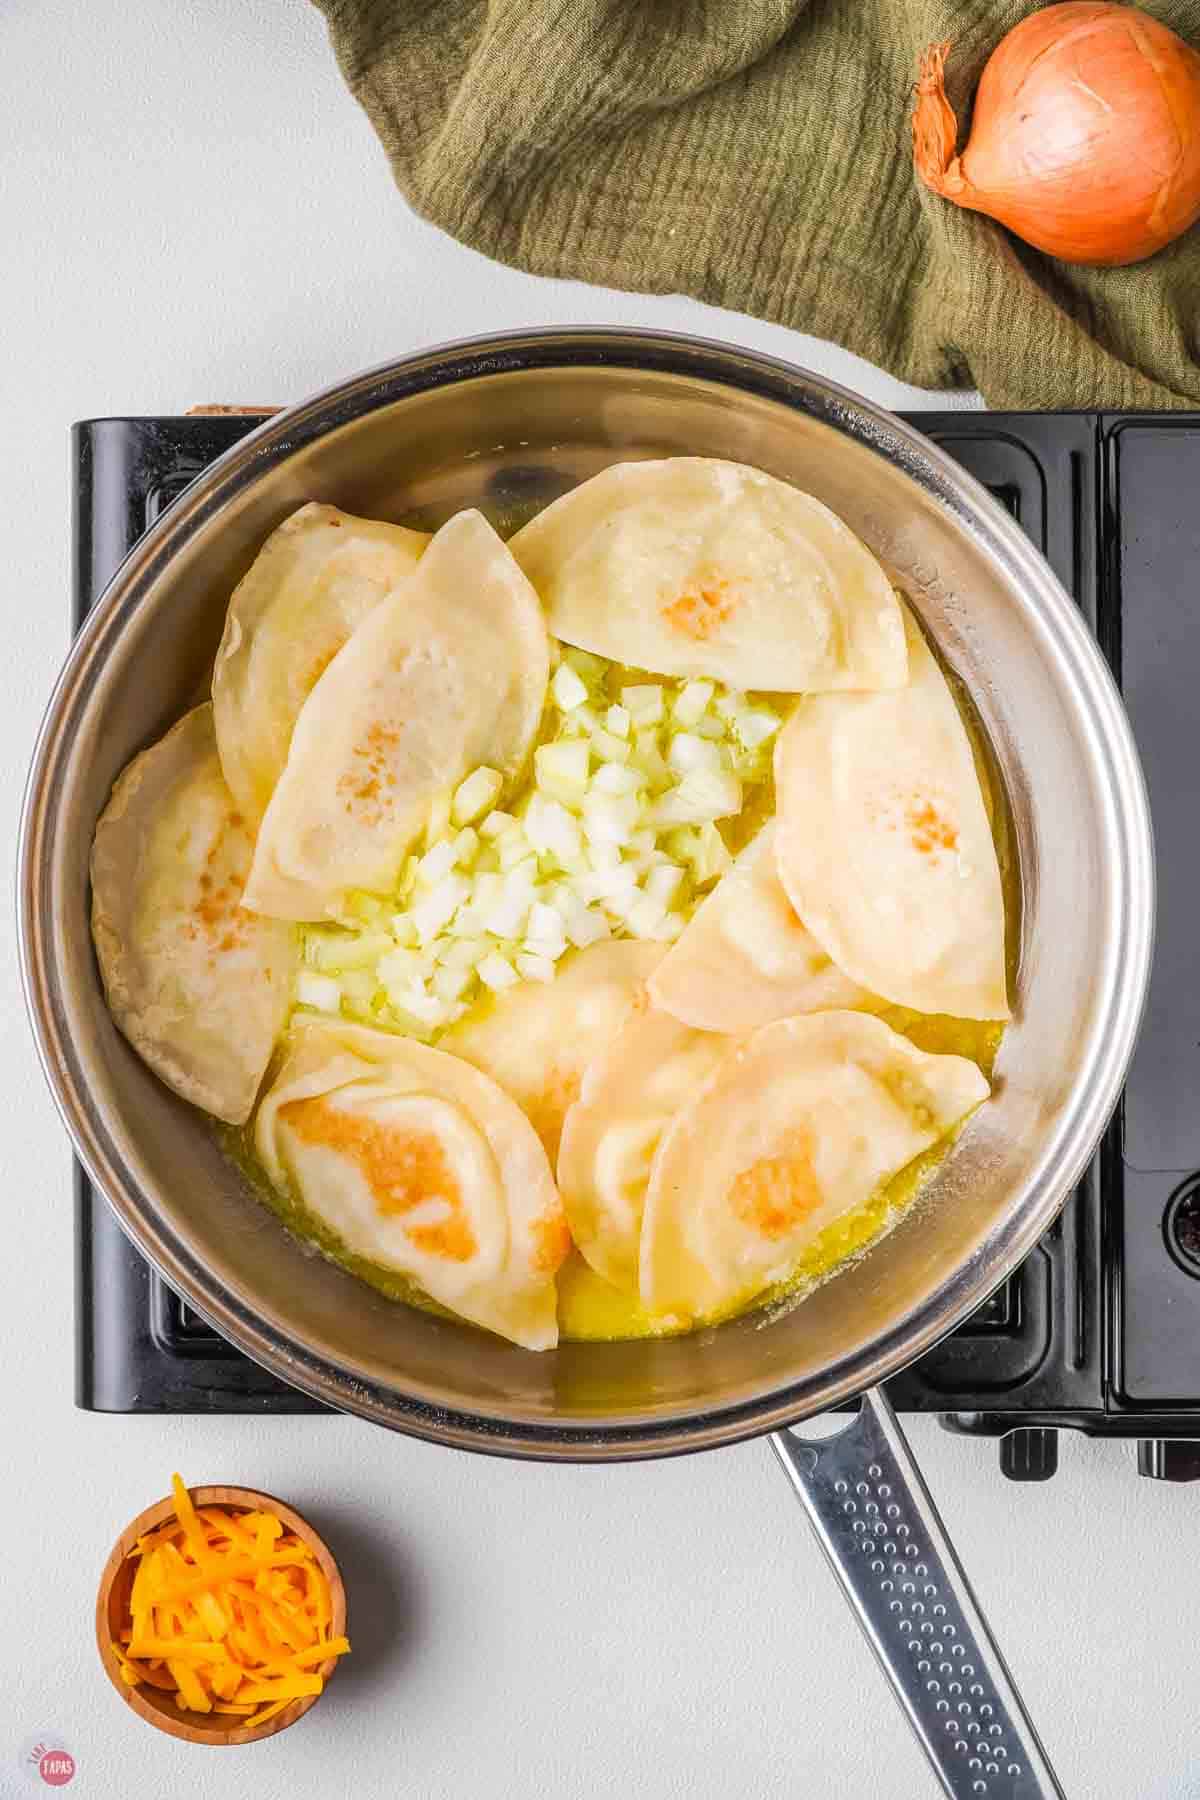
- Preheat the oven to 350°F and spray a 9×9 baking dish with nonstick cooking spray. In a large skillet over medium heat, melt butter and brown the frozen pierogies and diced onions in two batches. Set aside to cool slightly.
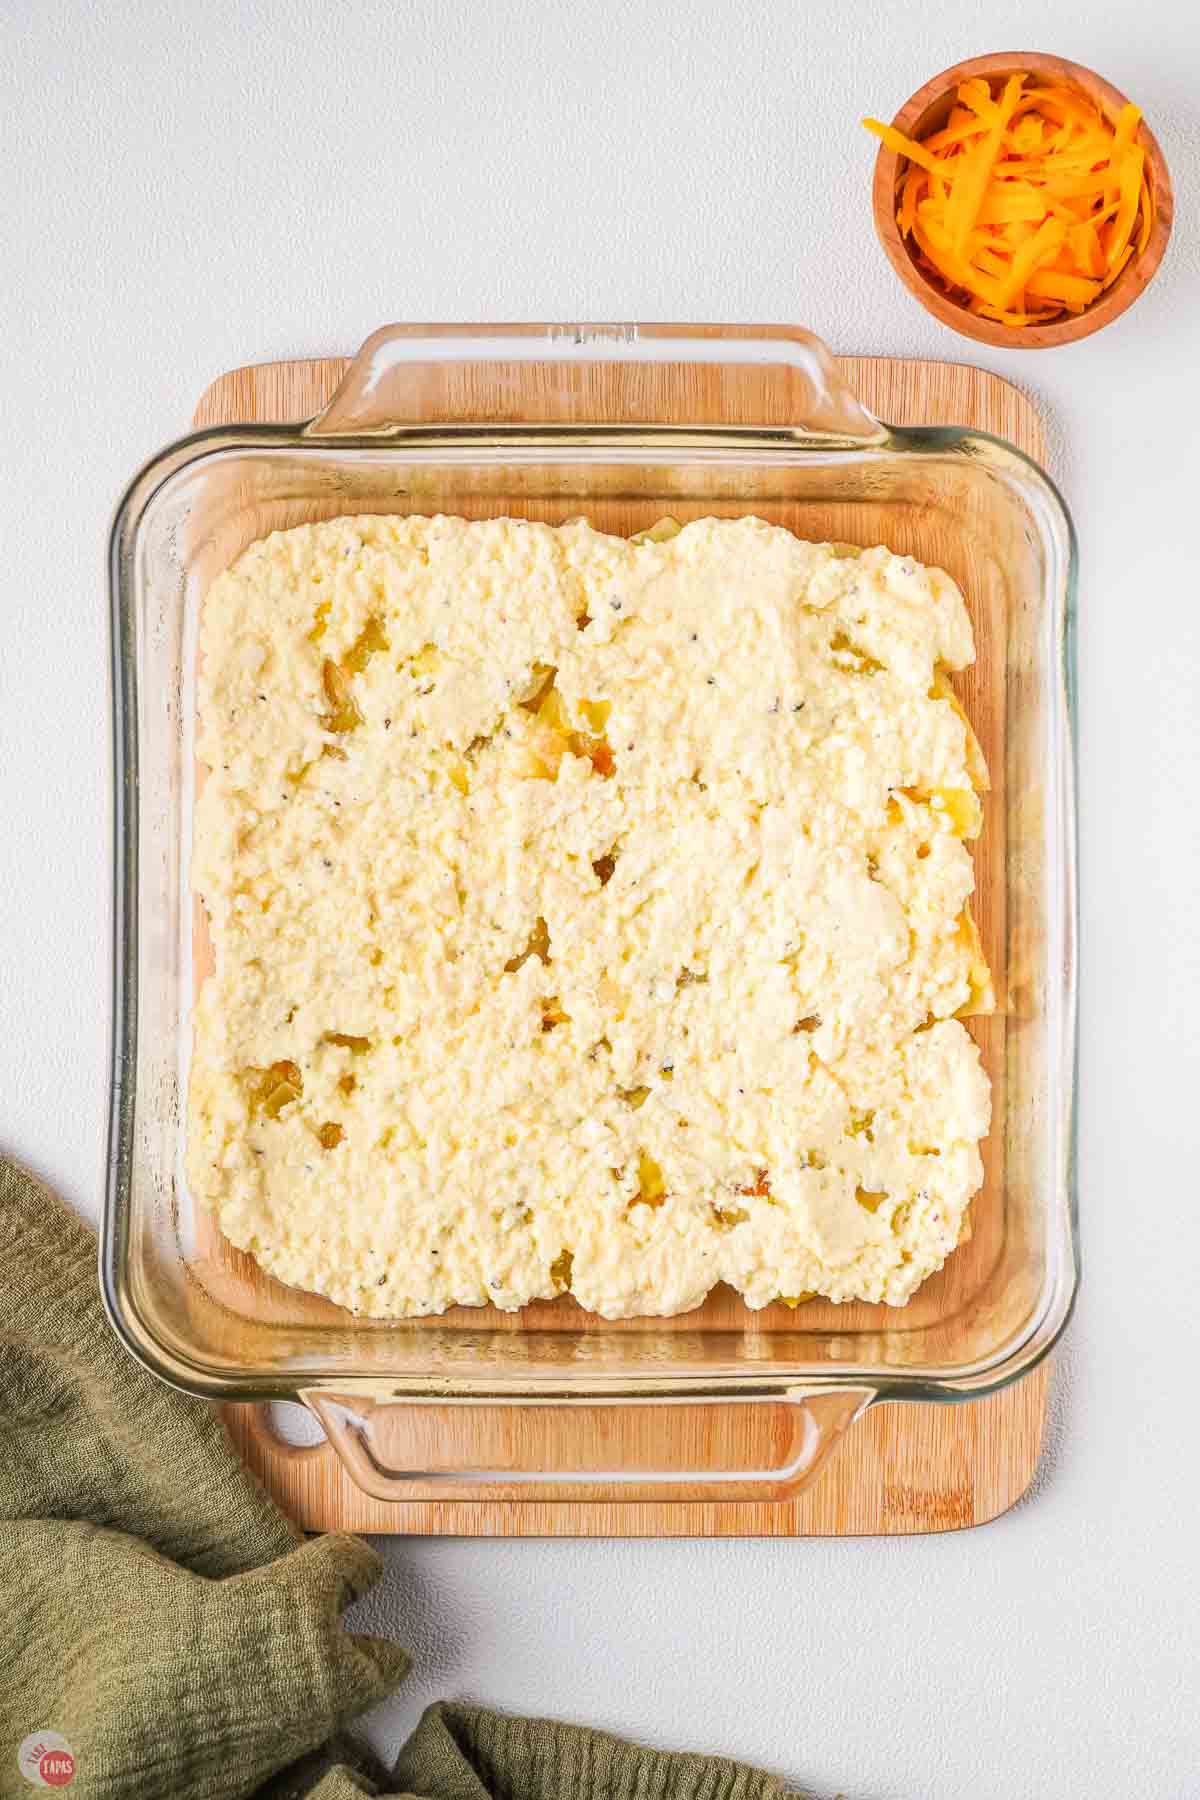
- In a mixing bowl, combine the ricotta cheese, beaten eggs, salt, and pepper. Layer half the browned pierogis in a greased 9×9 baking dish. Spread a third of the ricotta mixture over them, then add a third of the sliced kielbasa and a third of the shredded cheddar.
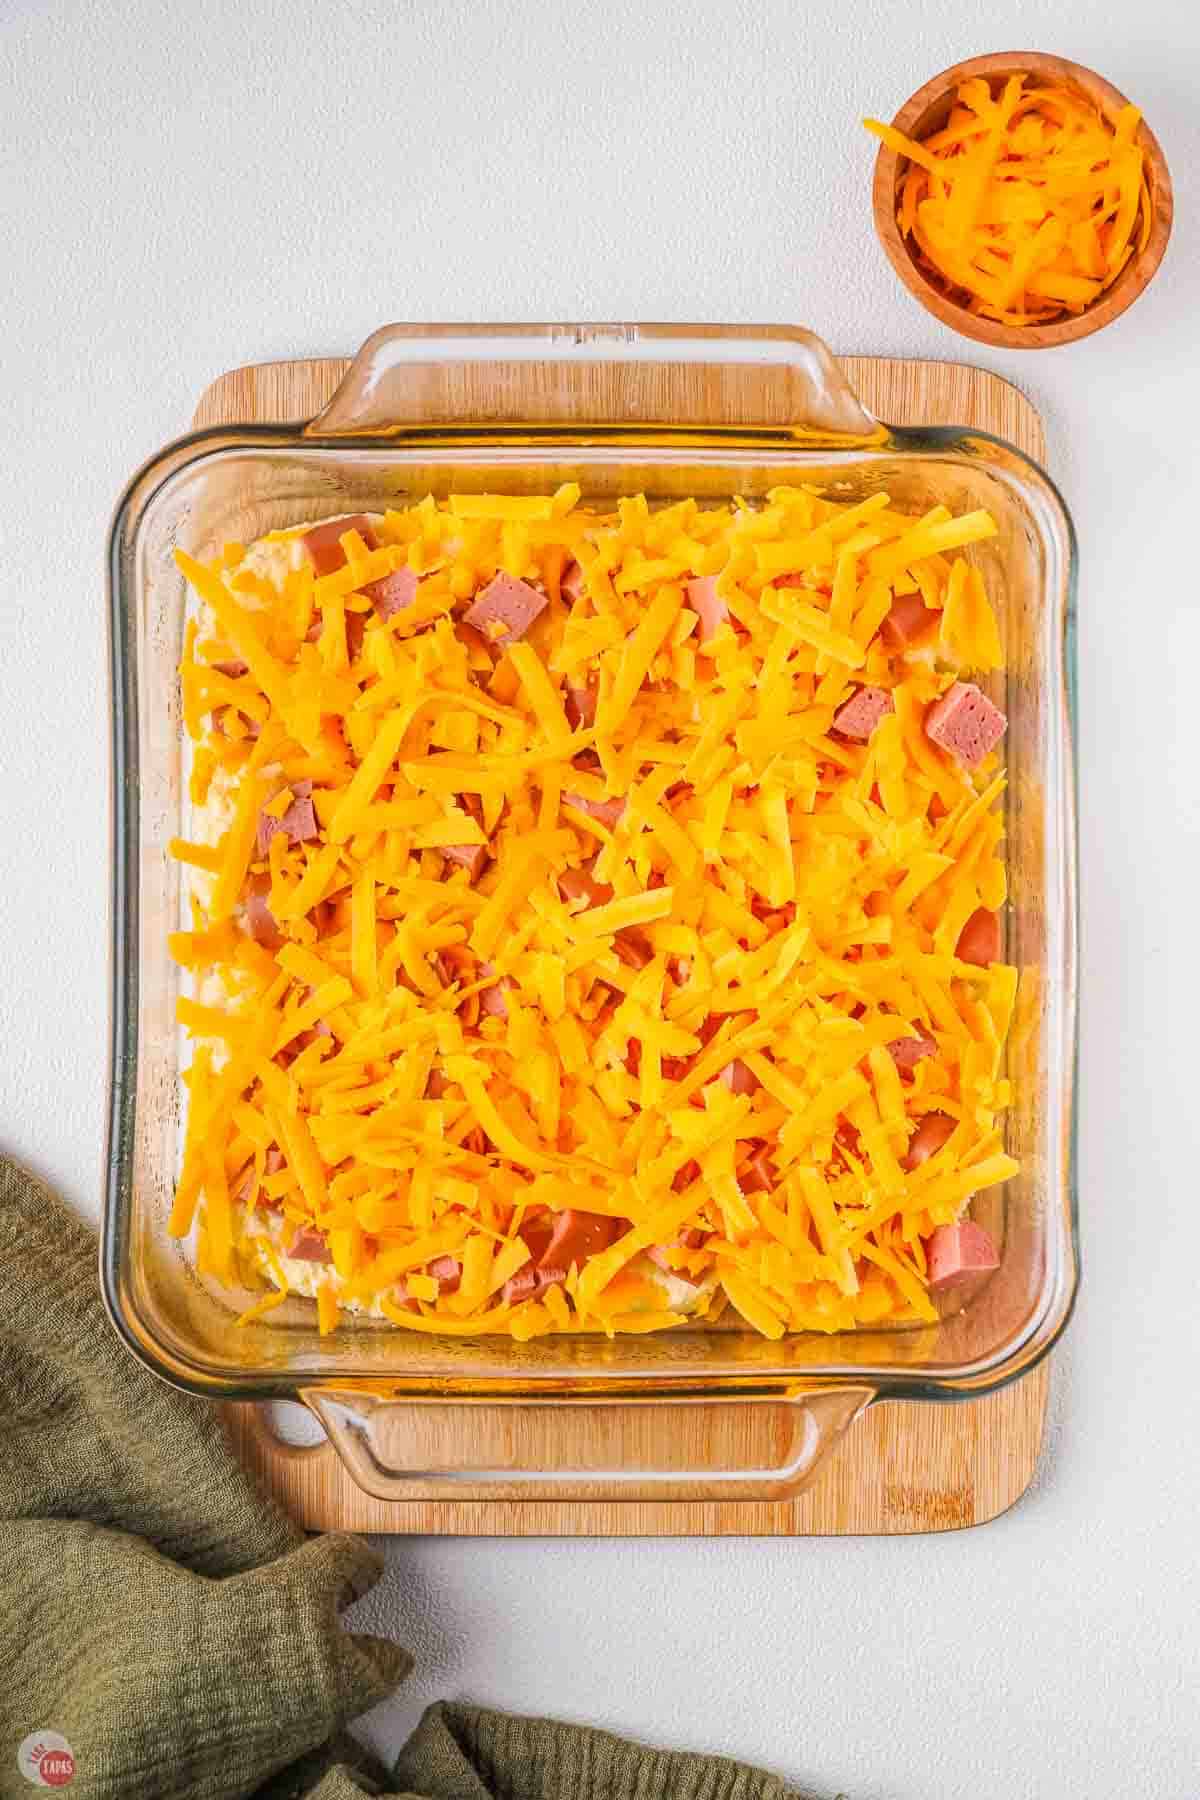
- Repeat with remaining pierogis and the rest of the ricotta, kielbasa, and cheese, ending with cheese on top. Cover with foil and bake at 350°F for 40 minutes.
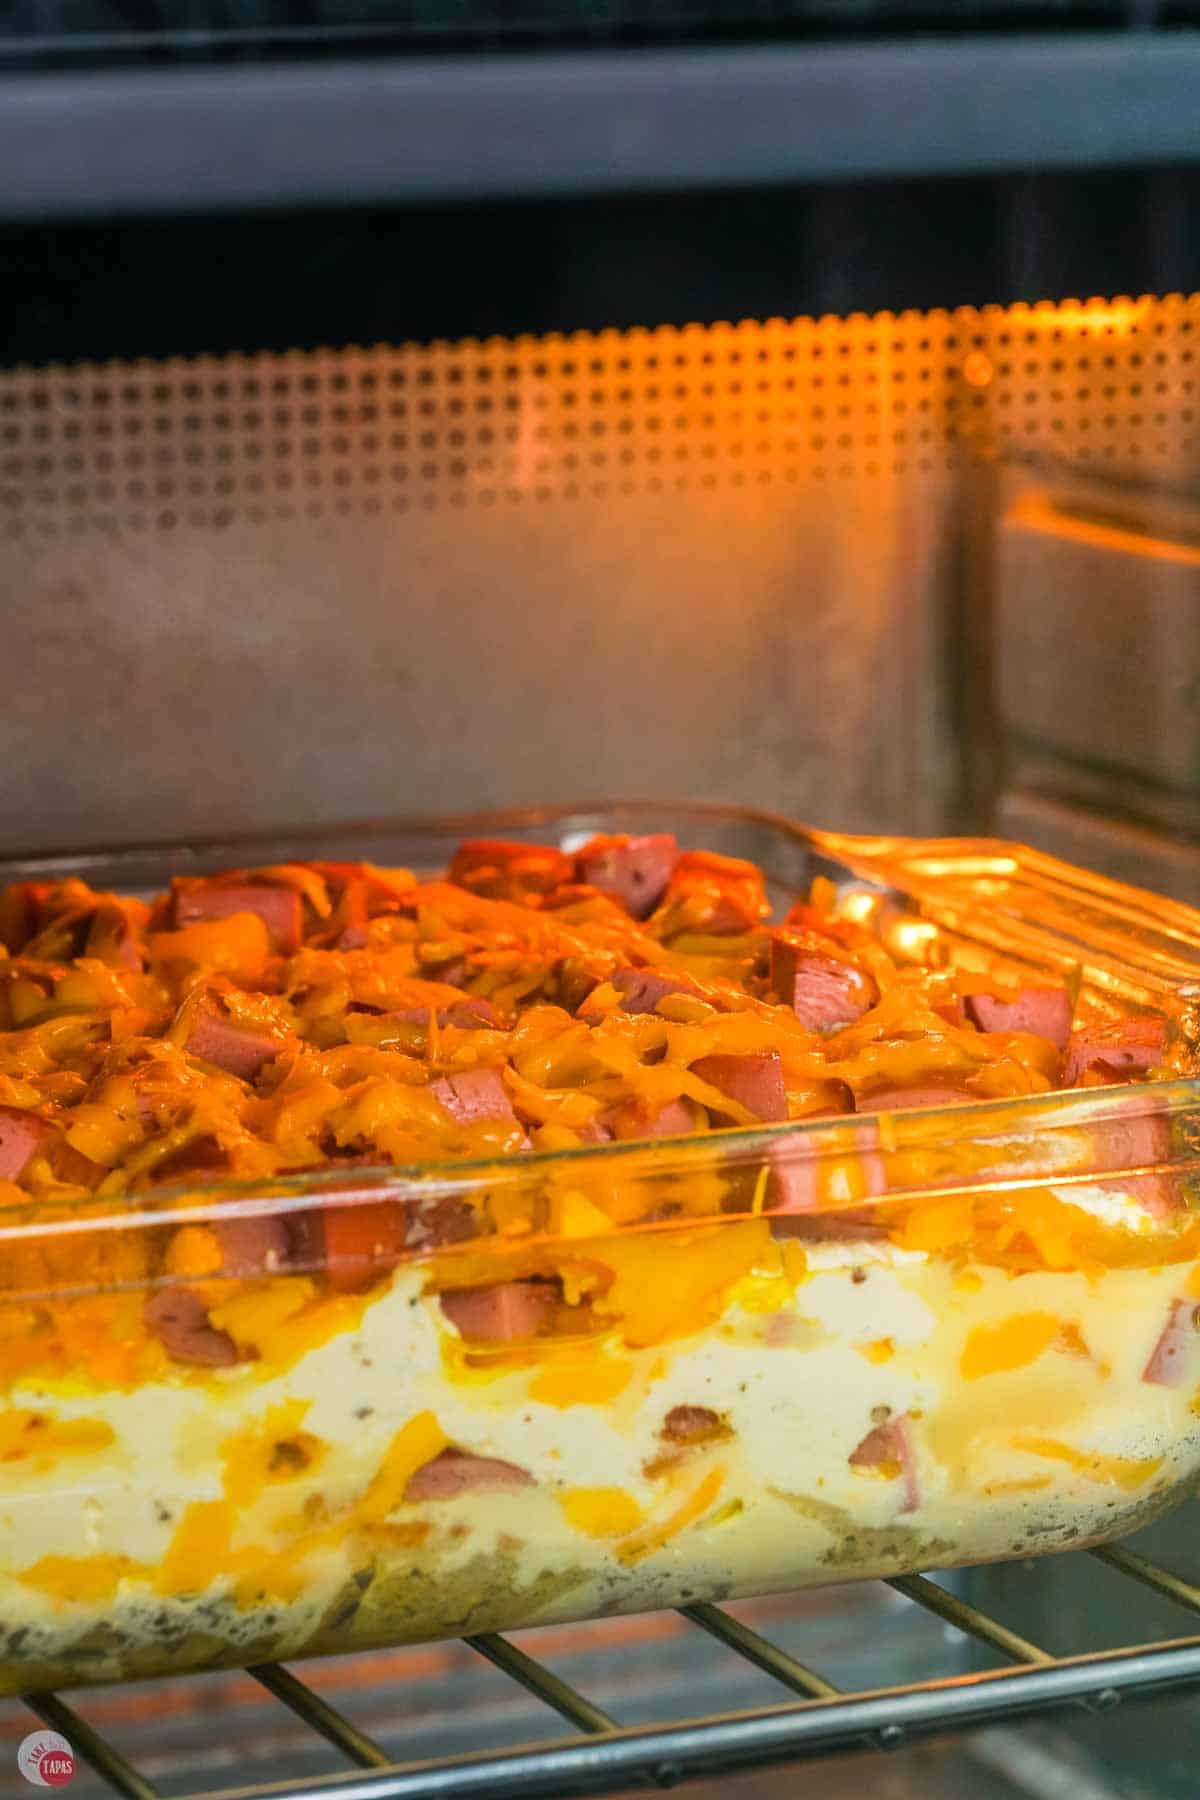
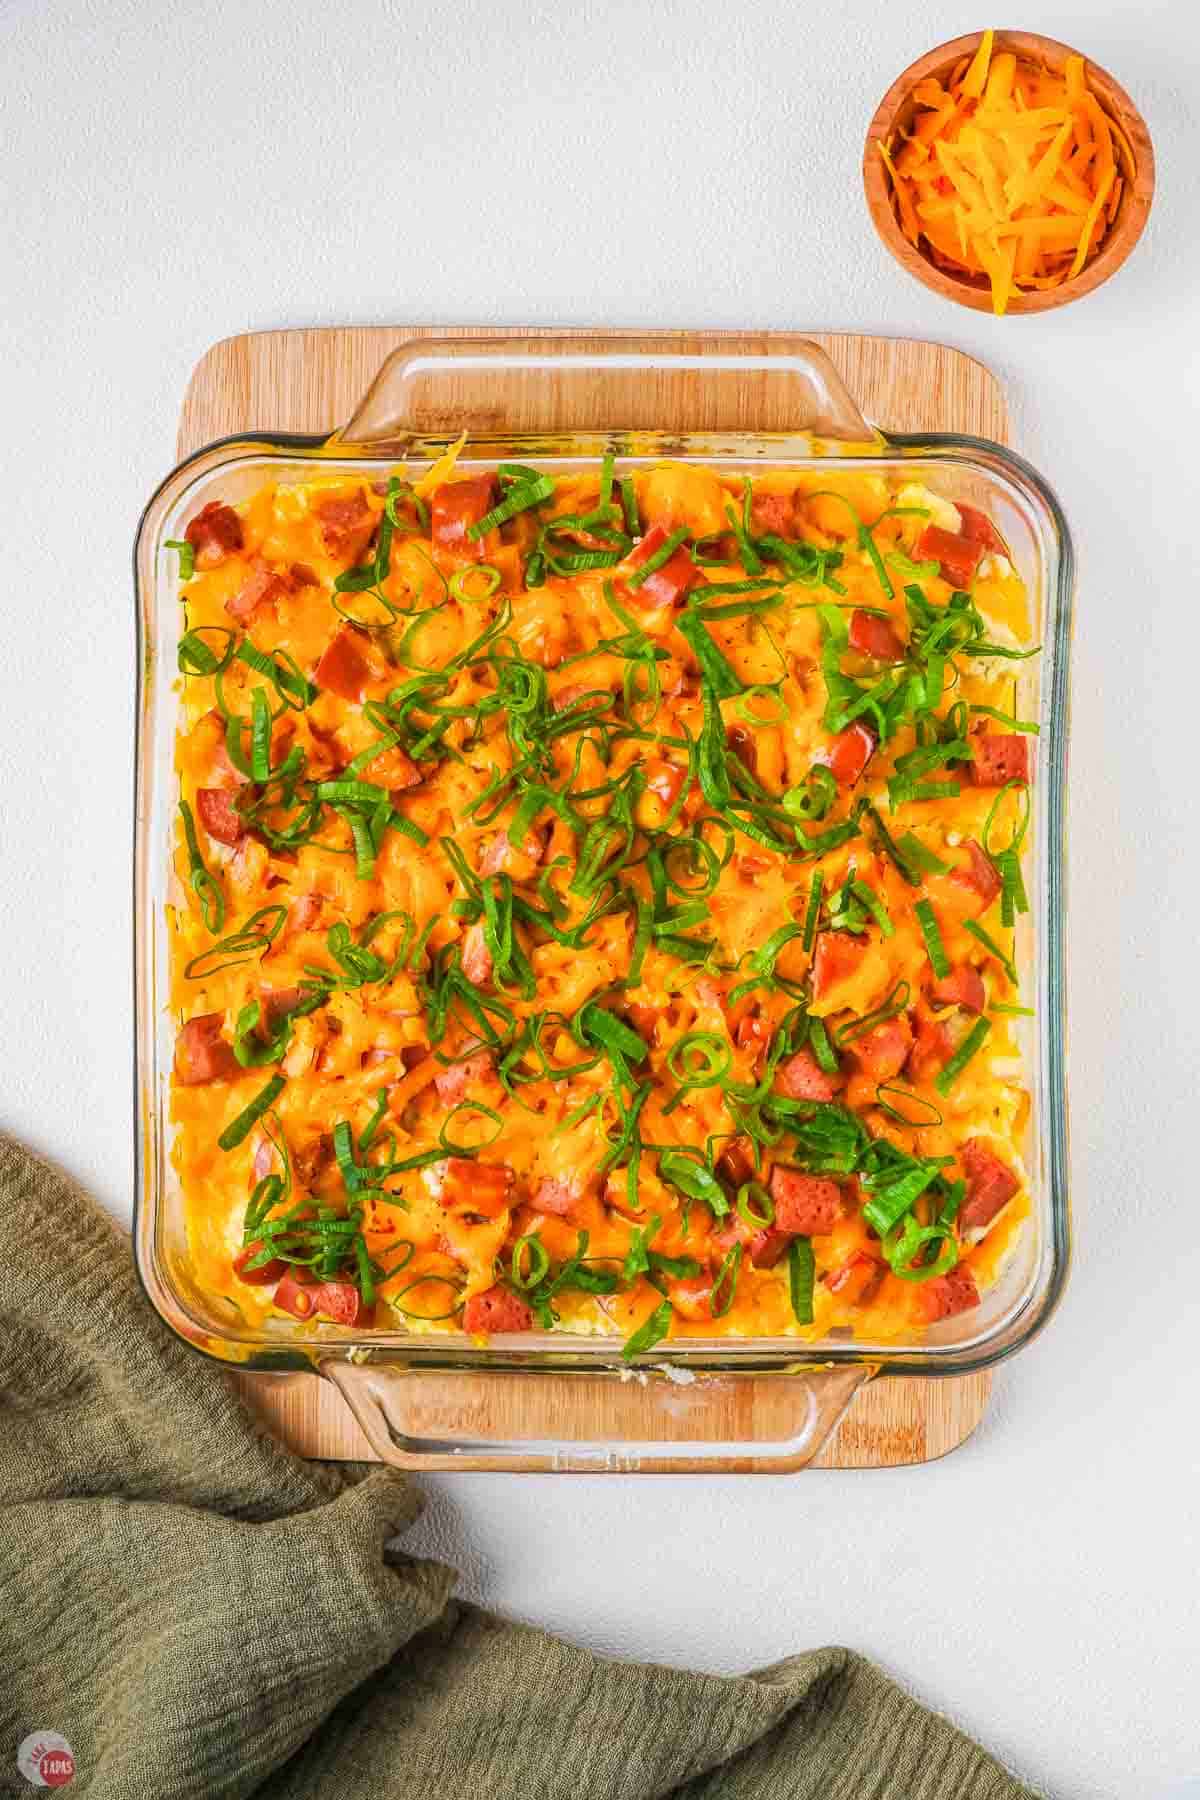
- Remove the foil and bake another 10 minutes until the cheese is golden and bubbly. Let it cool for 5 minutes before serving.
For the full recipe and detailed instructions, please refer to the recipe card at the bottom of the post.
Storage
Refrigerator: Store leftovers in an airtight container for up to 4 days. Let the casserole cool to room temperature before putting away so it doesn’t heat up the fridge.
Freezer: This casserole freezes for up to 3 months. Cool completely to room temperature, cover tightly with plastic wrap and then aluminum foil, label with the date, and freeze.
Reheating from Refrigerator: Warm in a 350°F oven for 15-20 minutes until heated through. You can also reheat individual portions in the microwave for 1-2 minutes or pop them in the air fryer at 375°F for 5-7 minutes for crispy edges.
Reheating from Frozen: Thaw overnight in the refrigerator. Bake covered at 350°F for 25-30 minutes until the internal temperature reaches 165°F. Remove the foil for the last 5 minutes to crisp the cheese on top.
Make-Ahead: Assemble the entire casserole up to 24 hours ahead and refrigerate covered. Bake as directed, adding 5-10 extra minutes since it’s starting cold. You can also freeze it unbaked and bake from frozen at 350°F for 60-70 minutes covered, then 10 minutes uncovered.
Variations
- Vegetarian Pierogi Casserole: Skip the kielbasa and add sautéed mushrooms, bell peppers, or spinach between the layers for extra vegetables.
- Breakfast Pierogi Casserole: Use potato and onion pierogis and add cooked crumbled bacon or breakfast sausage instead of kielbasa. Perfect for brunch!
- Buffalo Pierogi Casserole: Mix buffalo sauce into the ricotta mixture and top with blue cheese crumbles along with the cheddar for spicy kick.
- Italian Pierogi Casserole: Use Italian sausage instead of kielbasa and add marinara sauce to the ricotta mixture. Top with mozzarella and Parmesan.
- Loaded Pierogi Casserole: Add cooked bacon, sour cream, and green onions. Top with extra cheese and serve with more sour cream.
- Different Cheese: Try Monterey Jack, pepper jack, or a Mexican cheese blend instead of cheddar for different flavor profiles.
Frequently Asked Questions
You don’t have to fully cook them but I highly recommend browning them in butter for a few minutes on each side before layering them in the casserole. This adds extra flavor and texture while keeping them from getting too mushy when it bakes in the oven.
Yes! Assemble the entire casserole up to 24 hours ahead and refrigerate covered. Bake as directed when ready, adding 5-10 extra minutes since it’s starting cold. You can also freeze it unbaked for up to 3 months.
A 9×9 inch baking dish is perfect for this recipe. An 8×8 works but you will have slightly thicker layers. A 9×13 makes the casserole too thin and the layers won’t hold together as well. Use a 9×13 if you plan to double the recipe.
Yes! Use full-fat cottage cheese and blend it in a food processor until smooth and creamy. This gives you the same texture as ricotta without buying a separate ingredient. And it’s usually more budget friendly.
Absolutely! Cool completely, cover tightly with plastic wrap and then foil, and freeze for up to 3 months. Thaw overnight in the refrigerator before reheating at 350°F for 25-30 minutes until it reaches 165°F in the middle.
Try Italian sausage, ground pork sausage, leftover ham, shredded chicken, or cooked bacon. For a vegetarian casserole, skip the meat and add sautéed mushrooms or bell peppers.
Brown them in butter before putting in the casserole. This creates a slight crust that holds up during baking. Also avoid overcooking the casserole which can make pierogis fall apart.
Recipe Tips & Tricks
- Spray the baking dish with nonstick spray for easy cleanup. The cheese will stick to the sides and be hard to clean off later.
- Thaw frozen pierogis slightly before browning. They’ll cook more evenly in the pan and won’t release as much water.
- Work in two batches when browning pierogis and onions. Crowding the pan steams them instead of browning.
- Let the browned pierogis cool slightly before layering. Hot pierogis can scramble the eggs in the ricotta mixture.
- Shred cheese from a block for better melting. Pre-shredded cheese contains anti-caking agents that keeps it from melting and can make the topping “grainy” in texture.
- Don’t skip the eggs in the ricotta mixture. They help everything set properly so the casserole slices cleanly.
- Cover with foil for the first 40 minutes to prevent the top from browning too fast. The inside needs time to heat through.
- Top with sliced green onions, sour cream, or crispy bacon right before serving for extra flavor and texture.
This baked pierogi casserole recipe is a super easy way to get dinner on the table with budget friendly ingredients everyone will love!
If you love this recipe as much as I do, please leave us a ⭐️⭐️⭐️⭐️⭐️ five-star review in the comment section below. Thanks!
Ingredients
- ½ cup butter
- 20 each pierogis frozen, cheese flavor
- 1 medium sweet onion diced small
- 16 ounces whole milk ricotta cheese
- 2 large eggs slightly beatne
- 1 teaspoon salt
- 1 teaspoon black pepper
- 12 ounces pork kielbasa diced, medium size
- 2 cups sharp cheddar cheese shredded/divided, shred your own for better melting
- 2 stalks green onions sliced
Instructions
- Preheat the oven to 350°F and spray a 9×9 baking dish with nonstick cooking spray.
- In a large skillet over medium heat, melt butter and brown the frozen pierogis and diced onions in two batches. Set aside to cool slightly.
- In a mixing bowl, combine the ricotta cheese, beaten eggs, salt, and pepper.
- To assemble the casserole, start by layering half of the pierogis on the bottom of the prepared dish.
- Add 1/3 of the ricotta mixture, 1/3 of the kielbasa, and 1/3 of the cheddar cheese. Repeat with the remaining pierogis and other ingredients, finishing with a layer of cheese on top.
- Cover the casserole with foil and bake for 40 minutes. Remove the foil and bake for an additional 10 minutes until the cheese is golden brown and bubbly.
- Let the casserole cool slightly before topping with sliced green onions and serving. Enjoy!
Notes
- Spray the baking dish with nonstick spray for easy cleanup. The cheese will stick to the sides and be hard to clean off later.
- Thaw frozen pierogis slightly before browning. They’ll cook more evenly in the pan and won’t release as much water.
- Work in two batches when browning pierogis and onions. Crowding the pan steams them instead of browning.
- Let the browned pierogis cool slightly before layering. Hot pierogis can scramble the eggs in the ricotta mixture.
- Shred cheese from a block for better melting. Pre-shredded cheese contains anti-caking agents that keeps it from melting and can make the topping “grainy” in texture.
- Don’t skip the eggs in the ricotta mixture. They help everything set properly so the casserole slices cleanly.
- Cover with foil for the first 40 minutes to prevent the top from browning too fast. The inside needs time to heat through.
- Top with sliced green onions, sour cream, or crispy bacon right before serving for extra flavor and texture.
Nutrition
©TakeTwoTapas.com. Content and photographs are copyright protected. Sharing of this recipe is both encouraged and appreciated. Copying and/or pasting full recipes to any social media is strictly prohibited.